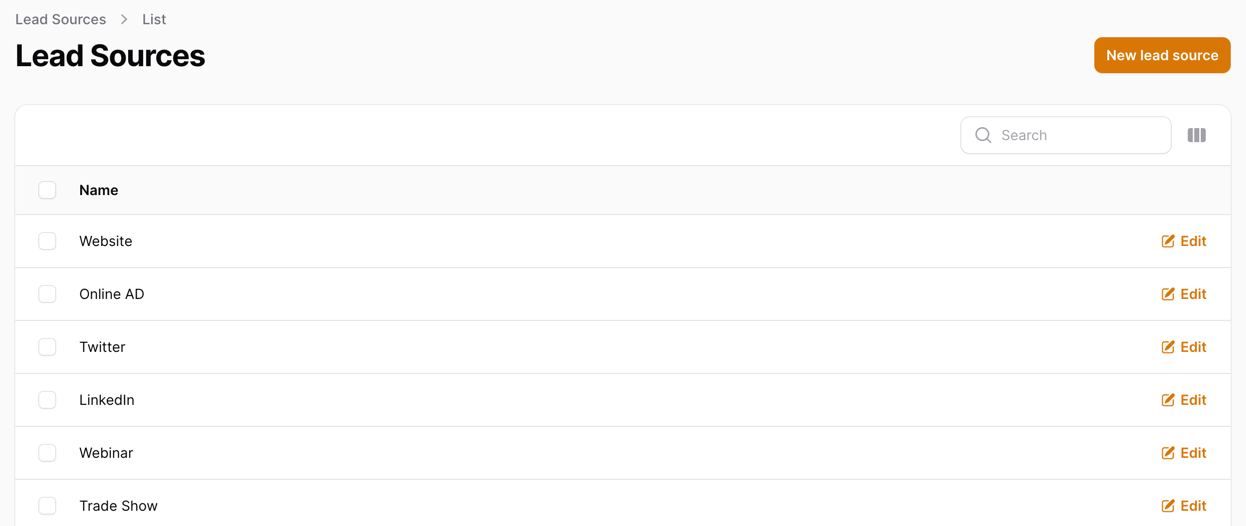
Next up, we need to know where our Customer came from. So for that, we will create a Lead Source Resource in Filament:
In this lesson, we will:
lead_sources DB structure: Model/Migration and a belongsTo relationship with customers
DeleteAction to the table with validation if that record is usedThe Lead Source Resource will have the following fields:
id
name
And that's it. We want to keep it simple for now.
We will start by creating a new database table:
Migration
Schema::create('lead_sources', function (Blueprint $table) { $table->id(); $table->string('name'); $table->timestamps();});Then, we will create a new Model for the Lead Source:
Model
use Illuminate\Database\Eloquent\Model;use Illuminate\Database\Eloquent\Relations\HasMany; class LeadSource extends Model{ protected $fillable = [ 'name', ]; public function customers(): HasMany { return $this->hasMany(Customer::class); }}As you can see, we have already added a relationship to our Customer Model. This will be useful later on.
Then, we can create a seed for our Lead Source:
database/seeders/DatabaseSeeder.php
public function run(): void{ // ... $leadSources = [ 'Website', 'Online AD', 'Twitter', 'LinkedIn', 'Webinar', 'Trade Show', 'Referral', ]; foreach ($leadSources as $leadSource) { LeadSource::create(['name' => $leadSource]); }}This will seed some basic Lead Sources into our database. Of course, you can add more if you want.
Next, we have the last step - connecting our Lead Source to our Customer via new migration:
Migration
use App\Models\LeadSource; // ... Schema::table('customers', function (Blueprint $table) { $table->foreignIdFor(LeadSource::class)->nullable()->constrained();});And our last step is modifying our Customer Model:
app/Models/Customer.php
use Illuminate\Database\Eloquent\Factories\HasFactory;use Illuminate\Database\Eloquent\Model;use Illuminate\Database\Eloquent\Relations\BelongsTo;use Illuminate\Database\Eloquent\SoftDeletes; class Customer extends Model{ use SoftDeletes; use HasFactory; protected $fillable = [ 'first_name', 'last_name', 'email', 'phone_number', 'description', 'lead_source_id' ]; public function leadSource(): BelongsTo { return $this->belongsTo(LeadSource::class); } // ...}That's it. You should now have a new table lead_sources created with some data inside of it if you run:
php artisan migrate:fresh --seed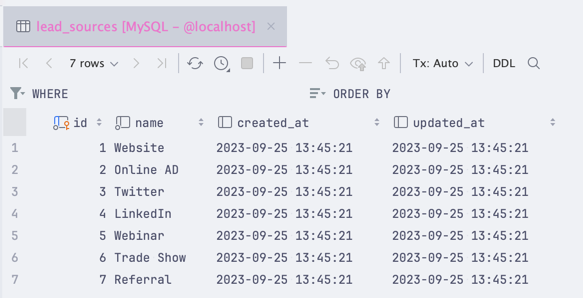
To create this Resource, we will use the same command as before:
php artisan make:filament-resource LeadSource --generateThis will once again create the necessary files for us, so all we have to do is load the page and see what we got:

It loads nicely and already has the data from our database. Even the create form is working. But there's one thing we need to change:
So let's do that by modifying our LeadSourceResource:
app/Filament/Resources/LeadSourceResource.php
use Filament\Notifications\Notification; // ... public static function table(Table $table): Table{ return $table ->columns([ Tables\Columns\TextColumn::make('name') ->searchable(), Tables\Columns\TextColumn::make('created_at') ->dateTime() ->sortable() ->toggleable(isToggledHiddenByDefault: true), Tables\Columns\TextColumn::make('updated_at') ->dateTime() ->sortable() ->toggleable(isToggledHiddenByDefault: true), ]) ->filters([ // ]) ->actions([ Tables\Actions\EditAction::make(), Tables\Actions\DeleteAction::make() ->action(function ($data, $record) { if ($record->customers()->count() > 0) { Notification::make() ->danger() ->title('Lead Source is in use') ->body('Lead Source is in use by customers.') ->send(); return; } Notification::make() ->success() ->title('Lead Source deleted') ->body('Lead Source has been deleted.') ->send(); $record->delete(); }) ]) ->bulkActions([ Tables\Actions\BulkActionGroup::make([ Tables\Actions\DeleteBulkAction::make(), ]), ]);} // ...Let's go over the changes we made:
DeleteAction to our tableDeleteAction is clicked, we check if there are any Customers connected to itThat's it! This is how it looks in our browser:
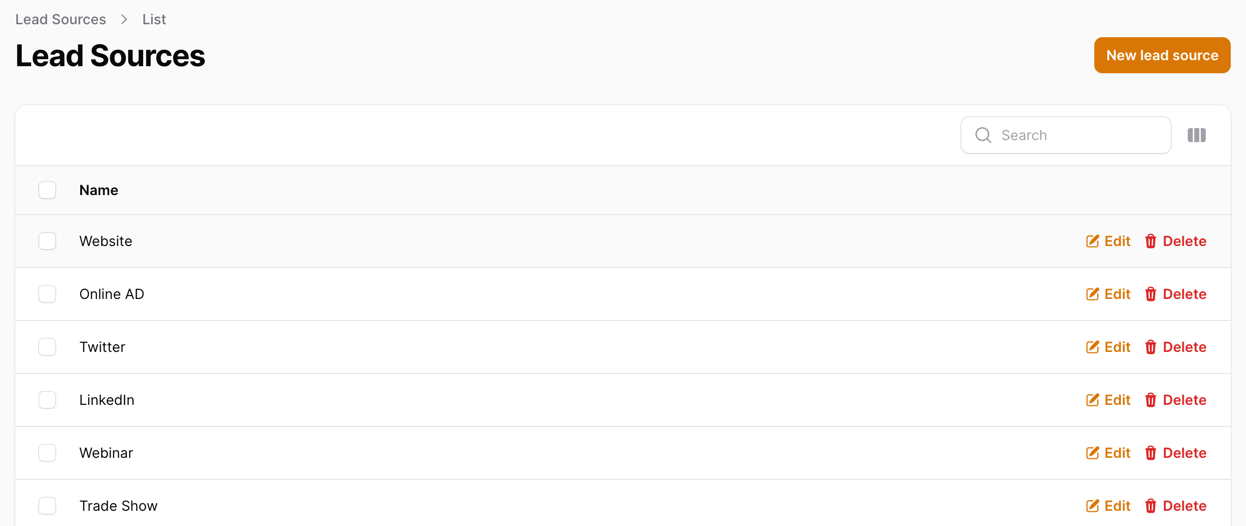
And if we try to delete a Lead Source that has Customers connected to it (for this example, we did this directly in the database):

It works! We can't delete a Lead Source with Customers connected to it.
Now that we have our Lead Sources and can manage them, we should add a select field to our Customer Resource so we can select a Lead Source for our Customer:
app/Filament/Resources/CustomerResource.php
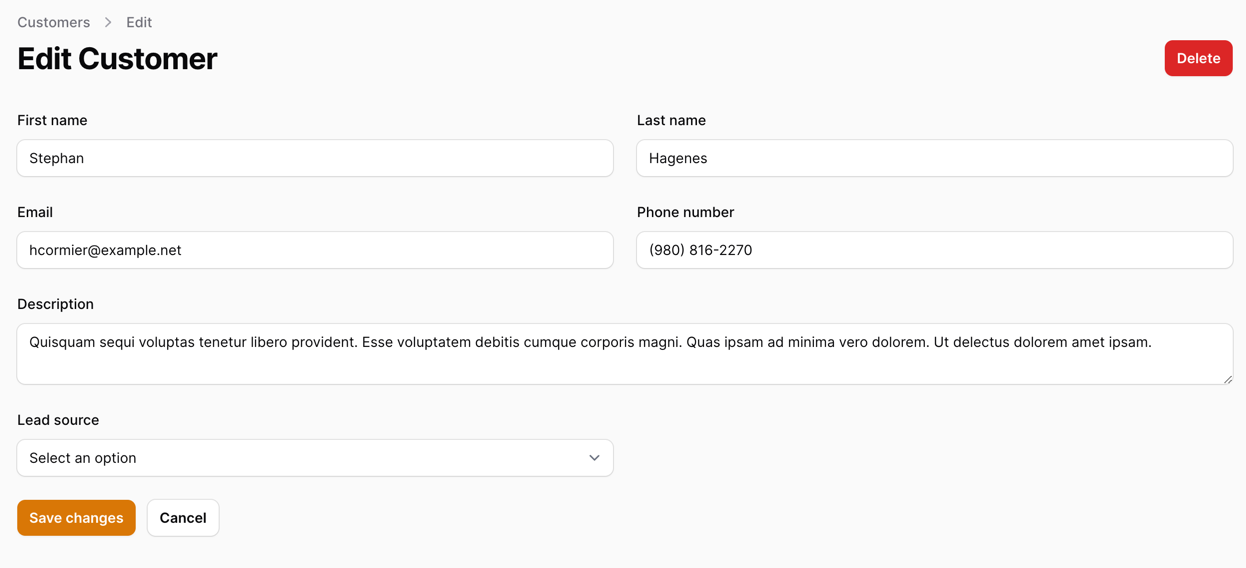
// ... public static function form(Form $form): Form{ return $form ->schema([ // ... Forms\Components\Textarea::make('description') ->maxLength(65535) ->columnSpanFull(), Forms\Components\Select::make('lead_source_id') ->relationship('leadSource', 'name'), ]);} // ...This should add a select field to our Customer Resource:
As a last step, we must add this field to the table. Otherwise, we won't be able to see it:
app/Filament/Resources/CustomerResource.php
// ... public static function table(Table $table): Table{ return $table ->columns([ // ... Tables\Columns\TextColumn::make('phone_number') ->searchable(), Tables\Columns\TextColumn::make('leadSource.name'), // ... ]) ->filters([ // ]) ->actions([ Tables\Actions\EditAction::make(), ]) ->bulkActions([ Tables\Actions\BulkActionGroup::make([ Tables\Actions\DeleteBulkAction::make(), ]), ]);} // ...Now, loading the Customer table should show us the Lead Source column:
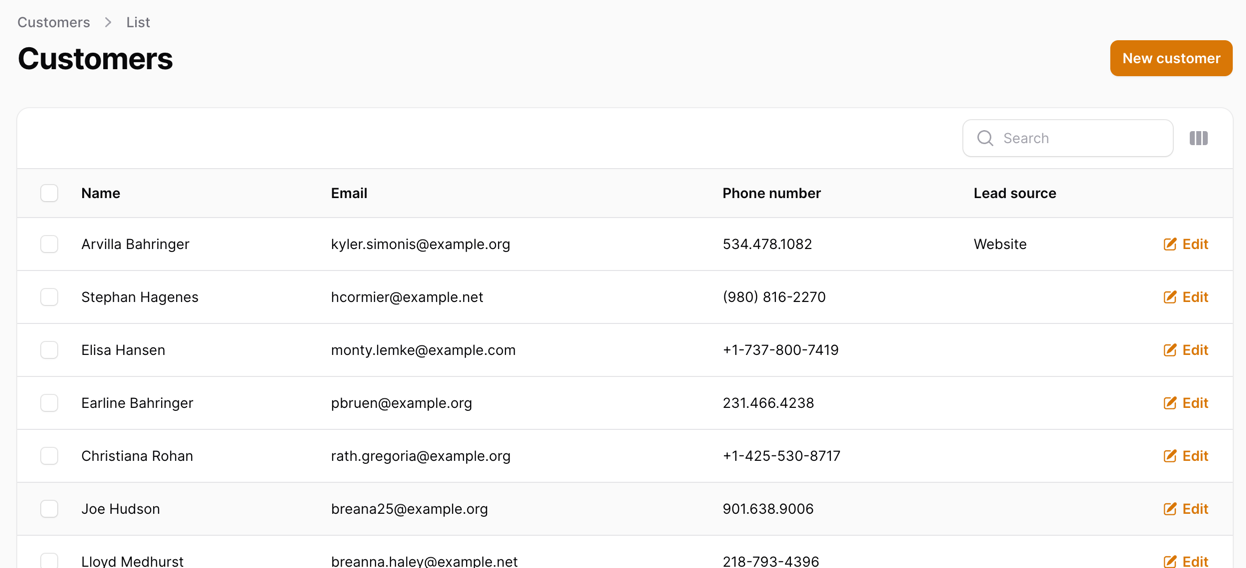
That's it! It is this simple to add a new field to our Resource.
Since introducing our Lead Sources, we should think about how we want to organize our navigation. What we have now is this:
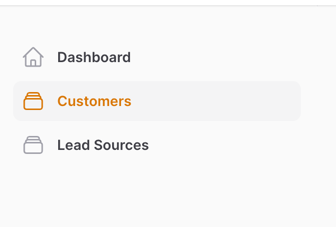
And it looks alright, but imagine if we have 10 or 20 different Resources. It would be a mess. So let's clean it up a bit by adding a dropdown for our Settings:
app/Providers/Filament/AdminPanelProvider.php
use Filament\Navigation\NavigationGroup;// .... class AdminPanelProvider extends PanelProvider{ public function panel(Panel $panel): Panel { return $panel // ... ->navigationGroups([ NavigationGroup::make() ->label('Settings') ->icon('heroicon-o-cog-6-tooth') ->collapsed(), ]) ->authMiddleware([ Authenticate::class, ]); }}This registers that such a group can be used in our navigation, but we haven't added anything. So let's do that:
app/Filament/Resources/LeadSourceResource.php
class LeadSourceResource extends Resource{ protected static ?string $model = LeadSource::class; protected static ?string $navigationGroup = 'Settings'; protected static ?string $navigationIcon = 'heroicon-o-rectangle-stack'; // ...}Once this is done, we should see a new dropdown in our navigation:
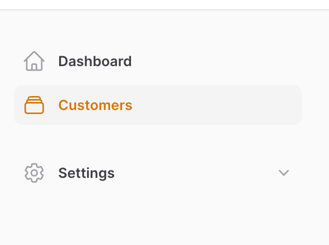
This becomes much cleaner and will give us a place to put all our settings.
As a bonus tip, you might have noticed that we have removed the icon from our LeadSourceResource. Filament does not support an icon on the settings dropdown and our resource. Here's what would happen if we did not delete the icon:
![]()