
React.js is one of the most popular front-end frameworks, but it lacks examples of how to integrate it with Laravel API. So, in this long article, I will show you how to do it in details, step-by-step.
We start from the very beginning, by installing a fresh Laravel project, and a Laravel Breeze starter kit:
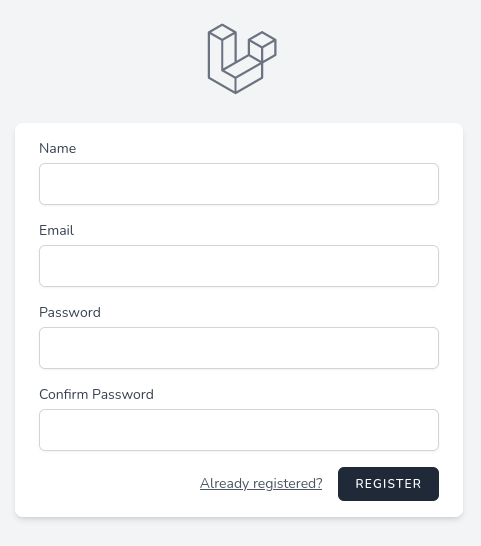
laravel new projectcd project// editing .env file herecomposer installphp artisan migratecomposer require laravel/breezephp artisan breeze:install bladeBy this point, we should have a default Laravel Breeze with Tailwind CSS design, and Login/Register functionality:
We will manage one table called Companies, with four text fields: name, email, address, website.
So, we create the model, and automatically create migrations with -m:
php artisan make:model Company -mThis is the DB structure: database/migrations/xxxxx_create_companies_table.php:
return new class extends Migration{ public function up() { Schema::create('companies', function (Blueprint $table) { $table->id(); $table->string('name'); $table->string('email'); $table->string('address')->nullable(); $table->string('website')->nullable(); $table->timestamps(); }); } public function down() { Schema::dropIfExists('companies'); }};Then, of course, we run the migration:
php artisan migrateIn the app/Company.php model, we make all fields fillable:
class Company extends Model{ use HasFactory; protected $fillable = ['name', 'email', 'address', 'website'];}Next, we create a Controller, with a few flags to generate exactly what we need:
php artisan make:controller Api/CompanyController --resource --api --model=CompanyPersonally, I like to use API Resources to transform the data. Although in this project, we won't make any transformations, I still have a habit of generating them:
php artisan make:resource CompanyResourceAnd, inside of app/Http/Resources/CompanyResource.php, there's this default code:
class CompanyResource extends JsonResource{ public function toArray($request) { return parent::toArray($request); }}Next, for validation, we generate a FormRequest class:
php artisan make:request CompanyRequestIn this case, I will re-use the same validation rules for both store/update functions, so this is the content of app/Http/Requests/CompanyRequest.php:
class CompanyRequest extends FormRequest{ public function authorize() { return true; } public function rules() { return [ 'name' => ['required', 'string'], 'email' => ['required', 'email'], 'address' => ['nullable', 'string'], 'website' => ['nullable', 'url'], ]; }}We use those API Resource and Form Request classes inside of our app/Http/Controllers/API/CompanyController.php, which has this code:
namespace App\Http\Controllers\Api; use App\Http\Controllers\Controller;use App\Http\Requests\CompanyRequest;use App\Http\Resources\CompanyResource;use App\Models\Company; class CompanyController extends Controller{ public function index() { return CompanyResource::collection(Company::all()); } public function store(CompanyRequest $request) { $company = Company::create($request->validated()); return new CompanyResource($company); } public function show(Company $company) { return new CompanyResource($company); } public function update(CompanyRequest $request, Company $company) { $company->update($request->validated()); return new CompanyResource($company); } public function destroy(Company $company) { $company->delete(); return response()->noContent(); }}And, we tie it all together to call that Controller from the routes/api.php:
use App\Http\Controllers\Api\CompanyController; // ... Route::apiResource('companies', CompanyController::class);In this simple project, we won't use any Middleware, the routes are public.
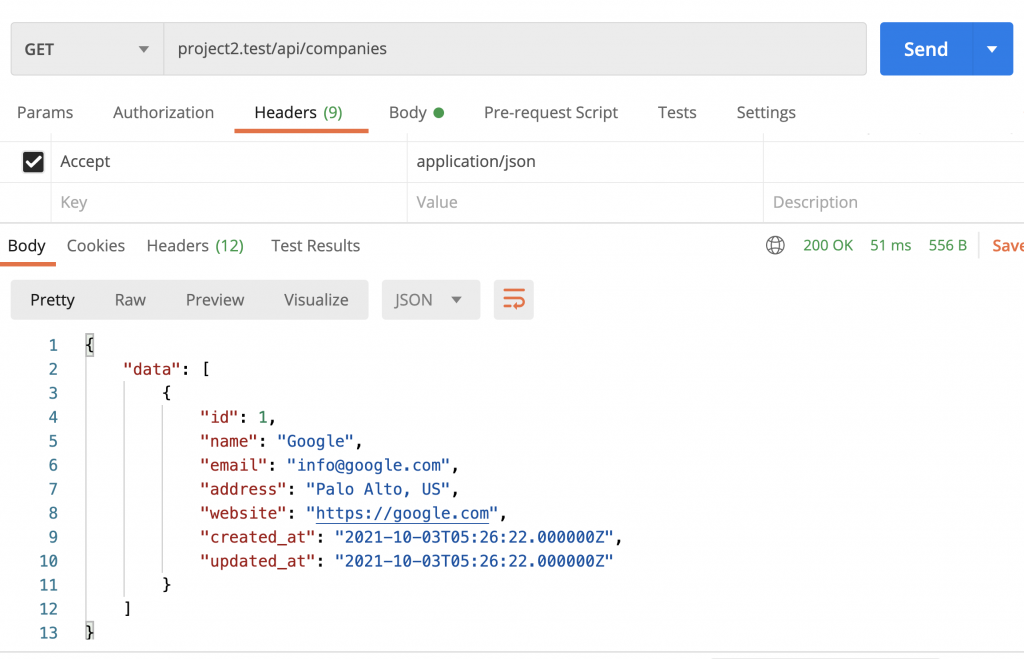
So, at this point, we have an API ready, and if we enter some company manually in the DB, here's what we get via Postman:
Now, we get to the front-end. We install React, React DOM and React Router DOM:
npm install react@18 react-dom@18Next, we need to prepare Vite to use React when compiling. First install React Vite plugin and import it in vite.config.js. Then add React to plugins array and rename resources/js/app.js to resources/js/app.jsx.
Before:
export default defineConfig({ plugins: [ laravel({ input: [ 'resources/css/app.css', 'resources/js/app.js', ], refresh: true, }), ],});After:
export default defineConfig({ plugins: [ laravel({ input: [ 'resources/css/app.css', 'resources/js/app.jsx', ], refresh: true, }), react(), ],});According to Laravel Vite when using Vite with React, you will need to ensure that any files containing JSX have a .jsx or .tsx extension so we will be using .jsx extension.
In resources/views/layouts/app.blade.php before @vite directive add @viteReactRefresh
The
@viteReactRefreshdirective must be called before the@vitedirective.
resources/views/layouts/app.blade.php:
// ... @viteReactRefresh @vite(['resources/css/app.css', 'resources/js/app.jsx']) </head>// ...Now, we need to create our first React.js component. For now, it will not do anything dynamic, just show the "Hello world", in resources/js/Pages/Companies/Index.jsx:
export default function PostsIndex() { return ( <div>Hello world.</div> );}Next, we add the id="app" in the main Blade file of our project resources/views/dashboard.blade.php:
<div class="bg-white overflow-hidden shadow-sm sm:rounded-lg"> <div class="p-6 bg-white border-b border-gray-200" id="app"> </div>Now, we can create our React application inside of that #app, here's the React 18 version syntax for it, in resources/js/app.jsx:
require('./bootstrap'); require('alpinejs'); import { createRoot } from 'react-dom/client';import CompaniesIndex from "./Pages/Companies/Index"; const root = createRoot(document.getElementById('app'));root.render(<CompaniesIndex />);That's it, let's run the main command to compile it all:
npm run devSo, now, after logging into our Laravel Breeze dashboard, we should see this:

First, we start by installing React Router DOM
npm install react-router-dom@6Create new file Layouts/App.jsx. Usually, here you would add your layout, but for this example, we will add only routes.
resources/js/Layouts/App.jsx:
import {BrowserRouter, Routes, Route, Link} from "react-router-dom";import CompaniesIndex from "../Pages/Companies/Index"; function App() { return ( <BrowserRouter> <Routes> <Route path="/dashboard" element={ <CompaniesIndex /> }></Route> </Routes> </BrowserRouter> )} export default App;Next, let's prepare the Laravel view to contain the React functionality. We need to add this line to routes/web.php at the end of the file, which would load the dashboard on any other view coming from React Router:
Route::view('/{any?}', 'dashboard')->where('any', '.*');Now we need to render Layouts/App.jsx in resources/js/app.jxs:
require('./bootstrap'); require('alpinejs'); import { createRoot } from 'react-dom/client';import App from "./Layouts/App"; const root = createRoot(document.getElementById('app'));root.render(<App />);To list companies we need to edit resources/js/Pages/Companies/Index.jsx file:
import { Component } from "react"; class CompaniesIndex extends Component { constructor(props) { super(props); this.state = { companies: [] } } fetchCompanies() { axios.get('/api/companies') .then(response => this.setState({ companies: response.data.data })) } componentDidMount() { this.fetchCompanies() } renderCompanies() { return this.state.companies.map(company => <tr key={company.id}> <td className="px-6 py-4 text-sm leading-5 text-gray-900 whitespace-no-wrap">{company.name}</td> <td className="px-6 py-4 text-sm leading-5 text-gray-900 whitespace-no-wrap">{company.email}</td> <td className="px-6 py-4 text-sm leading-5 text-gray-900 whitespace-no-wrap">{company.address}</td> <td className="px-6 py-4 text-sm leading-5 text-gray-900 whitespace-no-wrap">{company.website}</td> </tr>); } render() { return ( <div className="overflow-hidden overflow-x-auto p-6 bg-white border-gray-200"> <div className="min-w-full align-middle"> <table className="min-w-full divide-y divide-gray-200 border"> <thead> <tr> <th className="px-6 py-3 bg-gray-50"> <span className="text-xs font-medium tracking-wider leading-4 text-left text-gray-500 uppercase">Name</span> </th> <th className="px-6 py-3 bg-gray-50"> <span className="text-xs font-medium tracking-wider leading-4 text-left text-gray-500 uppercase">Email</span> </th> <th className="px-6 py-3 bg-gray-50"> <span className="text-xs font-medium tracking-wider leading-4 text-left text-gray-500 uppercase">Address</span> </th> <th className="px-6 py-3 bg-gray-50"> <span className="text-xs font-medium tracking-wider leading-4 text-left text-gray-500 uppercase">Website</span> </th> <th className="px-6 py-3 bg-gray-50"> </th> </tr> </thead> <tbody className="table-body"> {this.renderCompanies()} </tbody> </table> </div> </div> ) }} export default CompaniesIndexA few things to note here.
fetchCompanies() gets all companies from API and adds to state companies all data.
componentDidMount() when this component is mounted calls fetchCompanies() method to fetch companies list.
renderCompanies() goes through companies state and returns table row for every record.
render() returns what you see in the browser.
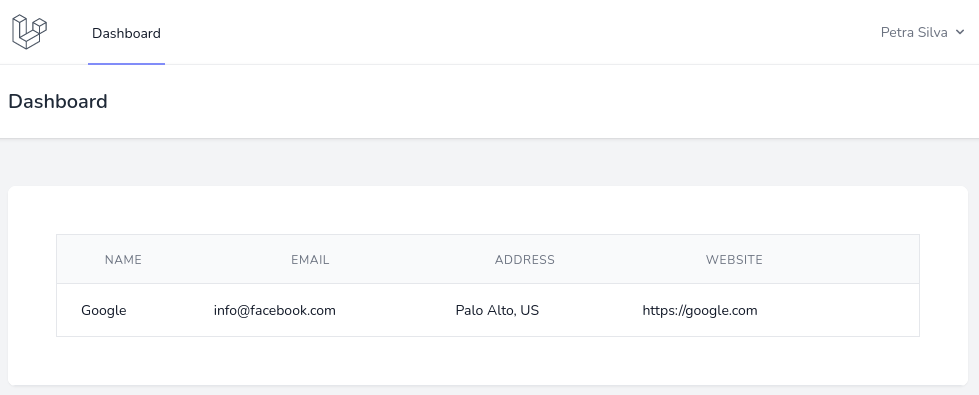
And, after running npm run dev, we see this on the dashboard:
Contrary to popular CRUD articles where Delete comes last, I want to implement it immediately now.
In the resources/js/Pages/Companies/Index.jsx file we add one more method that calls the Delete API endpoint.
deleteCompany = (event) => { if (!window.confirm('You sure?')) { return } axios.delete('/api/companies/' + event.target.value) .then(response => this.fetchCompanies()) .catch(error => console.log(error));}Also, we need to add delete button in renderCompanies():
resources/js/Pages/Companies/Index.jsx:
renderCompanies() { return this.state.companies.map(company => <tr key={company.id}> // ... <td className="px-6 py-4 text-sm leading-5 text-gray-900 whitespace-no-wrap"> <button value={company.id} onClick={this.deleteCompany} type="button" className="bg-gray-800 hover:bg-gray-700 rounded-md text-white px-4 py-2 font-semibold ease-in-out duration-150">Delete</button> </td> </tr>);}The render part is pretty clear, we just add button onClick="{this.deleteCompany}" there.
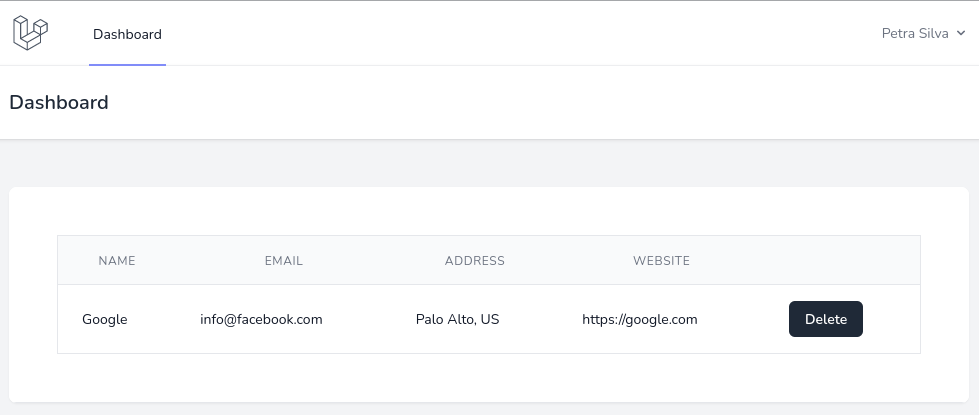
That's it for this section, we've made the delete button work!
Next, above the table, let's add a button that would lead to the form for creating a new company. For now, let's create an empty component in resources/js/Pages/Companies/Create.jsx:
import { Component } from "react"; class CompaniesCreate extends Component { render() { return ( <div>Create form coming soon.</div> ) }} export default CompaniesCreate;Next, we add a route to the resources/js/Layouts/App.jsx:
import {BrowserRouter, Routes, Route, Link} from "react-router-dom";import CompaniesIndex from "../Pages/Companies/Index";import CompaniesCreate from "../Pages/Companies/Create"; function App() { return ( <BrowserRouter> <Routes> <Route path="/dashboard" element={ <CompaniesIndex /> }></Route> <Route path="/companies/create" element={ <CompaniesCreate /> }></Route> </Routes> </BrowserRouter> )} export default App;Finally, we add a button above the table, with nav-link, in the resources/js/Pages/Companies/Index.jsx:
render() { return ( <div className="overflow-hidden overflow-x-auto p-6 bg-white border-gray-200"> <div className="flex place-content-end mb-4"> <NavLink to="/companies/create" className="px-4 py-2 rounded-md text-white bg-indigo-600 hover:bg-indigo-700">Create</NavLink> </div>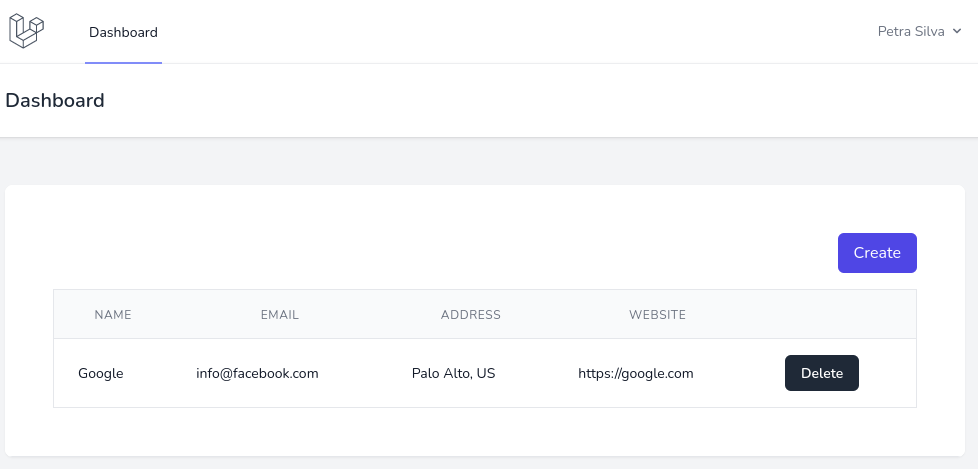
It leads to a page that is empty for now:

Now, we will fill it with the form and script to process that form, here's the full code for resources/js/Pages/Companies/Create.jsx:
import { Component } from "react";import { useNavigate } from "react-router-dom"; export const withNavigation = (Component) => { return props => <Component {...props} navigate={useNavigate()} />;} class CompaniesCreate extends Component { constructor(props) { super(props); this.state = { name: '', email: '', address: '', website: '', errors: {} } this.handleNameChange = this.handleNameChange.bind(this); this.handleEmailChange = this.handleEmailChange.bind(this); this.handleAddressChange = this.handleAddressChange.bind(this); this.handleWebsiteChange = this.handleWebsiteChange.bind(this); } handleNameChange(event) { this.setState({ name: event.target.value }); } handleEmailChange(event) { this.setState({ email: event.target.value }); } handleAddressChange(event) { this.setState({ address: event.target.value }); } handleWebsiteChange(event) { this.setState({ website: event.target.value }); } handleSubmit = (event) => { event.preventDefault(); axios.post('/api/companies', { name: this.state.name, email: this.state.email, address: this.state.address, website: this.state.website, }) .then(response => this.props.navigate('/dashboard')) .catch(error => this.setState({ errors: error.response.data.errors })); } errorMessage(field) { return ( <div className="text-red-600 mt-1"> { this.state.errors?.[field]?.map((message, index) => { return ( <div key={index}>{ message }</div> ) }) } </div> ) } render() { return ( <form className="space-y-6" onSubmit={ this.handleSubmit }> <div className="space-y-4 rounded-md shadow-sm"> <div> <label htmlFor="name" className="block text-sm font-medium text-gray-700">Name</label> <div className="mt-1"> <input value={this.state.name} onChange={this.handleNameChange} type="text" name="name" id="name" className="block mt-1 w-full rounded-md border-gray-300 shadow-sm focus:border-indigo-300 focus:ring focus:ring-indigo-200 focus:ring-opacity-50" /> { this.errorMessage('name') } </div> </div> <div> <label htmlFor="email" className="block text-sm font-medium text-gray-700">Email</label> <div className="mt-1"> <input value={this.state.email} onChange={this.handleEmailChange} type="text" name="email" id="email" className="block mt-1 w-full rounded-md border-gray-300 shadow-sm focus:border-indigo-300 focus:ring focus:ring-indigo-200 focus:ring-opacity-50" /> { this.errorMessage('email') } </div> </div> <div> <label htmlFor="address" className="block text-sm font-medium text-gray-700">Address</label> <div className="mt-1"> <input value={this.state.address} onChange={this.handleAddressChange} type="text" name="address" id="address" className="block mt-1 w-full rounded-md border-gray-300 shadow-sm focus:border-indigo-300 focus:ring focus:ring-indigo-200 focus:ring-opacity-50" /> { this.errorMessage('address') } </div> </div> <div> <label htmlFor="website" className="block text-sm font-medium text-gray-700">Website</label> <div className="mt-1"> <input value={this.state.website} onChange={this.handleWebsiteChange} type="text" name="website" id="website" className="block mt-1 w-full rounded-md border-gray-300 shadow-sm focus:border-indigo-300 focus:ring focus:ring-indigo-200 focus:ring-opacity-50" /> { this.errorMessage('website') } </div> </div> </div> <button type="submit" className="inline-flex items-center px-4 py-2 text-xs font-semibold tracking-widest text-white uppercase bg-gray-800 rounded-md border border-transparent ring-gray-300 transition duration-150 ease-in-out hover:bg-gray-700 active:bg-gray-900 focus:outline-none focus:border-gray-900 focus:ring disabled:opacity-25"> Create </button> </form> ) }} export default withNavigation(CompaniesCreate);In the render section, the most important parts are <form onSubmit={ this.handleSubmit }> and then each field has value={this.state.[field_name]}, binding it to the state and onChange={this.handle[field_name]Change} which binds inputs value to its state.
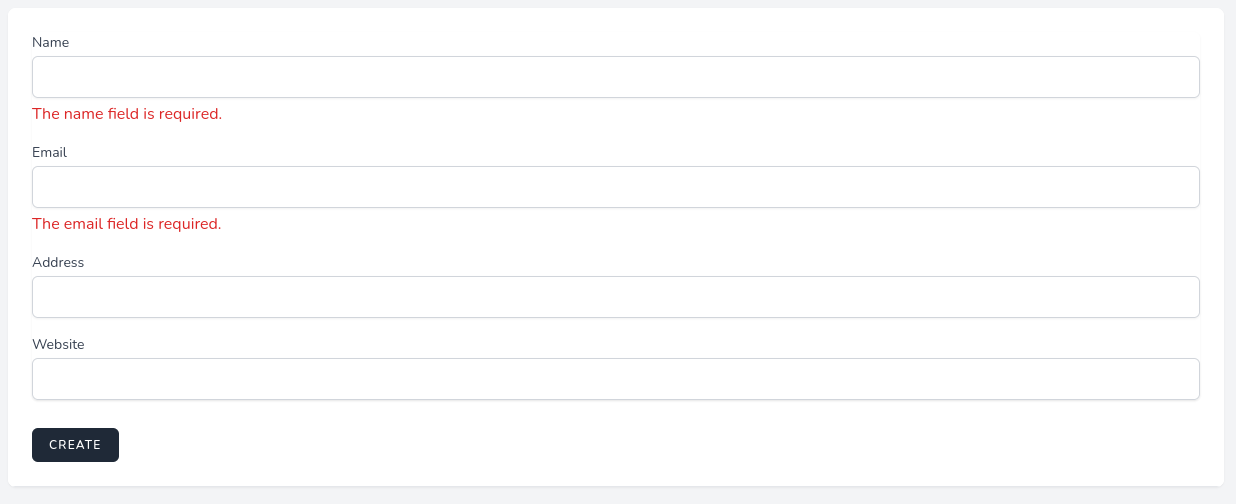
Next, the handleSubmit method will make a post request to API and if successful will navigate back to /dashboard, otherwise will add errors to the errors state.
In case of validation errors, we have errors object with all the errors and we show an error message after every input using errorMessage() method.
The edit form will be almost identical to the create form, with just a few differences.
First, the empty component resources/js/Pages/Companies/Edit.jsx:
import { Component } from "react"; class CompaniesEdit extends Component { render() { return ( <div>Edit form coming soon.</div> ) }} export default CompaniesEdit;Next, the route in resources/js/Layouts/App.jsx - this time with a parameter :id :
import {BrowserRouter, Routes, Route, Link} from "react-router-dom";import CompaniesIndex from "../Pages/Companies/Index";import CompaniesCreate from "../Pages/Companies/Create";import CompaniesEdit from "../Pages/Companies/Edit"; function App() { return ( <BrowserRouter> <Routes> <Route path="/dashboard" element={ <CompaniesIndex /> }></Route> <Route path="/companies/create" element={ <CompaniesCreate /> }></Route> <Route path="/companies/edit/:id" element={ <CompaniesEdit /> }></Route> </Routes> </BrowserRouter> )} export default App;Then, a button to edit a particular record in resources/js/Pages/Companies/Index.jsx:
renderCompanies() { return this.state.companies.map(company => <tr key={company.id}> // ... <td className="px-6 py-4 text-sm leading-5 text-gray-900 whitespace-no-wrap"> <NavLink to={`/companies/edit/${company.id}`} className="mr-2 bg-gray-800 rounded-md text-white px-3 py-1 font-bold">Edit</NavLink> <button value={company.id} onClick={this.deleteCompany} type="button" className="bg-red-500 rounded-md text-white px-3 py-1 font-bold">Delete</button> </td> </tr>);}Here's the visual result:
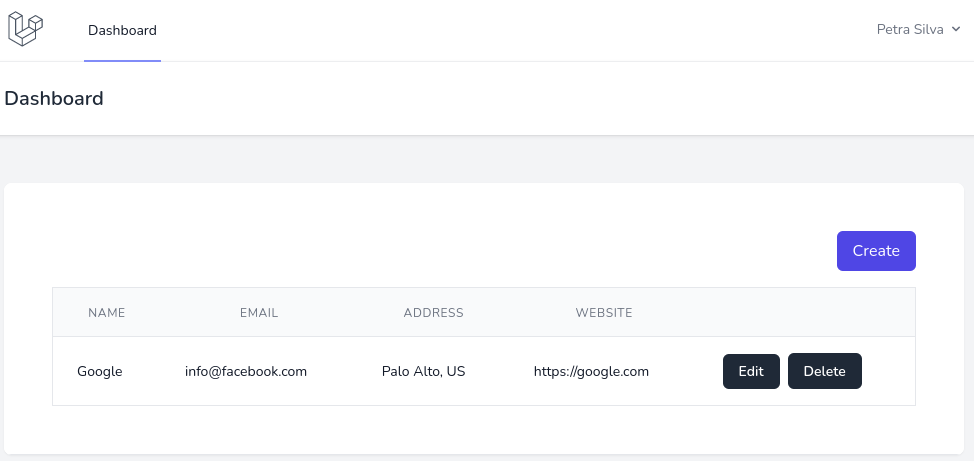
And, when we click Edit, we see this, as expected:

Now, let's build the actual form. Here's the code of resources/js/Pages/Companies/Edit.jsx:
import { Component } from "react";import { useNavigate, useParams } from "react-router-dom"; export const withNavigation = (Component) => { return props => <Component {...props} navigate={useNavigate()} />;} export const withParams = (Component) => { return props => <Component {...props} params={useParams()} />;} class CompaniesEdit extends Component { constructor(props) { super(props); this.state = { id: '', name: '', email: '', address: '', website: '', errors: {}, isLoading: false } this.handleNameChange = this.handleNameChange.bind(this); this.handleEmailChange = this.handleEmailChange.bind(this); this.handleAddressChange = this.handleAddressChange.bind(this); this.handleWebsiteChange = this.handleWebsiteChange.bind(this); } handleNameChange(event) { this.setState({ name: event.target.value }); } handleEmailChange(event) { this.setState({ email: event.target.value }); } handleAddressChange(event) { this.setState({ address: event.target.value }); } handleWebsiteChange(event) { this.setState({ website: event.target.value }); } handleSubmit = (event) => { event.preventDefault(); if (this.state.isLoading) return; this.setState({ errors: {}, isLoading: true }); axios.put('/api/companies/' + this.state.id, { 'name': this.state.name, 'email': this.state.email, 'address': this.state.address, 'website': this.state.website, }) .then(response => this.props.navigate('/dashboard')) .catch(error => this.setState({ errors: error.response.data.errors })) .finally(() => this.setState({ isLoading: false })); } componentDidMount() { this.setState({ isLoading: true }); axios.get('/api/companies/' + this.props.params.id).then(response => { this.setState({ id: response.data.data.id }); this.setState({ name: response.data.data.name }); this.setState({ email: response.data.data.email }); this.setState({ address: response.data.data.address }); this.setState({ website: response.data.data.website }); }).finally(() => this.setState({ isLoading: false })); } errorMessage(field) { return ( <div className="text-red-600 mt-1"> { this.state.errors?.[field]?.map((message, index) => { return ( <div key={index}>{ message }</div> ) }) } </div> ) } render() { return ( <form className="space-y-6" onSubmit={ this.handleSubmit }> <div className="space-y-4 rounded-md shadow-sm"> <div> <label htmlFor="name" className="block text-sm font-medium text-gray-700">Name</label> <div className="mt-1"> <input value={this.state.name} onChange={this.handleNameChange} type="text" name="name" id="name" className="block mt-1 w-full rounded-md border-gray-300 shadow-sm focus:border-indigo-300 focus:ring focus:ring-indigo-200 focus:ring-opacity-50" /> { this.errorMessage('name') } </div> </div> <div> <label htmlFor="email" className="block text-sm font-medium text-gray-700">Email</label> <div className="mt-1"> <input value={this.state.email} onChange={this.handleEmailChange} type="text" name="email" id="email" className="block mt-1 w-full rounded-md border-gray-300 shadow-sm focus:border-indigo-300 focus:ring focus:ring-indigo-200 focus:ring-opacity-50" /> { this.errorMessage('email') } </div> </div> <div> <label htmlFor="address" className="block text-sm font-medium text-gray-700">Address</label> <div className="mt-1"> <input value={this.state.address || ''} onChange={this.handleAddressChange} type="text" name="address" id="address" className="block mt-1 w-full rounded-md border-gray-300 shadow-sm focus:border-indigo-300 focus:ring focus:ring-indigo-200 focus:ring-opacity-50" /> { this.errorMessage('address') } </div> </div> <div> <label htmlFor="website" className="block text-sm font-medium text-gray-700">Website</label> <div className="mt-1"> <input value={this.state.website || ''} onChange={this.handleWebsiteChange} type="text" name="website" id="website" className="block mt-1 w-full rounded-md border-gray-300 shadow-sm focus:border-indigo-300 focus:ring focus:ring-indigo-200 focus:ring-opacity-50" /> { this.errorMessage('website') } </div> </div> </div> <button type="submit" className="inline-flex items-center px-4 py-2 text-xs font-semibold tracking-widest text-white uppercase bg-gray-800 rounded-md border border-transparent ring-gray-300 transition duration-150 ease-in-out hover:bg-gray-700 active:bg-gray-900 focus:outline-none focus:border-gray-900 focus:ring disabled:opacity-25"> Save </button> </form> ) }} export default withParams(withNavigation(CompaniesEdit));It is very similar to the Create form, but here are a few differences.
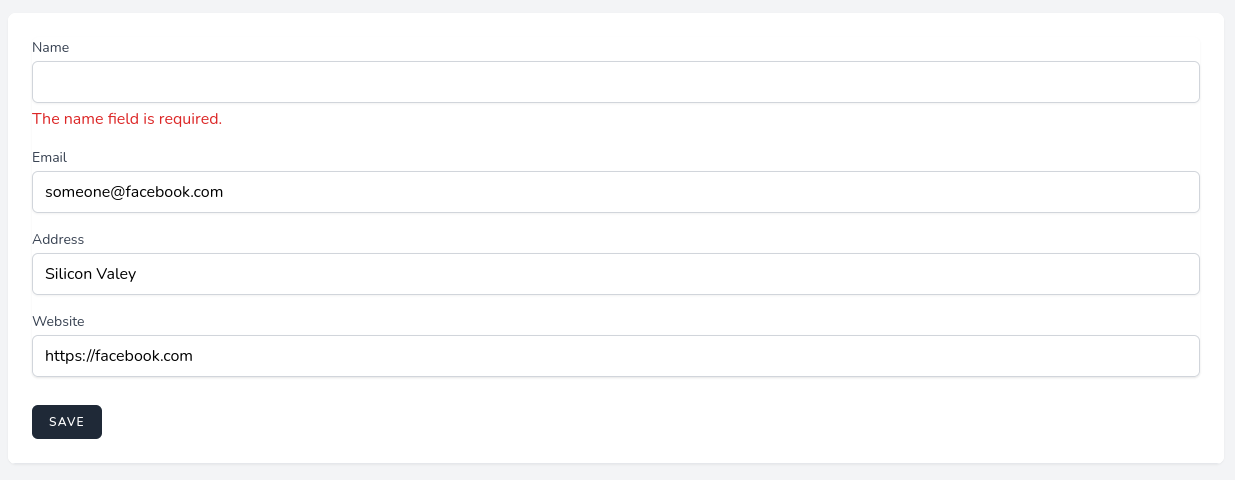
First, we accept the props, then when the component is mounted componentDidMount() is called automatically. There we get the company and put all companies data in its state.
The submit and validation parts work identically to the create form: redirects to the /dashboard in case of success, or show the error in case of the validation error.
That's it, a long tutorial about React and Laravel. The code repository is available for free on GitHub.