.png-674b51a1a9f9d.jpg)
Some Laravel tasks are running in the background; you must check whether they are finished. But what if you didn't need to constantly check but rather "listen" for those events to finish? Let's implement exactly this real-time feedback with the Reverb server.
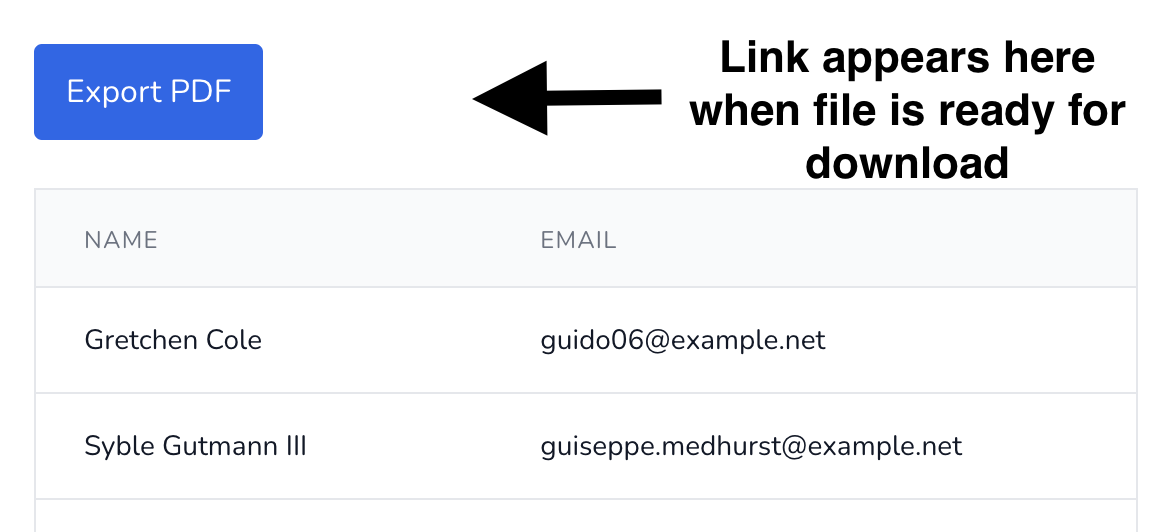
This is our task: allow the user to export some files and tell the user when the file is prepared for download.
In this tutorial, I will show you how to implement it with the official Laravel Reverb tool. There are other alternatives, but we are currently focusing on official Laravel tools.
What we'll cover in this tutorial:
So, are you ready? Let's dive in!
For this tutorial, we will create a fresh Laravel project using the laravel new command. Here are our settings:
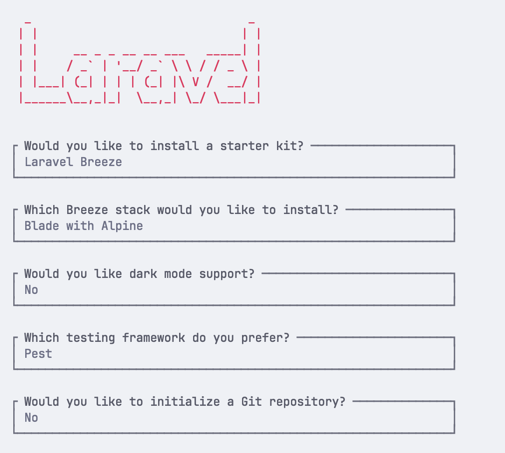
We will use Laravel Breeze for our Authentication and UI. Our database will be SQLite, as that is the default for Laravel 11.
We need to add our Admin user and some random users by modifying database/seeders/DatabaseSeeder.php:
database/seeders/DatabaseSeeder.php:
class DatabaseSeeder extends Seeder{ public function run() { User::factory()->create([ 'name' => 'Test User', 'email' => 'admin@admin.com', ]); User::factory() ->count(1000) ->create(); }}Then, we can run the migration and seed the database:
php artisan migrate:fresh --seedBefore we dive into the Reverb things, let's set up our base front end. This will include:
Let's do this quickly:
app/Http/Controllers/UsersController.php
namespace App\Http\Controllers; use App\Models\User; class UsersController extends Controller{ public function __invoke() { $users = User::query() ->paginate(); return view('users.index', compact('users')); }}resources/views/users/index.blade.php
<x-app-layout> <x-slot name="header"> <h2 class="font-semibold text-xl text-gray-800 dark:text-gray-200 leading-tight"> {{ __('Users List') }} </h2> </x-slot> <div class="py-12"> <div class="max-w-7xl mx-auto sm:px-6 lg:px-8"> <div class="bg-white dark:bg-gray-800 overflow-hidden shadow-sm sm:rounded-lg"> <div class="p-6 text-gray-90 0 dark:text-gray-100"> <table class="min-w-full divide-y divide-gray-200 dark:divide-gray-700"> <thead class="bg-gray-50 dark:bg-gray-800"> <tr> <th class="px-6 py-3 text-left text-xs font-medium text-gray-500 dark:text-gray-400 uppercase tracking-wider"> Name </th> <th class="px-6 py-3 text-left text-xs font-medium text-gray-500 dark:text-gray-400 uppercase tracking-wider"> Email </th> </tr> </thead> <tbody class="bg-white dark:bg-gray-900 divide-y divide-gray-200 dark:divide-gray-700"> @foreach ($users as $user) <tr> <td class="px-6 py-4 whitespace-nowrap"> <div class="text-sm font-medium text-gray-900 dark:text-gray-100"> {{ $user->name }} </div> </td> <td class="px-6 py-4 whitespace-nowrap"> <div class="text-sm text-gray-500 dark:text-gray-400"> {{ $user->email }} </div> </td> </tr> @endforeach </tbody> </table> <div class="mt-4"> {{ $users->links() }} </div> </div> </div> </div> </div></x-app-layout>routes/web.php
use App\Http\Controllers\UsersController; // ... Route::middleware('auth')->group(function () { // ... Route::get('users', UsersController::class)->name('users.index');});Then, we need to run NPM to compile our assets:
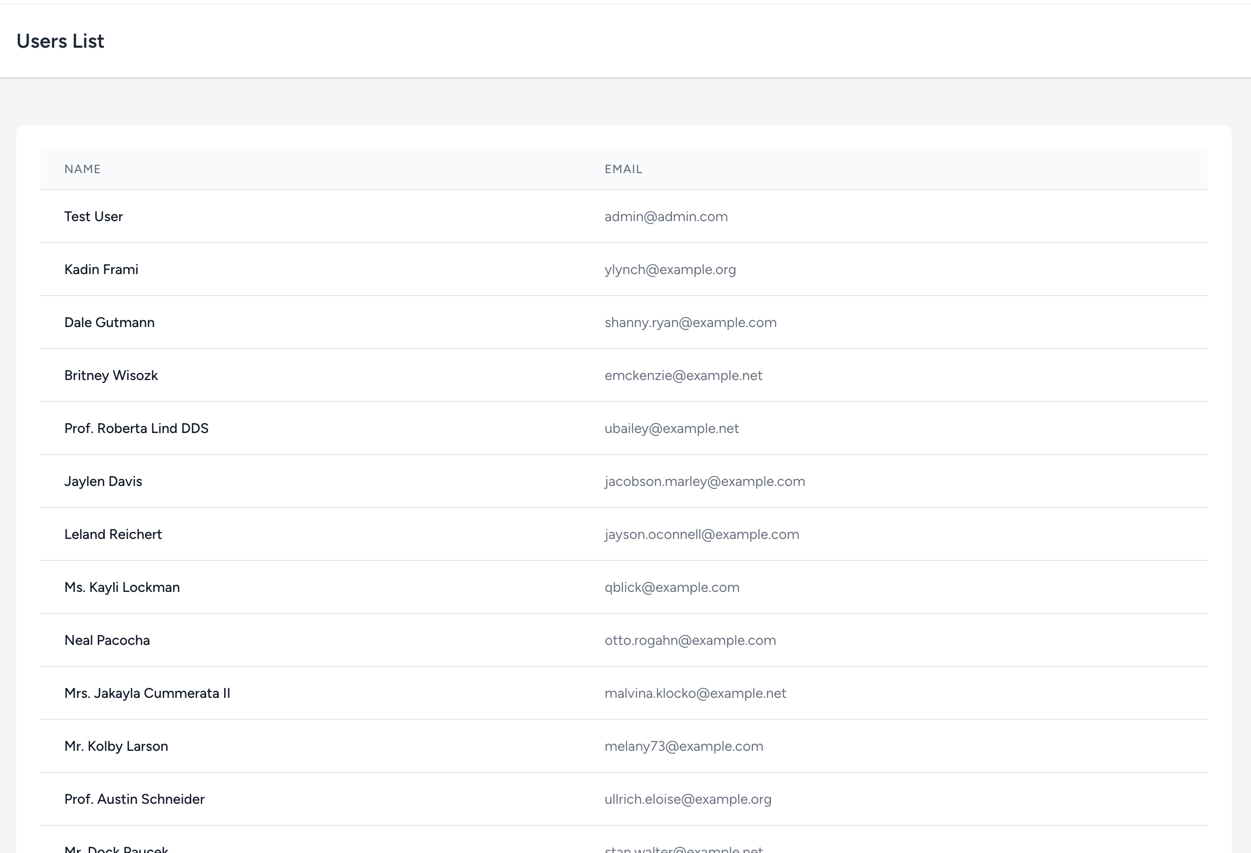
npm run buildNow, if you navigate to <APP_URL>/users, you should see the default table of users with our seeded data:
Note: you can log in with admin@admin.com / password.
Ok, preparation is done; now let's build a button to export users with Reverb.
To install Reverb, we have to call this command:
php artisan install:broadcastingThis will ask us if we want to install Reverb, enter yes and press Enter.
Once the package installs - it will ask if we want Node dependencies to be installed. Enter yes and press Enter.
That's it! Reverb is installed and ready to be used.
All setup is done, and our main goal is to have the export button for the user. The request is sent to the Controller when the user clicks the button. The Controller dispatches the Events and a Job. When the Job process is finished, a link will appear to download the newly-formed PDF.
To do this, we need a set of new files:
Create a Job that will generate a PDF file with data:
php artisan make:job ProcessPdfExportNext, create an Event, which will be broadcasted to all clients that requested to export data.
php artisan make:event ExportPdfStatusUpdatedNow, create a Controller which will use that Event and Job:
php artisan make:controller ExportPdfControllerapp/Http/Controllers/Api/ExportPdfController.php:
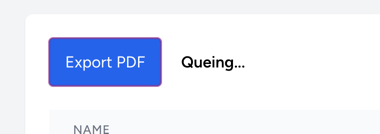
namespace App\Http\Controllers; use App\Events\ExportPdfStatusUpdated;use App\Http\Controllers\Controller;use App\Jobs\ProcessPdfExport;use Illuminate\Http\Request; class ExportPdfController extends Controller{ public function __invoke(Request $request) { event(new ExportPdfStatusUpdated($request->user(), [ 'message' => 'Queing...', ])); ProcessPdfExport::dispatch($request->user()); return response()->noContent(); }}The ExportPdfStatusUpdated Event accepts two parameters:
broadcastOn method['message' => '', 'link' => ''] format, for the message and the link to display in the browser when the event happens.app/Events/ExportPdfStatusUpdated.php:
namespace App\Events; use App\Models\User;use Illuminate\Broadcasting\Channel;use Illuminate\Broadcasting\InteractsWithSockets;use Illuminate\Broadcasting\PresenceChannel;use Illuminate\Broadcasting\PrivateChannel;use Illuminate\Contracts\Broadcasting\ShouldBroadcast;use Illuminate\Foundation\Events\Dispatchable;use Illuminate\Queue\SerializesModels;use Illuminate\Support\Arr; class ExportPdfStatusUpdated implements ShouldBroadcast{ use Dispatchable, InteractsWithSockets, SerializesModels; protected User $user; public string $message; public $link; public function __construct(User $user, array $payload) { $this->user = $user; $this->message = Arr::pull($payload, 'message'); $this->link = Arr::pull($payload, 'link'); } public function broadcastOn() { return new PrivateChannel('App.Models.User.'.$this->user->id); }}Now, the Job to generate the PDF:
Note: We will not generate the actual PDF file as we will simply add sleep(5) to our code. This is to simulate the time it takes to generate the PDF file.
app/Jobs/ProcessPdfExport.php:
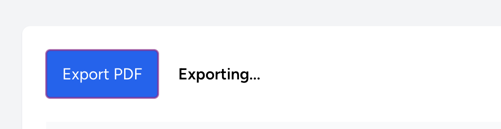
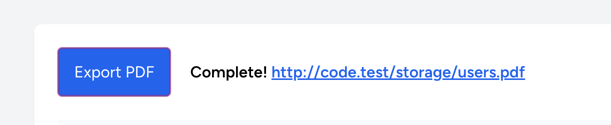
namespace App\Jobs; use App\Events\ExportPdfStatusUpdated;use App\Models\User;use Barryvdh\DomPDF\Facade\Pdf;use Illuminate\Bus\Queueable;use Illuminate\Contracts\Queue\ShouldBeUnique;use Illuminate\Contracts\Queue\ShouldQueue;use Illuminate\Foundation\Bus\Dispatchable;use Illuminate\Queue\InteractsWithQueue;use Illuminate\Queue\SerializesModels;use Illuminate\Support\Facades\Storage; class ProcessPdfExport implements ShouldQueue{ use Dispatchable, InteractsWithQueue, Queueable, SerializesModels; protected User $user; public function __construct(User $user) { $this->user = $user; } public function handle() { event(new ExportPdfStatusUpdated($this->user, [ 'message' => 'Exporting...', ])); sleep(5); event(new ExportPdfStatusUpdated($this->user, [ 'message' => 'Complete!', 'link' => Storage::disk('public')->url('users.pdf'), ])); }}And finally, one of the most important parts: the route to the Controller:
routes/web.php
use App\Http\Controllers\ExportPdfController; // ... Route::middleware('auth')->group(function () { // ... Route::post('/export-pdf', ExportPdfController::class)->name('export.pdf');});We will have two smaller parts in the resources/views/users/index.blade.php file.
The first part is the button itself: the only thing we do here is display the Export PDF button with empty export status placeholder:
<div class="pb-6"> <button id="export-button" class="bg-blue-600 text-white rounded px-4 py-3 mr-4" type="button"> Export PDF </button> <span id="export-status" class="font-bold"></span></div>The second part is more interesting. We register a new browser event, window.addEventListener('DOMContentLoaded'..., so the script runs only when the document is fully loaded. Then we listen to a channel for a specific ExportPdfStatusUpdated event and update the DOM to display a message and link with the data the event carries. The final event listener requests API to start the whole process.
<script>window.addEventListener('DOMContentLoaded', function () { var channel = window.Echo.private('App.Models.User.' + {{ auth()->id() }}); channel.listen('ExportPdfStatusUpdated', function (e) { var span = document.getElementById('export-status'); if (e.link !== null) { var link_template = `<a href="${e.link}" target="_blank" class="text-blue-600 underline">${e.link}</a>`; span.innerHTML = e.message + ' ' + link_template; return } span.innerHTML = e.message; }); var button = document.getElementById('export-button'); button.addEventListener('click', function () { axios.post('/export-pdf'); });})</script>The complete file looks like this:
resources/views/users/index.blade.php:
<x-slot name="header"> <h2 class="font-semibold text-xl text-gray-800 dark:text-gray-200 leading-tight"> {{ __('Users List') }} </h2> </x-slot> <div class="py-12"> <div class="max-w-7xl mx-auto sm:px-6 lg:px-8"> <div class="bg-white dark:bg-gray-800 overflow-hidden shadow-sm sm:rounded-lg"> <div class="p-6 text-gray-90 0 dark:text-gray-100"> <div class="pb-6"> <button id="export-button" class="bg-blue-600 text-white rounded px-4 py-3 mr-4" type="button"> Export PDF </button> <span id="export-status" class="font-bold"></span> </div> <table class="min-w-full divide-y divide-gray-200 dark:divide-gray-700"> <thead class="bg-gray-50 dark:bg-gray-800"> <tr> <th class="px-6 py-3 text-left text-xs font-medium text-gray-500 dark:text-gray-400 uppercase tracking-wider"> Name </th> <th class="px-6 py-3 text-left text-xs font-medium text-gray-500 dark:text-gray-400 uppercase tracking-wider"> Email </th> </tr> </thead> <tbody class="bg-white dark:bg-gray-900 divide-y divide-gray-200 dark:divide-gray-700"> @foreach ($users as $user) <tr> <td class="px-6 py-4 whitespace-nowrap"> <div class="text-sm font-medium text-gray-900 dark:text-gray-100"> {{ $user->name }} </div> </td> <td class="px-6 py-4 whitespace-nowrap"> <div class="text-sm text-gray-500 dark:text-gray-400"> {{ $user->email }} </div> </td> </tr> @endforeach </tbody> </table> <div class="mt-4"> {{ $users->links() }} </div> </div> </div> </div> </div> <script> window.addEventListener('DOMContentLoaded', function () { var channel = window.Echo.private('App.Models.User.' + {{ auth()->id() }}); channel.listen('ExportPdfStatusUpdated', function (e) { var span = document.getElementById('export-status'); if (e.link !== null) { var link_template = `<a href="${e.link}" target="_blank" class="text-blue-600 underline">${e.link}</a>`; span.innerHTML = e.message + ' ' + link_template; return } span.innerHTML = e.message; }); var button = document.getElementById('export-button'); button.addEventListener('click', function () { axios.post('/export-pdf'); }); }) </script></x-app-layout>As a last step, we need to compile our assets:
npm run buildLast, we must run the Reverb server and the Laravel application. Here's how to do it:
php artisan reverb:startAnd since we are using Queue for the Job, we need to run the Queue Worker:
php artisan queue:listenBut there is one more thing - we need to run 2 queue workers simultaneously. This is due to:
So, open a new terminal window and run the second worker:
php artisan queue:listenOnce that is done, we can go into our application and click the Export PDF button. The messages should appear in this order:
That's it! We have successfully implemented real-time feedback with Reverb in Laravel.
Happy broadcasting!
.png-674b5251359fd.jpg)
.png-674b525c12315.jpg)
.png-674b52368b309.jpg)