Notice: we have a newer version of the same tutorial with Laravel 11 and Reverb: Laravel Reverb Demo: Real-Time Notification on Completed Task
Some Laravel tasks are running in the background and you need to check whether they are finished. But what if you didn't need to constantly check, but rather "listen" for those events to finish? Let's implement exactly this real-time feedback, with Soketi server.
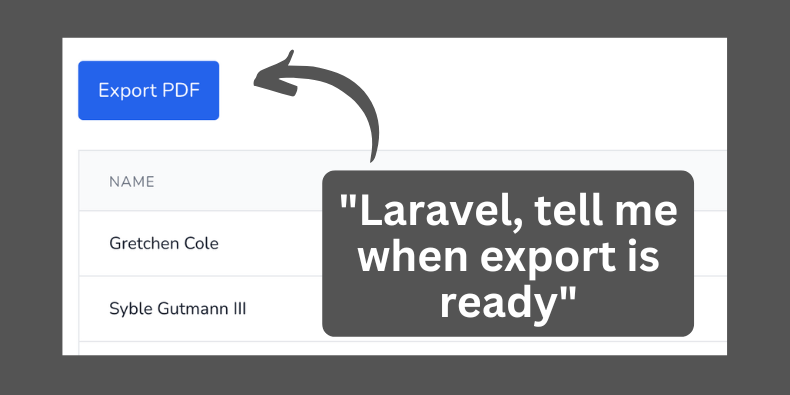
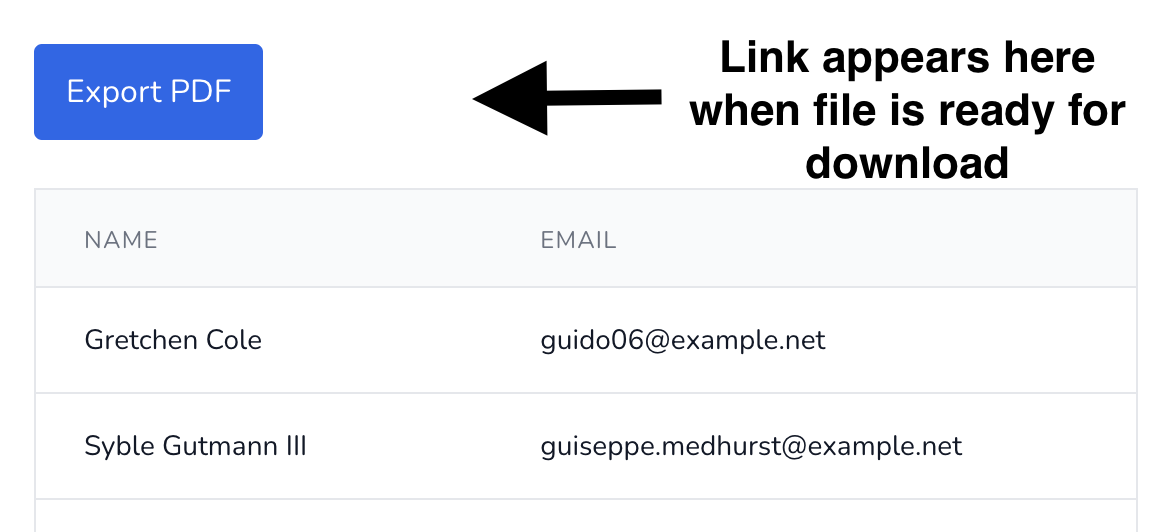
This is our task: allow the user to export some file, and tell the user when the file is actually prepared for download.

In this tutorial, I will show you how to implement it, step-by-step, with one of the options for WebSockets, called Soketi. There are other alternatives, but Soketi server solution has lately become the most recommended in Laravel community, as the most reliable.
What we'll cover in this tutorial:
So, are you ready? Let's dive in!
For this tutorial, we are going to use Laravel Daily pre-made project for such demonstration purposes https://github.com/LaravelDaily/Laravel-Breeze-Pages-Skeleton, which gives us Laravel Breeze Auth with a simple page of the list of users.
You can also use the default Laravel installation, but it might need a bit more setup in the beginning.
Clone the repo:
git clone https://github.com/LaravelDaily/Laravel-Breeze-Pages-Skeleton tutorial-soketi-export-pdfRun composer to install project dependencies:
composer installCopy .env.example to .env:
cp .env.example .envGenerate your app key:
php artisan key:generateTo be able to download exported files, we also going to need symlink to the public folder:
php artisan storage:linkAfter that, update the .env file with your database credentials:
APP_URL=<your website url>DB_DATABASE=<your db name>DB_USERNAME=<your db username>DB_PASSWORD=<your db password>And migrate your database:
php artisan migrate:fresh --seedBy default there will be 10 users seeded, let's add some more by modifying database/seeders/UserSeeder.php and changing it to 100 users. The file should look like this:
database/seeders/UserSeeder.php:
class UserSeeder extends Seeder{ public function run() { User::factory(100)->create(); }}And re-seed our database again:
php artisan migrate:fresh --seedInstall npm dependencies and compile the assets for our project:
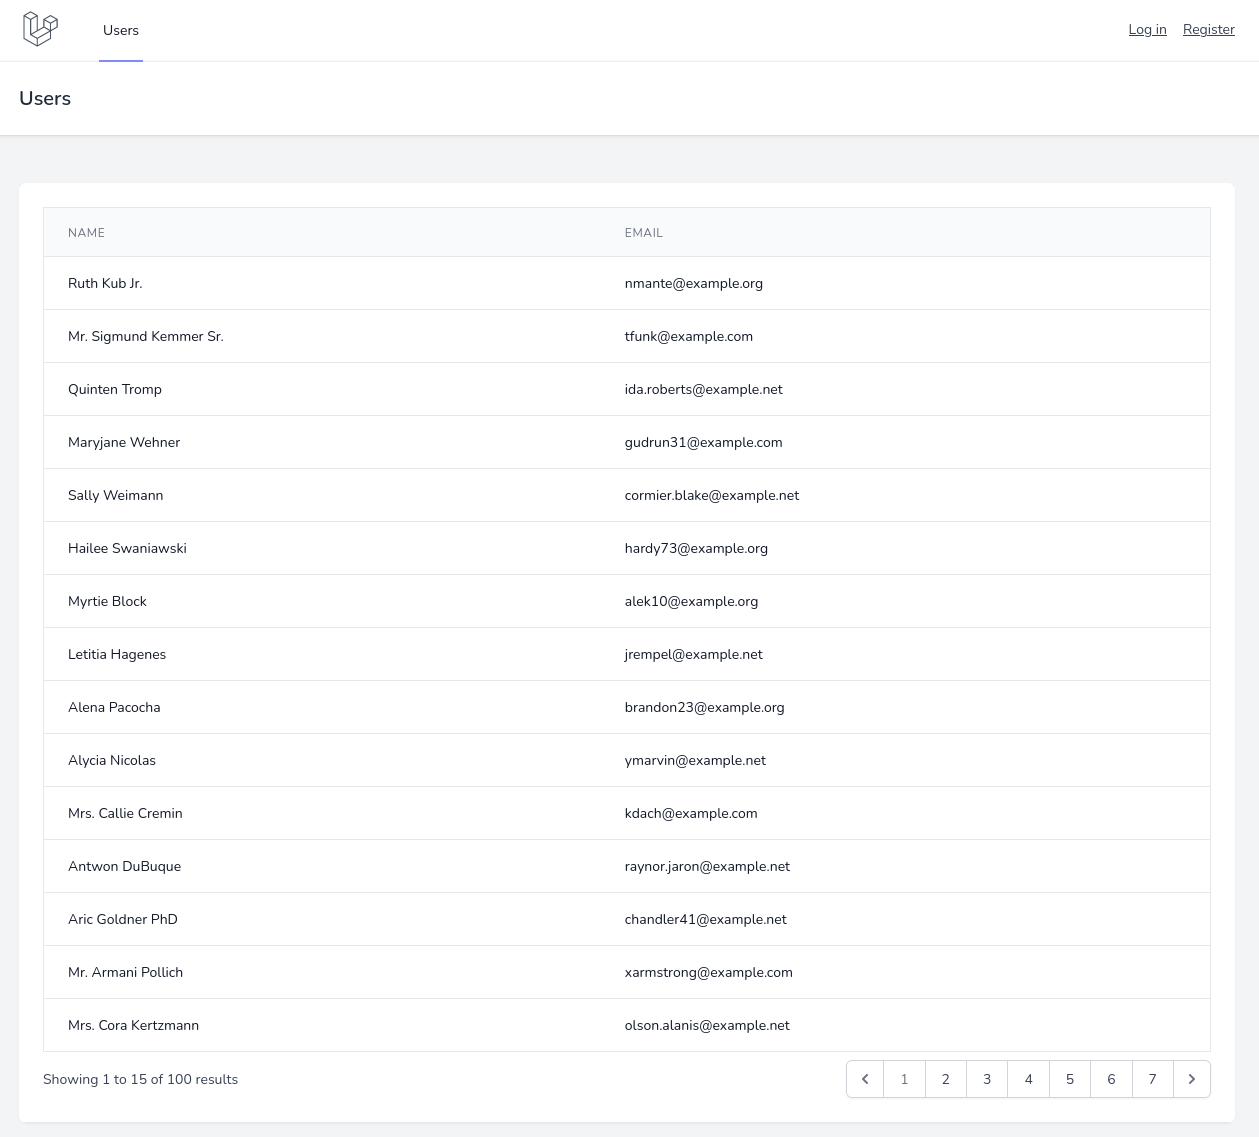
npm installnpm run devNow, if you navigate to <APP_URL>/users, you should see the default table of users with our seeded data:

Ok, preparation is done, now let's build a button to export users, with Soketi.
For the WebSockets server we're going to use Soketi, it is a simple and fast WebSockets server.
Node.js LTS (14.x, 16.x, 18.x) is required due to uWebSockets.js build limitations.
Soketi may be easily installed via the NPM CLI:
When using -g flag you need to be root (or use sudo) to be able to install the Soketi server globally.
npm install -g @soketi/soketiIf installation fails with error code 128 as shown, delete the /root/.npm folder and try again.
npm ERR! code 128npm ERR! An unknown git error occurrednpm ERR! command git --no-replace-objects clone -b v20.10.0 ssh://git@github.com/uNetworking/uWebSockets.js.git /root/.npm/_cacache/tmp/git-cloneOvhFm4 --recurse-submodules --depth=1npm ERR! fatal: could not create leading directories of '/root/.npm/_cacache/tmp/git-cloneOvhFm4': Permission deniedAfter installation, a Soketi server using the default configuration may be started using the start command:
soketi startBy default, this will start a server at 127.0.0.1:6001 with the following application credentials:
app-id
app-key
app-secret
Before broadcasting any events, you will first need to enable the App\Providers\BroadcastServiceProvider. This can be done by uncommenting the // App\Providers\BroadcastServiceProvider::class, line in the config/app.php file.
From:
config/app.php:
// .../* * Application Service Providers... */App\Providers\AppServiceProvider::class,App\Providers\AuthServiceProvider::class,// App\Providers\BroadcastServiceProvider::class,App\Providers\EventServiceProvider::class,App\Providers\RouteServiceProvider::class,// ...to:
config/app.php:
// .../* * Application Service Providers... */App\Providers\AppServiceProvider::class,App\Providers\AuthServiceProvider::class,App\Providers\BroadcastServiceProvider::class,App\Providers\EventServiceProvider::class,App\Providers\RouteServiceProvider::class,// ...To broadcast events, we will use Pusher Channels, so we need to install the Pusher Channels PHP SDK using Composer:
composer require pusher/pusher-php-serverWhen using Laravel's event broadcasting feature within your application, Soketi is easy to configure.
First, replace the default pusher configuration in your application's config/broadcasting.php file with the following configuration:
config/broadcasting.php:
'connections' => [ 'pusher' => [ 'driver' => 'pusher', 'key' => env('PUSHER_APP_KEY', 'app-key'), 'secret' => env('PUSHER_APP_SECRET', 'app-secret'), 'app_id' => env('PUSHER_APP_ID', 'app-id'), 'options' => [ 'host' => env('PUSHER_HOST', '127.0.0.1'), 'port' => env('PUSHER_PORT', 6001), 'scheme' => env('PUSHER_SCHEME', 'http'), 'encrypted' => true, 'useTLS' => env('PUSHER_SCHEME') === 'https', ], ],],Finally, in your .env configuration change BROADCAST_DRIVER and add Pusher variables:
From:
BROADCAST_DRIVER=log PUSHER_APP_ID=PUSHER_APP_KEY=PUSHER_APP_SECRET=PUSHER_APP_CLUSTER=mt1to:
BROADCAST_DRIVER=pusher PUSHER_APP_ID=app-idPUSHER_APP_KEY=app-keyPUSHER_APP_SECRET=app-secretPUSHER_APP_CLUSTER=mt1PUSHER_HOST=127.0.0.1PUSHER_PORT=6001PUSHER_SCHEME=httpNext, the Channels.
The application's broadcast channels are defined in the Routes Channels file.
routes/channels.php:
use Illuminate\Support\Facades\Broadcast; /*|--------------------------------------------------------------------------| Broadcast Channels|--------------------------------------------------------------------------|| Here you may register all of the event broadcasting channels that your| application supports. The given channel authorization callbacks are| used to check if an authenticated user can listen to the channel.|*/ Broadcast::channel('App.Models.User.{id}', function ($user, $id) { return (int) $user->id === (int) $id;});This is why we need the Auth from Laravel Breeze in the first place: every user will have their own separate broadcasting channel.
It actually comes with Laravel by default and is completely sufficient for our objectives. No changes are needed here.
The channel method accepts two arguments: the name of the channel and a callback which returns true or false indicating whether the user is authorized to listen on the channel.
More information about defining channels can be found in official Laravel documentation.
Laravel Echo (a JavaScript library) can listen to the events within the browser client.
Laravel Echo is compatible with the PusherJS library. Therefore, its configuration resembles the typical configuration of a PusherJS client.
To configure the client side we need to install Laravel Echo and PusherJS libraries:
npm install laravel-echo pusher-js@7 --save-devOnce again, update your .env values:
from:
VITE_PUSHER_APP_KEY="${PUSHER_APP_KEY}"VITE_PUSHER_APP_CLUSTER="${PUSHER_APP_CLUSTER}"to:
VITE_PUSHER_APP_KEY="${PUSHER_APP_KEY}"VITE_PUSHER_APP_CLUSTER="${PUSHER_APP_CLUSTER}"VITE_PUSHER_HOST="${PUSHER_HOST}"VITE_PUSHER_APP_CLUSTER="${PUSHER_APP_CLUSTER}"VITE_PUSHER_PORT="${PUSHER_PORT}"VITE_PUSHER_SCHEME="${PUSHER_SCHEME}"In that way, we reuse the same variable values we used for Pusher to be used by Vite to compile our client-side assets.
The last thing we need to do is to update our frontend bootstrap to include those libraries and values by updating the resources/js/bootstrap.js file:
From:
resources/js/bootstrap.js:
// import Echo from 'laravel-echo'; // window.Pusher = require('pusher-js'); // window.Echo = new Echo({// broadcaster: 'pusher',// key: import.meta.env.VITE_PUSHER_APP_KEY,// cluster: import.meta.env.VITE_PUSHER_APP_CLUSTER,// forceTLS: true// });to:
resources/js/bootstrap.js:
import Echo from 'laravel-echo';import Pusher from 'pusher-js'; window.Pusher = Pusher; window.Echo = new Echo({ broadcaster: 'pusher', key: import.meta.env.VITE_PUSHER_APP_KEY, wsHost: import.meta.env.VITE_PUSHER_HOST ?? `ws-${import.meta.env.VITE_PUSHER_APP_CLUSTER}.pusher.com`, wsPort: import.meta.env.VITE_PUSHER_PORT ?? 80, wssPort: import.meta.env.VITE_PUSHER_PORT ?? 443, forceTLS: (import.meta.env.VITE_PUSHER_SCHEME ?? 'https') === 'https', enabledTransports: ['ws', 'wss']});Make sure that
enabledTransportsis set to ['ws', 'wss']. If not set, in case of connection failure, the client will try other transports such as XHR polling, which Soketi doesn't support.
All setup is done, and our main goal now is to have the export button for the user. When the user clicks the button, the request is sent to the Controller. The Controller dispatches the Events and a Job. When the Job process is finished, a link will appear to download the newly-formed PDF.
The whole workflow process can be drawn like that:

When calling API endpoints, we need our requests to be authenticated. Since we are using Laravel Breeze and Sanctum, it is done by enabling the EnsureFrontendRequestsAreStateful middleware in the app/Http/Kernel.php file. Find the API section in middleware groups and uncomment it:
From:
app/Http/Kernel.php:
'api' => [ // \Laravel\Sanctum\Http\Middleware\EnsureFrontendRequestsAreStateful::class, 'throttle:api', \Illuminate\Routing\Middleware\SubstituteBindings::class,],to:
app/Http/Kernel.php:
'api' => [ \Laravel\Sanctum\Http\Middleware\EnsureFrontendRequestsAreStateful::class, 'throttle:api', \Illuminate\Routing\Middleware\SubstituteBindings::class,],Now, we need a set of new files:
Create a Job that will generate a PDF file with data:
php artisan make:job ProcessPdfExportNext, create an Event, which will be broadcasted to all clients that requested to export data.
php artisan make:event ExportPdfStatusUpdatedNow, create a Controller which will use that Event and Job:
php artisan make:controller Api/ExportPdfControllerapp/Http/Controllers/Api/ExportPdfController.php:
namespace App\Http\Controllers\Api; use App\Events\ExportPdfStatusUpdated;use App\Http\Controllers\Controller;use App\Jobs\ProcessPdfExport;use Illuminate\Http\Request; class ExportPdfController extends Controller{ public function __invoke(Request $request) { event(new ExportPdfStatusUpdated($request->user(), [ 'message' => 'Queing...', ])); ProcessPdfExport::dispatch($request->user()); return response()->noContent(); }}The ExportPdfStatusUpdated Event accepts two parameters:
broadcastOn method['message' => '', 'link' => ''] format, for the message and the link to display in the browser when the event happens.app/Events/ExportPdfStatusUpdated.php:
namespace App\Events; use App\Models\User;use Illuminate\Broadcasting\Channel;use Illuminate\Broadcasting\InteractsWithSockets;use Illuminate\Broadcasting\PresenceChannel;use Illuminate\Broadcasting\PrivateChannel;use Illuminate\Contracts\Broadcasting\ShouldBroadcast;use Illuminate\Foundation\Events\Dispatchable;use Illuminate\Queue\SerializesModels;use Illuminate\Support\Arr; class ExportPdfStatusUpdated implements ShouldBroadcast{ use Dispatchable, InteractsWithSockets, SerializesModels; protected User $user; public string $message; public $link; public function __construct(User $user, array $payload) { $this->user = $user; $this->message = Arr::pull($payload, 'message'); $this->link = Arr::pull($payload, 'link'); } public function broadcastOn() { return new PrivateChannel('App.Models.User.'.$this->user->id); }}Now, the Job to generate the PDF.
First, to be able to generate PDF files at all, we need to install the DomPDF package via:
composer require barryvdh/laravel-dompdfJob updates status when the export process begins, and once again when PDF export is complete and attaching a link to the generated file for the user to download.
app/Jobs/ProcessPdfExport.php:
namespace App\Jobs; use App\Events\ExportPdfStatusUpdated;use App\Models\User;use Barryvdh\DomPDF\Facade\Pdf;use Illuminate\Bus\Queueable;use Illuminate\Contracts\Queue\ShouldBeUnique;use Illuminate\Contracts\Queue\ShouldQueue;use Illuminate\Foundation\Bus\Dispatchable;use Illuminate\Queue\InteractsWithQueue;use Illuminate\Queue\SerializesModels;use Illuminate\Support\Facades\Storage; class ProcessPdfExport implements ShouldQueue{ use Dispatchable, InteractsWithQueue, Queueable, SerializesModels; protected User $user; public function __construct(User $user) { $this->user = $user; } public function handle() { event(new ExportPdfStatusUpdated($this->user, [ 'message' => 'Exporting...', ])); $pdf = Pdf::loadView('pdf.users', ['users' => User::all()]); Storage::put('public/users.pdf', $pdf->output()); event(new ExportPdfStatusUpdated($this->user, [ 'message' => 'Complete!', 'link' => Storage::disk('public')->url('users.pdf'), ])); }}We need to create a template for our PDF file, too:
resources/views/pdf/users.blade.php:
<table> <thead> <tr> <th>ID</th> <th>Name</th> <th>Email</th> <th>Created at</th> </tr> </thead> <tbody> @foreach($users as $user) <tr> <td>{{ $user->id }}</td> <td>{{ $user->name }}</td> <td>{{ $user->email }}</td> <td>{{ $user->created_at }}</td> </tr> @endforeach </tbody></table>And finally, one of the most important parts: add the route to the end of the routes/api.php file which will be called when the user presses the button:
routes/api.php:
use App\Http\Controllers\Api\ExportPdfController; Route::group([ 'as' => 'api.', 'middleware' => 'auth:sanctum',], function () { Route::post('/export-pdf', ExportPdfController::class)->name('export.pdf');});We are going to have two smaller parts in the resources/views/users/index.blade.php file.
The first part is the button itself: the only thing we do here is that we display the Export PDF button for authenticated users only.
@auth <div class="pb-6"> <button id="export-button" class="bg-blue-600 text-white rounded px-4 py-3 mr-4" type="button"> Export PDF </button> <span id="export-status" class="font-bold"></span> </div>@endauthThe second part is more interesting. We register a new browser event, window.addEventListener('DOMContentLoaded'... so the script runs only when the document is fully loaded. Then we listen to a channel for a specific ExportPdfStatusUpdated event and update DOM to display a message and link with the data event carries. The final event listener just sends a request to API to start the whole process.
<script>window.addEventListener('DOMContentLoaded', function () { var channel = window.Echo.private('App.Models.User.' + {{ auth()->id() }}); channel.listen('ExportPdfStatusUpdated', function (e) { var span = document.getElementById('export-status'); if (e.link !== null) { var link_template = `<a href="${e.link}" target="_blank" class="text-blue-600 underline">${e.link}</a>`; span.innerHTML = e.message + ' ' + link_template; return } span.innerHTML = e.message; }); var button = document.getElementById('export-button'); button.addEventListener('click', function () { axios.post('/api/export-pdf'); });})</script>The complete file looks like that:
resources/views/users/index.blade.php:
<x-app-layout> <x-slot name="header"> <h2 class="font-semibold text-xl text-gray-800 leading-tight"> {{ __('Users') }} </h2> </x-slot> <div class="py-12"> <div class="max-w-7xl mx-auto sm:px-6 lg:px-8"> <div class="bg-white overflow-hidden shadow-sm sm:rounded-lg"> <div class="overflow-hidden overflow-x-auto p-6 bg-white border-b border-gray-200"> <div class="min-w-full align-middle"> @auth <div class="pb-6"> <button id="export-button" class="bg-blue-600 text-white rounded px-4 py-3 mr-4" type="button"> Export PDF </button> <span id="export-status" class="font-bold"></span> </div> @endauth <table class="min-w-full divide-y divide-gray-200 border"> <thead> <tr> <th class="px-6 py-3 bg-gray-50 text-left"> <span class="text-xs leading-4 font-medium text-gray-500 uppercase tracking-wider">Name</span> </th> <th class="px-6 py-3 bg-gray-50 text-left"> <span class="text-xs leading-4 font-medium text-gray-500 uppercase tracking-wider">Email</span> </th> </tr> </thead> <tbody class="bg-white divide-y divide-gray-200 divide-solid"> @foreach($users as $user) <tr class="bg-white"> <td class="px-6 py-4 whitespace-no-wrap text-sm leading-5 text-gray-900"> {{ $user->name }} </td> <td class="px-6 py-4 whitespace-no-wrap text-sm leading-5 text-gray-900"> {{ $user->email }} </td> </tr> @endforeach </tbody> </table> </div> <div class="mt-2"> {{ $users->links() }} </div> </div> </div> </div> </div> <script> window.addEventListener('DOMContentLoaded', function () { var channel = window.Echo.private('App.Models.User.' + {{ auth()->id() }}); channel.listen('ExportPdfStatusUpdated', function (e) { console.log(e) var span = document.getElementById('export-status'); if (e.link !== null) { var link_template = `<a href="${e.link}" target="_blank" class="text-blue-600 underline">${e.link}</a>`; span.innerHTML = e.message + ' ' + link_template; return } span.innerHTML = e.message; }); var button = document.getElementById('export-button'); button.addEventListener('click', function () { axios.post('/api/export-pdf'); }); }) </script></x-app-layout>And here's the final result:

That's it, the final code repository is here on GitHub
Happy broadcasting!