Until now, we checked if the user can do something by checking if users.is_admin or users.is_accountant is true.
This can be done better by using roles and permissions. And Filament has an excellent plugin for that called Shield which under the hood uses spatie/laravel-permission package.
This lesson will use the Shield package to add roles and permissions functionality.

First, let's install the package via composer.
composer require bezhansalleh/filament-shield "^3.0@beta"Then we need to add Spatie\Permission\Traits\HasRoles trait to the User Model.
app/Models/User.php:
use Spatie\Permission\Traits\HasRoles; class User extends Authenticatable implements FilamentUser{ use HasApiTokens, HasFactory, Notifiable; use HasRoles; // ...}Next, we need to register this package in the panel.
app/Providers/Filament/AdminPanelProvider.php:
class AdminPanelProvider extends PanelProvider{ public function panel(Panel $panel): Panel { return $panel // ... ->plugins([ \BezhanSalleh\FilamentShield\FilamentShieldPlugin::make() ]); }}If you have multiple panels, you may choose to add it only for admin users. This way, only users with access to that panel will have access to the Roles resource.
And now, we can run the installation of the package.
php artisan shield:installAfter following the prompts, the package will publish the config file and permissions migration and will run it. It will also create Policies for all Filament Resources, Pages, and Widgets.
In the end, it will show all the users and will ask to provide an ID of the user to set for a super_admin role.
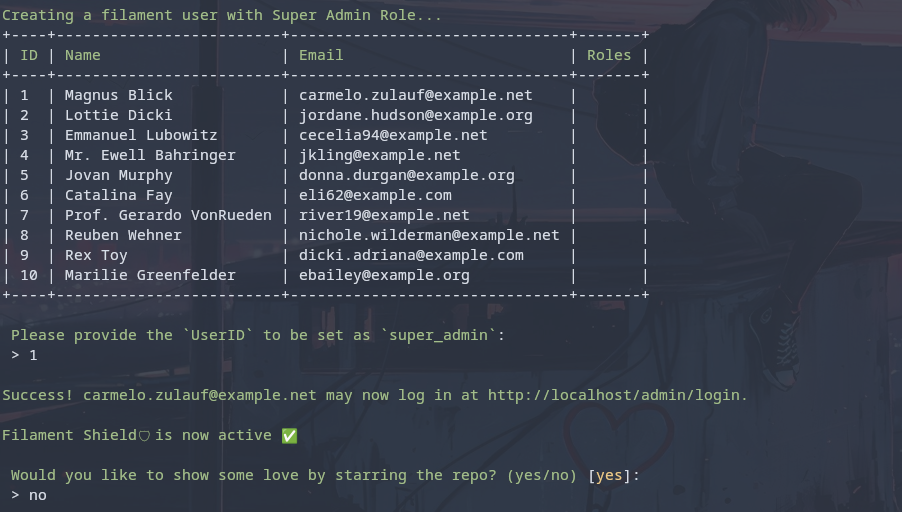
After logging into the admin panel, we can see a new navigation item:
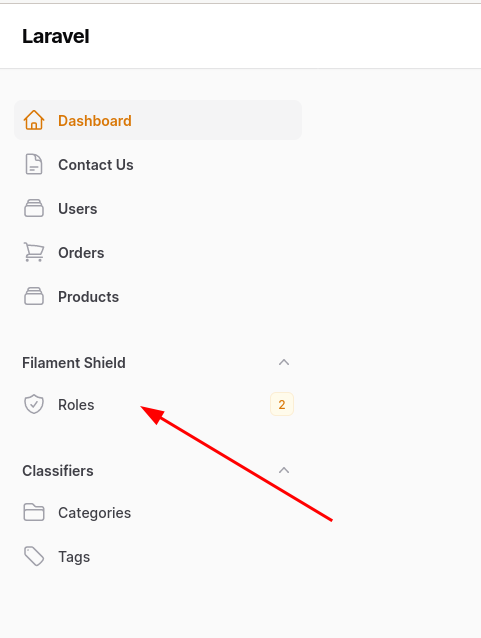
By default, Shield created two roles: super_admin and filament_user. Our goal is to replace the is_accountant DB field, so for that, we will make an Accountant role.
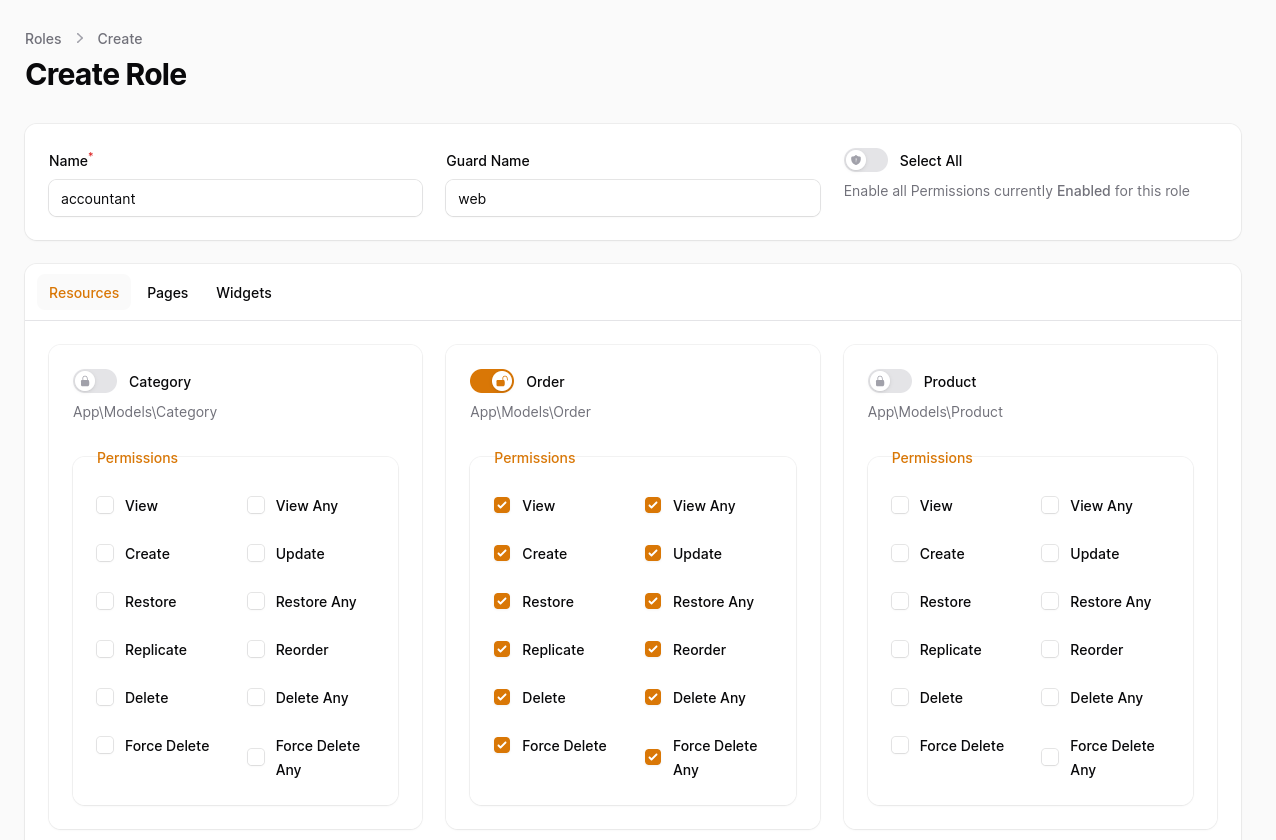
Go to Roles and press New Role. The name will be accountant. As for permissions, this role only needs access to the Order, so check the Order from the resources tab.
Now we need to allow admin only to the /admin panel and accountant only to the /accountant panel. This access is done in the User Model canAccessPanel method.
app/Models/User.php:
class User extends Authenticatable implements FilamentUser{ // ... public function canAccessPanel(Panel $panel): bool { return true; if ($panel->getId() === 'admin') { return $this->hasRole('super_admin'); } if ($panel->getId() === 'accountant') { return $this->hasRole('accountant'); } return false; }}And that's it. Everything else works as expected, and now we have a powerful roles system with a friendly GUI.
Shield plugin has a roles/permission manager, but doesn't have the feature to assign a role to a user. But luckily, we have a UserResouce, and we can achieve the goal quickly using the Select form field.
app/Filament/Resources/UserResource.php:
class UserResource extends Resource{ protected static ?string $model = User::class; protected static ?string $navigationIcon = 'heroicon-o-rectangle-stack'; public static function form(Form $form): Form { return $form ->schema([ Forms\Components\TextInput::make('name'), Forms\Components\TextInput::make('email')->email(), Forms\Components\Select::make('roles') ->preload() ->multiple() ->relationship('roles', 'name') ->columnSpan('full'), ]); } // ...}That's how easy it was.
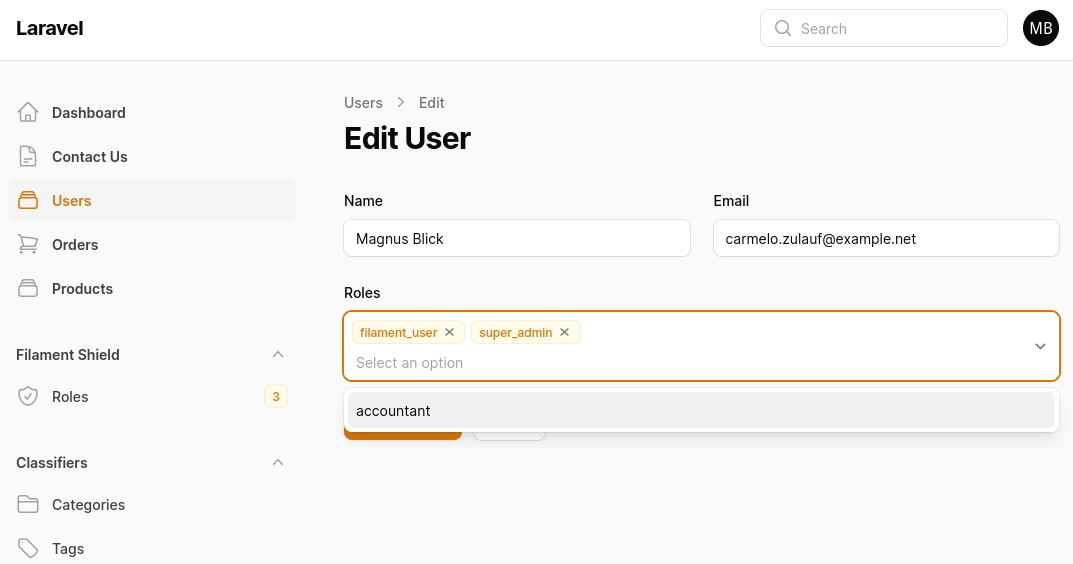
If you want to see roles in the table, it's just one line of the code.
app/Filament/Resources/UserResource.php:
class UserResource extends Resource{ // ... public static function table(Table $table): Table { return $table ->columns([ Tables\Columns\TextColumn::make('name'), Tables\Columns\TextColumn::make('email'), Tables\Columns\TextColumn::make('roles.name'), Tables\Columns\TextColumn::make('created_at') ->dateTime(), ]) // ... } // ...}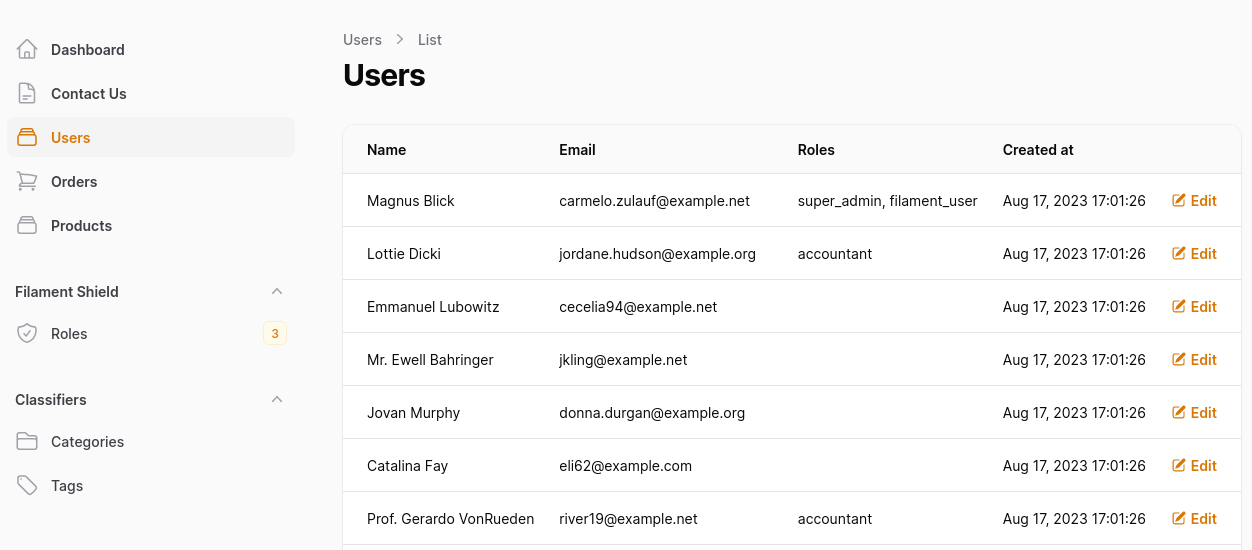
So, that's all I've chosen to talk about in this course about core features of Filament 3.
The repository for this course is available on GitHub.
Of course, there's much more that you can dive into: official docs, tutorials, plugins, forum topics, etc. But my goal here was to prepare you for that journey with the must-know functionality of Filament.
I will continue creating content about Filament in other forms, so watch what's happening here on LaravelDaily.com or on my Twitter.