.png-674b51bb7821d.jpg)
Filament has a powerful feature called Render hooks to render Blade content in various places and is especially useful for plugin developers. In this article, we will show you four practical examples of this.

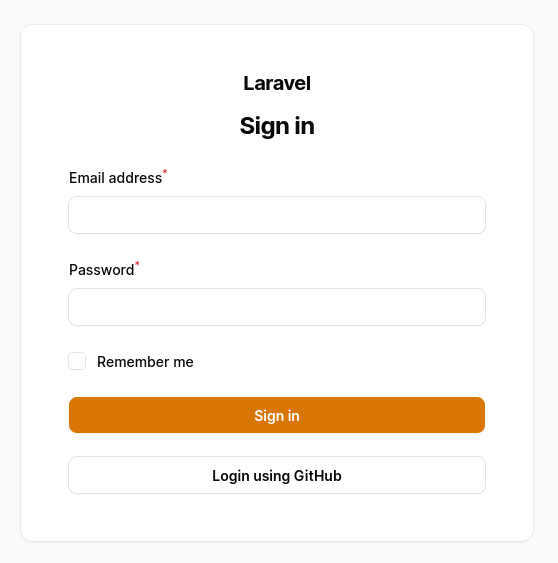
These days, many applications provide an option to authenticate using OAuth via Facebook, GitHub, etc. In this first example, let's see how we can add these login buttons using the render hook.
The render hook can be registered in Service Provider.
app/Providers/AppServiceProvider.php:
use Illuminate\Contracts\View\View;use Filament\Support\Facades\FilamentView; class AppServiceProvider extends ServiceProvider{ // ... public function boot(): void { FilamentView::registerRenderHook( 'panels::auth.login.form.after', fn (): View => view('socialite-logins'), ); }}Here, we use the panels::auth.login.form.after render hook and call the socialite-logins View file in which buttons are added.
resources/views/socialite-logins.blade.php:
<x-filament::button color="gray" href="https://filamentphp.com" tag="a"> Login using GitHub</x-filament::button>And that's it!

The second example comes from a bezhanSalleh/filament-language-switch plugin. This plugin uses the panels::global-search.after render hook and loads the Livewire component.
src/FilamentLanguageSwitchPlugin.php:
class FilamentLanguageSwitchPlugin implements Plugin{ protected string $renderHookName = 'panels::global-search.after'; // ... public function register(Panel $panel): void { Livewire::component('switch-filament-language', SwitchFilamentLanguage::class); $panel ->renderHook( name: $this->getRenderHookName(), hook: fn (): string => Blade::render('@livewire(\'switch-filament-language\')') ); } // ...}The Blade file package shows a dropdown list of languages and uses the wire:click attribute to make an action.
resources/views/language-switch.blade.php:
// ... <x-filament::dropdown.list class="!border-t-0"> @foreach (config('filament-language-switch.locales') as $key => $locale) @if (!app()->isLocale($key)) <button type="button" class="fi-dropdown-list-item flex w-full items-center gap-2 whitespace-nowrap rounded-md p-2 text-sm transition-colors duration-75 outline-none disabled:pointer-events-none disabled:opacity-70 fi-dropdown-list-item-color-gray hover:bg-gray-950/5 focus:bg-gray-950/5 dark:hover:bg-white/5 dark:focus:bg-white/5" wire:click="changeLocale('{{ $key }}')"> @if (config('filament-language-switch.flag')) <span> <x-dynamic-component :component="'flag-1x1-' . (!blank($locale['flag_code']) ? $locale['flag_code'] : 'un')" class="flex-shrink-0 w-5 h-5 group-hover:text-white group-focus:text-white text-primary-500" style="border-radius: 0.25rem" /> </span> @else <span class="w-6 h-6 flex items-center justify-center flex-shrink-0 @if (!app()->isLocale($key)) group-hover:bg-white group-hover:text-primary-600 group-hover:border group-hover:border-primary-500/10 group-focus:text-white @endif bg-primary-500/10 text-primary-500 font-semibold rounded-full p-4 text-xs"> {{ \Illuminate\Support\Str::of($locale['name'])->snake()->upper()->explode('_')->map(function ($string) use ($locale) { return \Illuminate\Support\Str::of($locale['name'])->wordCount() > 1 ? \Illuminate\Support\Str::substr($string, 0, 1) : \Illuminate\Support\Str::substr($string, 0, 2); })->take(2)->implode('') }} </span> @endif <span class="hover:bg-transparent text-gray-700 dark:text-gray-200"> {{ \Illuminate\Support\Str::of($locale[config('filament-language-switch.native') ? 'native' : 'name'])->headline() }} </span> </button> @endif @endforeach </x-filament::dropdown.list> // ...
For the third example, let's see how we can scope the render hook to a specific resource or page. You can find the list of which hooks can be scoped in the official documentation.
app/Providers/AppServiceProvider.php:
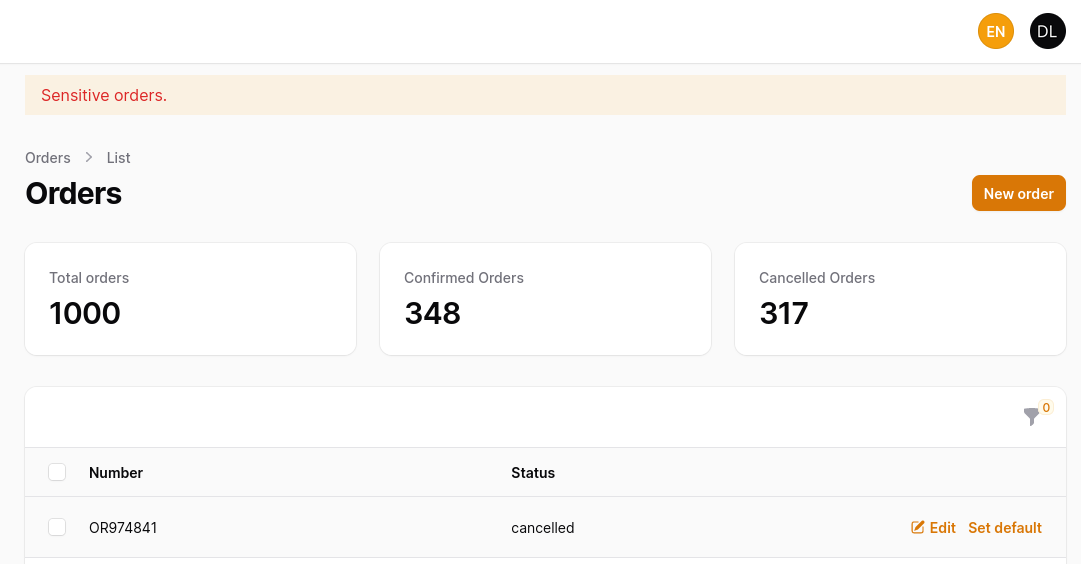
use Illuminate\Contracts\View\View;use Filament\Support\Facades\FilamentView; class AppServiceProvider extends ServiceProvider{ // ... public function boot(): void { FilamentView::registerRenderHook( 'panels::page.start', fn (): View => view('warning-banner'), scopes: \App\Filament\Resources\OrderResource::class, ); }}In this example, we use the panels::page.start render hook to call a warning-banner View file and scope it only to an OrderResource resource.
We can add everything that needs to be shown inside the Blade file.
resources/views/warning-banner.blade.php:
<div class="mt-3 px-4 py-2 bg-primary-500/10 text-danger-600"> Sensitive orders.</div>Now, when we visit any page belonging to an OrderResource, we will see this message.

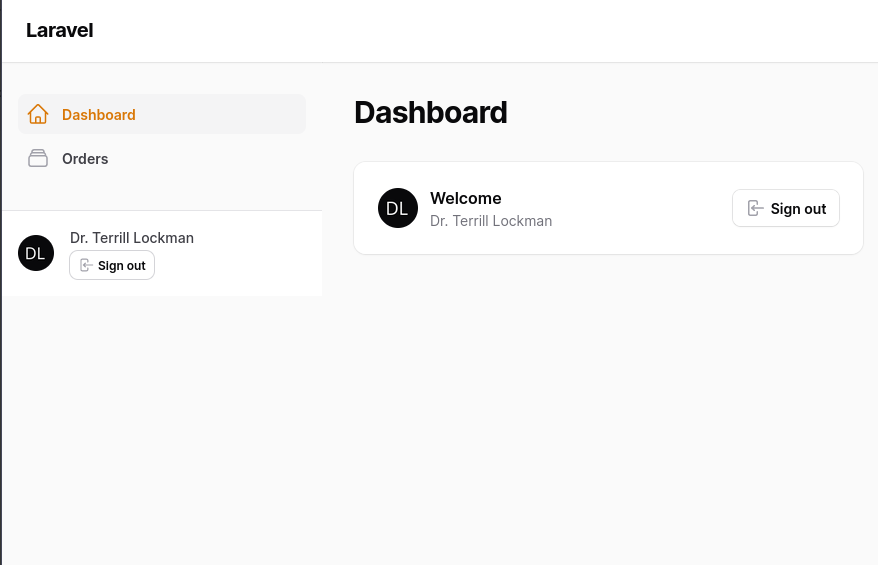
In this example, we will add a user's avatar with a name and a sign-out button at the bottom of the sidebar.
app/Providers/AppServiceProvider.php:
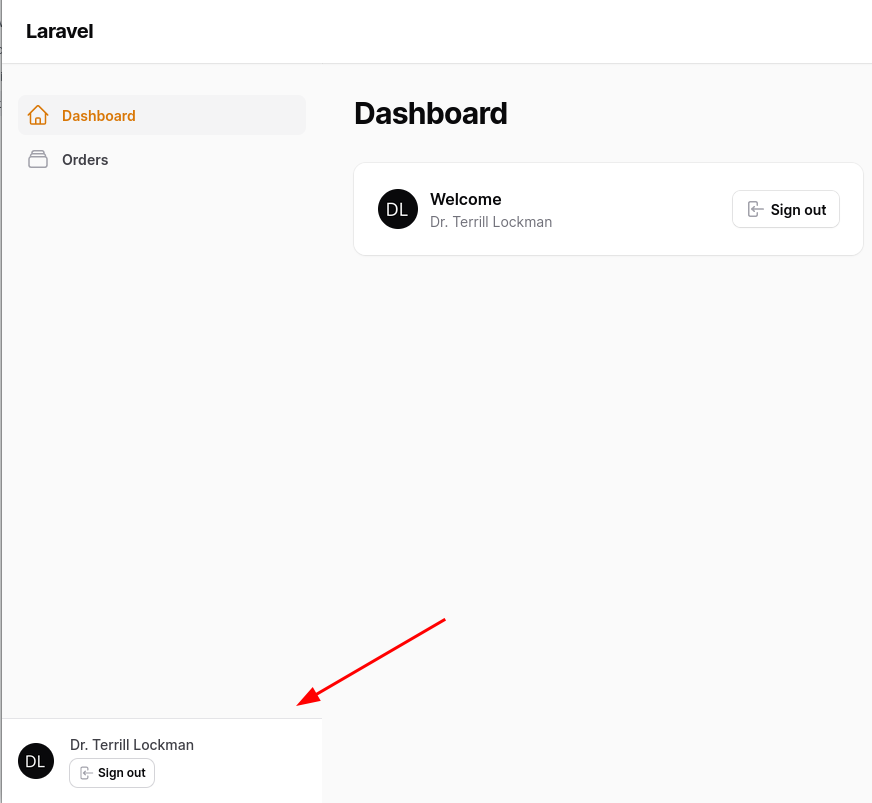
use Illuminate\Contracts\View\View;use Filament\Support\Facades\FilamentView; class AppServiceProvider extends ServiceProvider{ // ... public function boot(): void { FilamentView::registerRenderHook( 'panels::sidebar.footer', fn (): View => view('sidebar-footer'), ); }}We are using the panels::sidebar.footer render hook for this. When styling this part, if we don't make it fixed, then it will be added just after the navigation.

But if we make it fixed and set it at the bottom, the result will be expected:

In this case, the Blade file would look like this:
resources/views/sidebar-footer.blade.php:
@php $user = filament()->auth()->user();@endphp <div class="bottom-0 left-0 z-20 w-full p-4 bg-white border-t border-gray-200 md:flex md:items-center md:justify-between md:p-6 dark:bg-gray-800 dark:border-gray-600"> <x-filament::avatar :src="filament()->getUserAvatarUrl($user)" class="fi-user-avatar rounded-full" style="margin-right: 1rem;" /> <div class="space-y-1"> <div class="text-gray-700 dark:text-gray-200 font-medium text-sm"> {{ filament()->getUserName($user) }} </div> <form action="{{ filament()->getLogoutUrl() }}" method="post" class="my-auto -me-2.5 sm:me-0" > @csrf <x-filament::button color="gray" icon="heroicon-m-arrow-left-on-rectangle" icon-alias="panels::widgets.account.logout-button" labeled-from="sm" tag="a" type="submit" size="xs" outlined > {{ __('filament-panels::widgets/account-widget.actions.logout.label') }} </x-filament::button> </form> </div></div>You can find all Filament render hooks in the official documentation.
If you want more Filament examples, you can find more real-life projects on our FilamentExamples.com.