
One of the quickest ways to launch a website is to use a prebuilt HTML/CSS theme, free or paid. In this tutorial, I will show step-by-step how to take such Bootstrap-based theme for a real estate project, and turn it into a Laravel project: with layout, components and Eloquent data.
We'll be building quite a simple project based on a free Bootstrap 5 theme called Property.
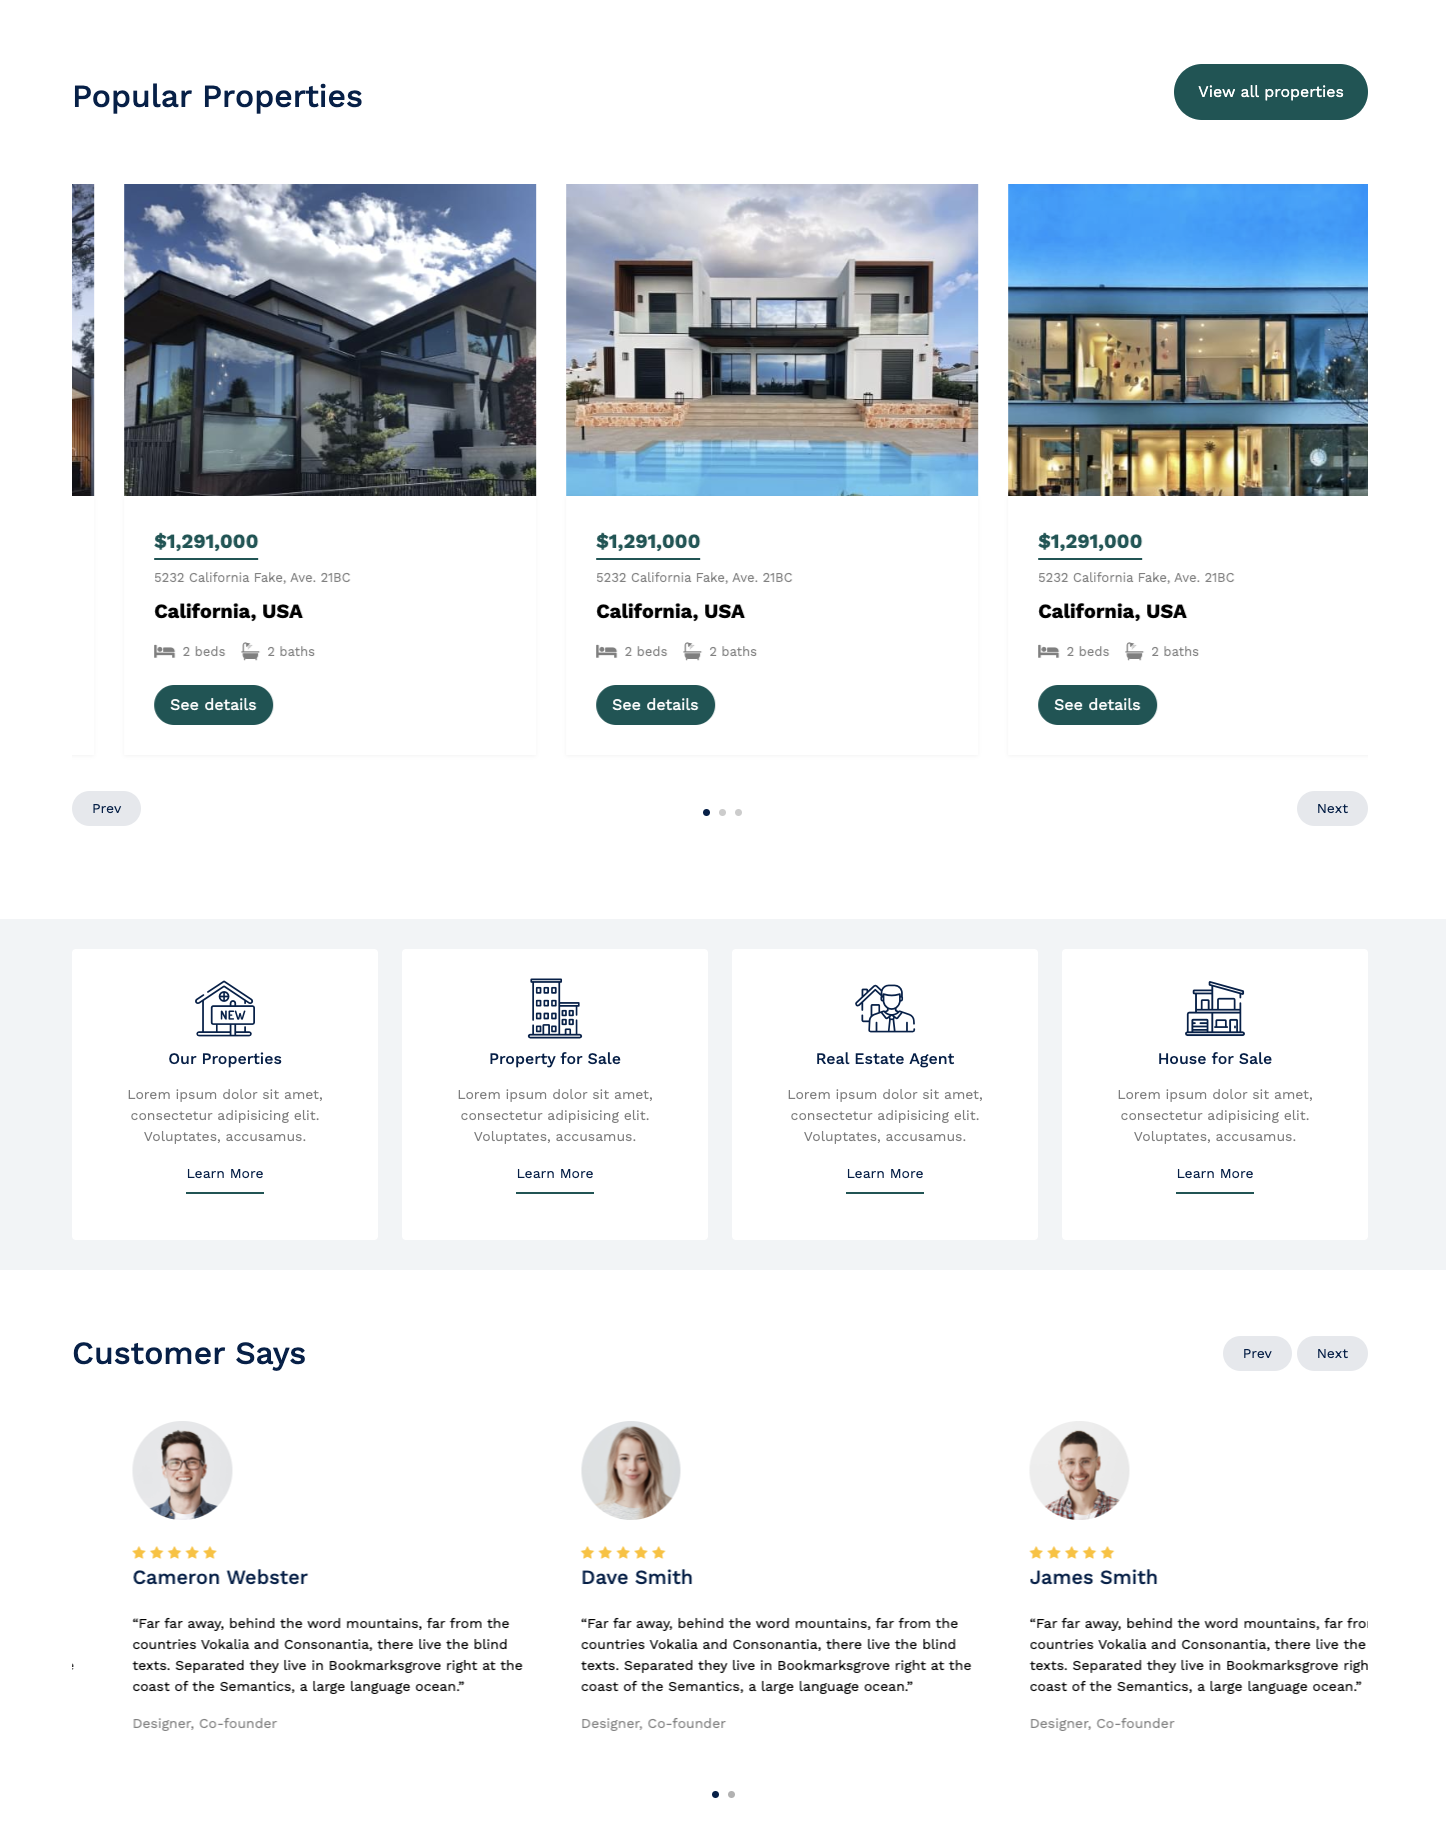
These are the steps we will cover:
So, let's begin our journey!
As with every new Laravel project, we need to start by creating a new project.
laravel new projectNext, download the theme from here and extract it. Now we need to copy all assets to the Laravel project. Copy CSS, fonts, images, and js folders into the Laravel projects public folder.
Now, we will create the main app layout which all pages will extend. Create a new file resources/views/layouts/app.blade.php. Copy everything from templates index.html into the newly created app.blade.php.
For layouts, we will use Blade Layouts Template Inheritance. For this, we need to set the blade directive @yield in resources/views/layouts/app.blade.php. In the downloaded template content starts at line 89 with a class of hero and continues until line 923 with a class of site-footer. Before removing all that content, let's prepare the resources/views/welcome.blade.php file. We will use this file because, by default, it goes to the first page. Replace all its content with the code below:
@extends('layouts.app') @section('content') {{-- Content goes here--}}@endsectionNow cut the whole content from resources/views/layouts/app.blade.php from about 89 lines to 922 and add it into resources/views/welcome.blade.php inside the @section directive. And in resources/views/layouts/app.blade.php instead of the whole content just add @yield('content').
</nav> <!-- end of navigation --> <div class="hero"> <!-- start of content --> <div class="hero-slide"> <!-- content --> </div></div> <!-- end of content --> <div class="site-footer"> <!-- start of footer -->All assets in the main layout like CSS, JS, and images need to be wrapped into the asset() helper. For example, CSS files would like below:
resources/views/layouts/app.blade.php
// ...<link rel="stylesheet" href="fonts/icomoon/style.css" /> <link rel="stylesheet" href="fonts/flaticon/font/flaticon.css" /> <link rel="stylesheet" href="css/tiny-slider.css" /><link rel="stylesheet" href="css/aos.css" /><link rel="stylesheet" href="css/style.css" /> <link rel="stylesheet" href="{{ asset('fonts/icomoon/style.css') }}" /> <link rel="stylesheet" href="{{ asset('fonts/flaticon/font/flaticon.css') }}" /> <link rel="stylesheet" href="{{ asset('css/tiny-slider.css') }}" /><link rel="stylesheet" href="{{ asset('css/aos.css') }}" /><link rel="stylesheet" href="{{ asset('css/style.css') }}" /> // ...If you would visit your projects page, you should see the homepage working.
You can see the GitHub commit with the changes here.
Let's now create a few more pages, services, about, and contact. Because all these pages are static, it is going to be very similar to how we created the homepage. First, we need to create routes.
routes/web.php:
Route::get('/', function () { return view('welcome');}); Route::view('services', 'services')->name('services'); Route::view('about', 'about')->name('about');Route::view('contact', 'contact')->name('contact'); Next, we need to create blade files for each page in resources/views. Create three files services.blade.php, about.blade.php, and contact.blade.php. Each of these files has the same starting code:
@extends('layouts.app') @section('content') {{-- Content goes here--}}@endsectionNote, that other pages' content addition to class
herohas two other classespage-inner overlay.
</nav> <!-- end of navigation --> <div class="hero page-inner overlay" style="background-image: url('images/hero_bg_1.jpg')" > <!-- start of content --> <div class="hero-slide"> <!-- content --> </div></div> <!-- end of content --> <div class="site-footer"> <!-- start of footer -->Now, we can add content to these pages. Open the corresponding file from the downloaded template. Start of content should start at about 89 lines where the class hero starts and end before the footer. The footer starts within the class site-footer. Copy the content into the corresponding blade file inside the @section blade directive.
All that's left is to add routes to navigation. In the resources/views/layouts/app.blade.php in the nav HTML tag find where links to those pages are, should be at about 71 lines. Add created routes to those links.
// ...<li><a href="services.html">Services</a></li> <li><a href="about.html">About</a></li> <li><a href="contact.html">Contact Us</a></li> <li><a href="{{ route('services') }}">Services</a></li> <li><a href="{{ route('about') }}">About</a></li> <li><a href="{{ route('contact') }}">Contact Us</a></li> // ...If you would visit the homepage you should have working navigation with our added three links and working three new pages.
You can see the GitHub commit with the changes here.
Since Laravel introduced blade components layouts can be built using them. First, we need to create the component itself.
php artisan make:component AppLayoutLayout files will be stored in resources/views/layouts. By default components are stored in the resources/views/components folder, so we need to change that for this component only.
app/View/Components/AppLayout.php
class AppLayout extends Component{ public function render(): View|Closure|string { return view('components.app-layout'); return view('layouts.app'); }}Now, in the blade file, instead of the @yield directive, we need to use $slot.
resources/views/layouts/app.blade.php:
</div></nav> @yield('content') {{ $slot }} <div class="site-footer"> <div class="container">And on every page instead of using @extend and adding all content inside @section, we need to wrap everything in the component. In our case component is x-app-layout.
resources/views/xxxx.blade.php:
<x-app-layout> @extends('layouts.app') @section('content') {{-- content of your page goes here --}} @endsection </x-app-layout> You can check the whole difference in GitHub commit here.
In other parts we will use the first method Layouts Using Template Inheritance.
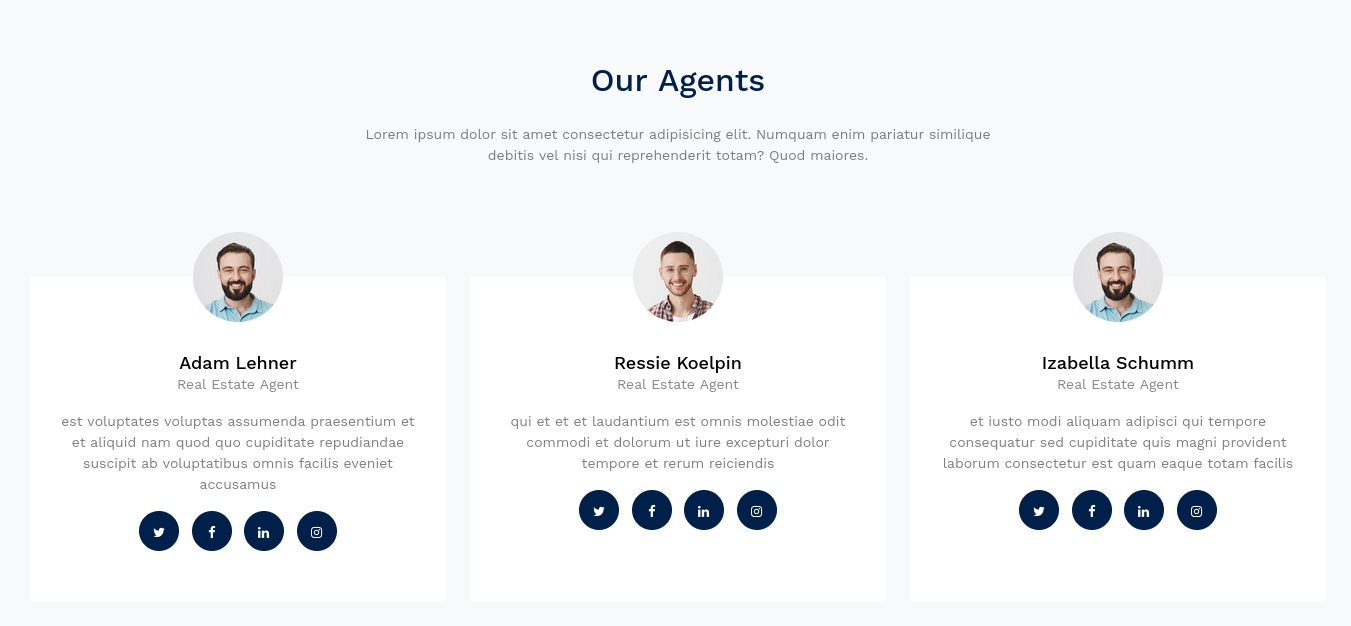
In the next parts of this tutorial instead of static data we will make it dynamic. We will start with agents. First, quickly Model with Migration.
php artisan make:model Agent -mdatabase/migrations/xxxx_create_agents_table.php:
return new class extends Migration { public function up(): void { Schema::create('agents', function (Blueprint $table) { $table->id(); $table->string('full_name'); $table->string('title'); $table->string('description'); $table->string('photo'); $table->string('twitter'); $table->string('facebook'); $table->string('linkedin'); $table->string('instagram'); $table->timestamps(); }); }};app/Models/Agent.php:
class Agent extends Model{ protected $fillable = ['full_name', 'description', 'title', 'photo', 'twitter', 'facebook', 'linkedin', 'instagram'];}Next, we need to make a controller and change the route file to use it for the homepage.
php artisan make:controller HomeController --invokableroutes/web.php:
use App\Http\Controllers\HomeController; Route::get('/', function () { return view('welcome');}); Route::get('/', HomeController::class); On the homepage, we show three agents, but of course, there could be more than that. So, we will take three agents in random order and show them on the homepage.
app/Http/Controllers/HomeController.php
class HomeController extends Controller{ public function __invoke(Request $request) { $agents = Agent::inRandomOrder()->take(3)->get(); return view('welcome', compact('agents')); }}Our Agents sections in resources/views/welcome.blade.php starts at about 717 line. But the first agent card starts at about 732 lines. We need to repeat the agent card which looks like the bellow:
<div class="col-sm-6 col-md-6 col-lg-4 mb-5 mb-lg-0"> <div class="h-100 person"> <img src="images/person_1-min.jpg" alt="Image" class="img-fluid" /> <div class="person-contents"> <h2 class="mb-0"><a href="#">James Doe</a></h2> <span class="meta d-block mb-3">Real Estate Agent</span> <p> Lorem ipsum dolor sit amet consectetur adipisicing elit. Facere officiis inventore cumque tenetur laboriosam, minus culpa doloremque odio, neque molestias? </p> <ul class="social list-unstyled list-inline dark-hover"> <li class="list-inline-item"> <a href="#"><span class="icon-twitter"></span></a> </li> <li class="list-inline-item"> <a href="#"><span class="icon-facebook"></span></a> </li> <li class="list-inline-item"> <a href="#"><span class="icon-linkedin"></span></a> </li> <li class="list-inline-item"> <a href="#"><span class="icon-instagram"></span></a> </li> </ul> </div> </div></div>Remove the other two cards and wrap the first one with @foreach and add appropriate values to the card.
<div class="row"> @foreach($agents as $agent) <div class="col-sm-6 col-md-6 col-lg-4 mb-5 mb-lg-0"> <div class="h-100 person"> <img src="{{ asset($agent->photo) }}" alt="Image" class="img-fluid" /> <div class="person-contents"> <h2 class="mb-0"><a href="#">{{ $agent->full_name }}</a></h2> <span class="meta d-block mb-3">{{ $agent->title }}</span> <p> {{ $agent->description }} </p> <ul class="social list-unstyled list-inline dark-hover"> <li class="list-inline-item"> <a href="{{ $agent->twitter }}"><span class="icon-twitter"></span></a> </li> <li class="list-inline-item"> <a href="{{ $agent->facebook }}"><span class="icon-facebook"></span></a> </li> <li class="list-inline-item"> <a href="{{ $agent->linkedin }}"><span class="icon-linkedin"></span></a> </li> <li class="list-inline-item"> <a href="{{ $agent->instagram }}"><span class="icon-instagram"></span></a> </li> </ul> </div> </div> </div> @endforeach</div>Commit for agents can be found here.
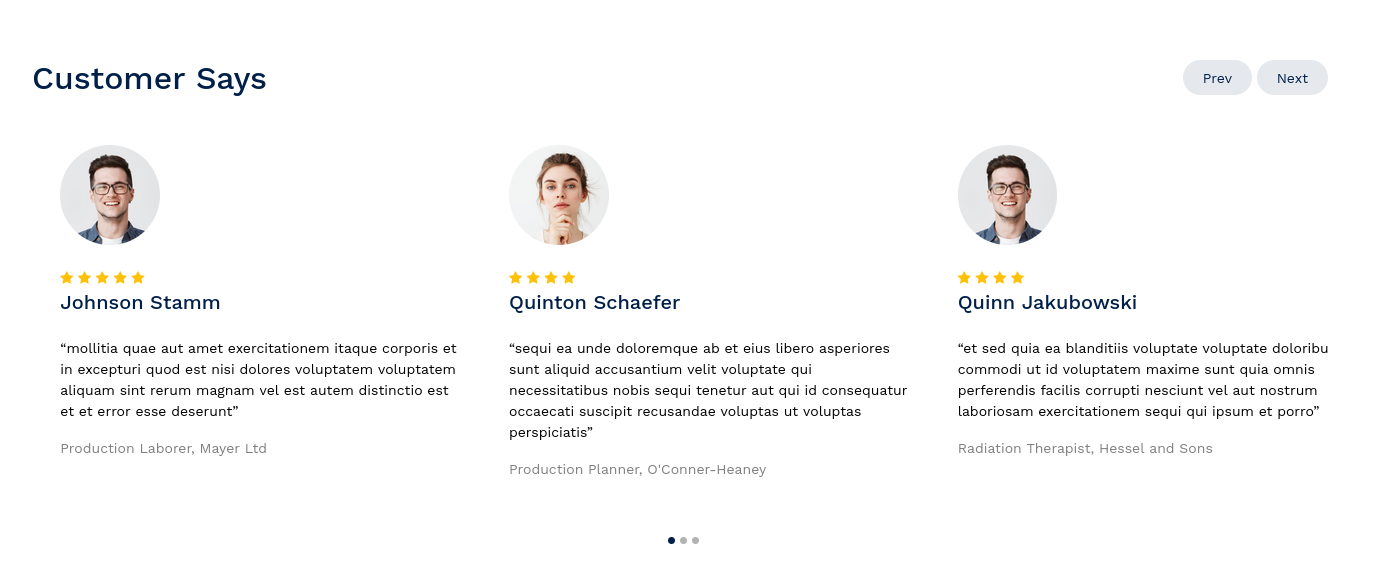
In this part, we will show testimonials. First quickly Model with Migrations, and grab data from the DB. But in this case, we will show 9 random records.
php artisan make:model Testimonial -mdatabase/migrations/xxxx_create_agents_table.php:
return new class extends Migration { public function up(): void { Schema::create('testimonials', function (Blueprint $table) { $table->id(); $table->string('full_name'); $table->string('photo'); $table->string('company'); $table->integer('rating'); $table->string('testimonial'); $table->timestamps(); }); }};app/Models/Testimonial.php:
class Testimonial extends Model{ protected $fillable = ['full_name', 'photo', 'company', 'rating', 'testimonial'];}app/Http/Controllers/HomeController.php
class HomeController extends Controller{ public function __invoke(Request $request) { $agents = Agent::inRandomOrder()->take(3)->get(); $testimonials = Testimonial::inRandomOrder()->take(9)->get(); return view('welcome', compact('agents')); return view('welcome', compact('agents', 'testimonials')); }}Now let's show testimonials on the homepage. The whole testimonials section starts at about 452 lines, but the testimonials start at about 474 lines as class item. The testimonial code looks like the below:
<div class="item"> <div class="testimonial"> <img src="images/person_1-min.jpg" alt="Image" class="img-fluid rounded-circle w-25 mb-4" /> <div class="rate"> <span class="icon-star text-warning"></span> <span class="icon-star text-warning"></span> <span class="icon-star text-warning"></span> <span class="icon-star text-warning"></span> <span class="icon-star text-warning"></span> </div> <h3 class="h5 text-primary mb-4">James Smith</h3> <blockquote> <p> “Far far away, behind the word mountains, far from the countries Vokalia and Consonantia, there live the blind texts. Separated they live in Bookmarksgrove right at the coast of the Semantics, a large language ocean.” </p> </blockquote> <p class="text-black-50">Designer, Co-founder</p> </div></div>By default in the template there are four static testimonials. Leave one and again wrap it in a @foreach directive and add appropriate data.
<div class="testimonial-slider-wrap"> <div class="testimonial-slider"> @foreach($testimonials as $testimonial) <div class="item"> <div class="testimonial"> <img src="{{ $testimonial->photo }}" alt="Image" class="img-fluid rounded-circle w-25 mb-4" /> <div class="rate"> @for($i = 0; $i < $testimonial->rating; $i++) <span class="icon-star text-warning"></span> @endfor </div> <h3 class="h5 text-primary mb-4">{{ $testimonial->full_name }}</h3> <blockquote> <p> “{{ $testimonial->testimonial }}” </p> </blockquote> <p class="text-black-50">{{ $testimonial->company }}</p> </div> </div> @endforeach </div></div>Commit for testimonials can be found here.
Second, to last part of this tutorial will be to add properties. Here we have a few places where property card is being shown. To reduce the same HTML code in this case we can use Blade Components. Again, first, we need Model and Migration, this time for property and its images.
php artisan make:model Property -mphp artisan make:model Image -mdatabase/migrations/xxxx_create_properties_table.php:
return new class extends Migration { public function up(): void { Schema::create('properties', function (Blueprint $table) { $table->id(); $table->foreignId('agent_id')->constrained(); $table->integer('price'); $table->string('address'); $table->string('country'); $table->string('beds'); $table->string('baths'); $table->text('description'); $table->boolean('is_popular'); $table->boolean('is_featured'); $table->timestamps(); }); }};app/Models/Property.php:
class Property extends Model{ protected $fillable = ['agent_id', 'price', 'address', 'country', 'beds', 'baths', 'description', 'is_popular', 'is_featured']; public function images(): HasMany { return $this->hasMany(Image::class); } public function agent(): BelongsTo { return $this->belongsTo(Agent::class); }}database/migrations/xxxx_create_images_table.php:
return new class extends Migration { public function up(): void { Schema::create('images', function (Blueprint $table) { $table->id(); $table->foreignId('property_id')->constrained(); $table->string('image'); $table->timestamps(); }); }};app/Models/Image.php:
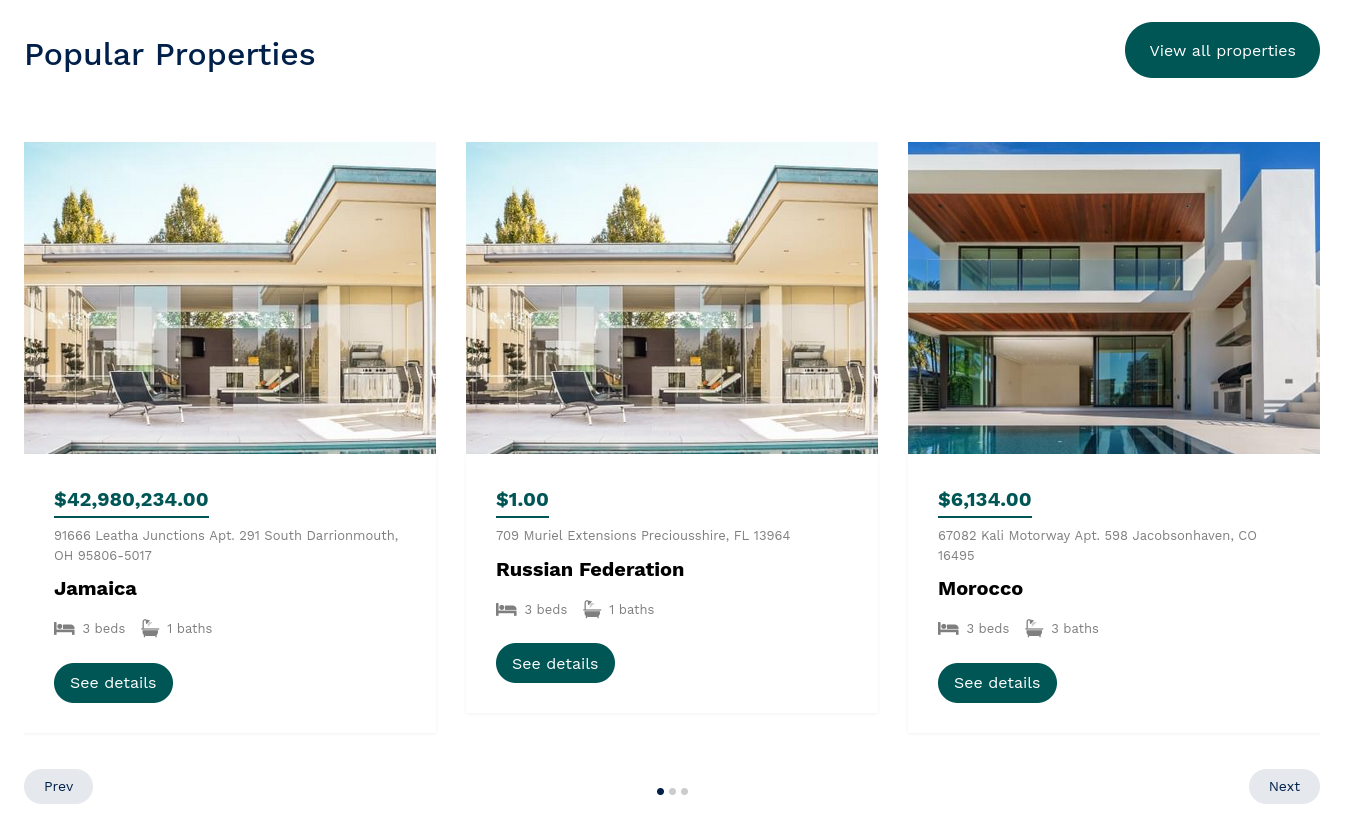
class Image extends Model{ protected $fillable = ['property_id', 'image'];}First, we will show properties on the homepage. Here we will show properties with is_popular set to true, in random order, and will show 9. And for the image, we will just take the first one.
app/Http/Controllers/HomeController.php:
class HomeController extends Controller{ public function __invoke(Request $request) { $agents = Agent::inRandomOrder()->take(3)->get(); $testimonials = Testimonial::inRandomOrder()->take(9)->get(); $properties = Property::with(['images'])->where('is_popular', true)->inRandomOrder()->take(9)->get(); return view('welcome', compact('agents', 'testimonials')); return view('welcome', compact('agents', 'testimonials', 'properties')); }}Now, let's create a Property blade component.
php artisan make:component property --viewThis is how the property card looks on all pages:
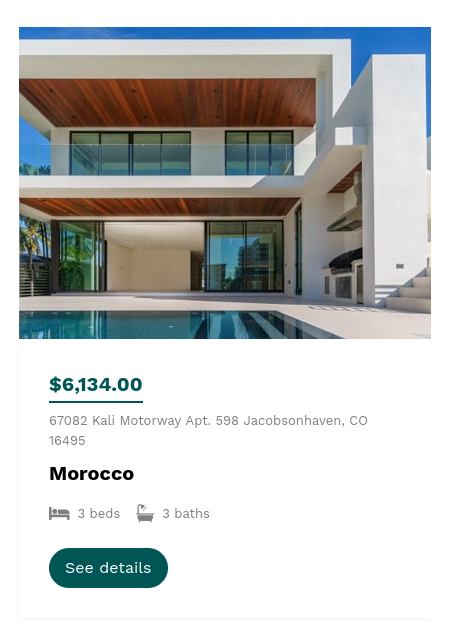
Next, in resources/views/welcome.blade.php the first property card starts at about 67 lines with the class property-item. Take that whole card HTML code and add it to our created property Blade Component. And also we will pass Property to this component so let's add property props to it. The component now should look like this:
resources/views/components/property.blade.php:
@props(['property']) <div class="property-item"> <a href="property-single.html" class="img"> <img src="images/img_1.jpg" alt="Image" class="img-fluid" /> </a> <div class="property-content"> <div class="price mb-2"><span>$1,291,000</span></div> <div> <span class="d-block mb-2 text-black-50">5232 California Fake, Ave. 21BC</span> <span class="city d-block mb-3">California, USA</span> <div class="specs d-flex mb-4"> <span class="d-block d-flex align-items-center me-3"> <span class="icon-bed me-2"></span> <span class="caption">2 beds</span> </span> <span class="d-block d-flex align-items-center"> <span class="icon-bath me-2"></span> <span class="caption">2 baths</span> </span> </div> <a href="property-single.html" class="btn btn-primary py-2 px-3">See details</a> </div> </div></div>And now in resources/views/welcome.blade.php instead of all property cards we can use the property Blade Component in @foreach.
// ...<div class="property-slider-wrap"> <div class="property-slider"> @foreach($properties as $property) <x-property :property="$property" /> @endforeach </div> <div id="property-nav" class="controls" tabindex="0" aria-label="Carousel Navigation" >// ...In the property now we have Property Model data, and we can add data in appropriate places.
@props(['property']) <div class="property-item"> <a href="property-single.html" class="img"> <img src="{{ asset($property->images->first()->image) }}" alt="Image" class="img-fluid" /> </a> <div class="property-content"> <div class="price mb-2"><span>${{ number_format($property->price, 2) }}</span></div> <div> <span class="d-block mb-2 text-black-50" >{{ $property->address }}</span > <span class="city d-block mb-3">{{ $property->country }}</span> <div class="specs d-flex mb-4"> <span class="d-block d-flex align-items-center me-3"> <span class="icon-bed me-2"></span> <span class="caption">{{ $property->beds }} beds</span> </span> <span class="d-block d-flex align-items-center"> <span class="icon-bath me-2"></span> <span class="caption">{{ $property->baths }} baths</span> </span> </div> <a href="property-single.html" class="btn btn-primary py-2 px-3" >See details</a > </div> </div></div>Next, let's create a new page to list all Properties. On this page Featured Properties will be with an is_featured set to true, and for pagination, on this page, we will use Livewire. First, we will create Controller, and Route, and will set up the initial page from the template.
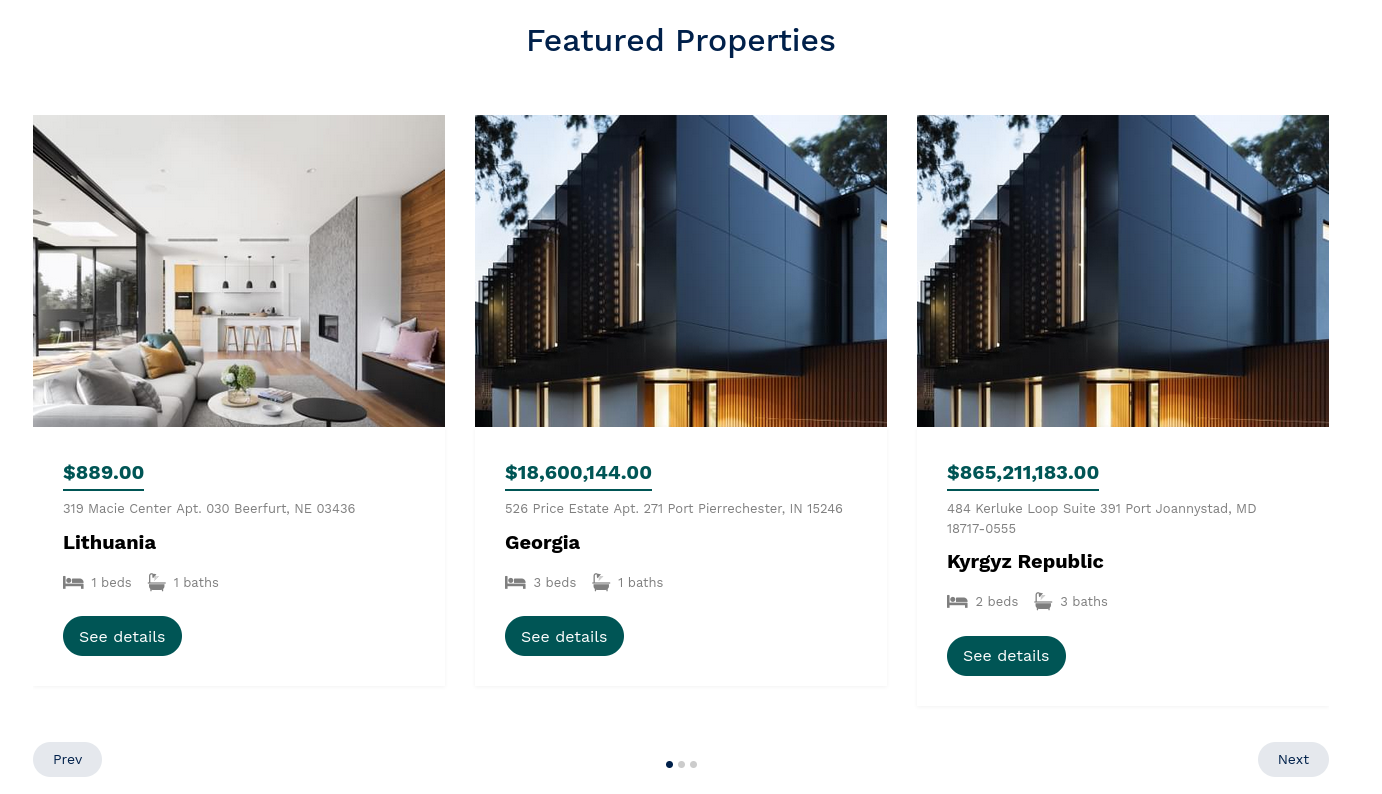
php artisan make:controller PropertyControllerapp/Http/Controllers/PropertyController.php:
use Illuminate\View\View; class PropertyController extends Controller{ public function index(): View { $properties = Property::with(['images'])->where('is_featured', true)->inRandomOrder()->take(9)->get(); return view('properties.index', compact('properties')); }}routes/web.php:
Route::get('/', HomeController::class); Route::view('services', 'services')->name('services');Route::view('about', 'about')->name('about');Route::view('contact', 'contact')->name('contact'); Route::get('properties', [PropertyController::class, 'index'])->name('properties'); Now, from the downloaded template open properties.html and copy the whole content into resources/views/properties/index.blade.php.
Fragment of properties.html:
</nav> <!-- end of navigation --> <div class="hero page-inner overlay" style="background-image: url('images/hero_bg_1.jpg')" > <!-- start of content --> <div class="hero-slide"> <!-- content --> </div></div> <!-- end of content --> <div class="site-footer"> <!-- start of footer -->resources/views/properties/index.blade.php:
@extends('layouts.app') @section('content') {{-- Content goes here--}}@endsectionThe next part is very similar to how we did on the homepage for popular properties. In resources/views/properties/index.blade.php first property item starts at about line 46. Replace all property cards with the property blade component wrapped in @foreach.
resources/views/properties/index.blade.php:
// ...<div class="property-slider-wrap"> <div class="property-slider"> @foreach($properties as $property) <x-property :property="$property" /> @endforeach </div> <div id="property-nav" class="controls" tabindex="0" aria-label="Carousel Navigation" >// ...Now we will show all properties. Before doing that install Livewire using official documentation. Next, create the component.
php artisan make:livewire PropertiesIn the Livewire component we need to use the trait WithPagination and just get all the properties.
app/Http/Livewire/Properties.php:
use App\Models\Property;use Illuminate\View\View;use Livewire\WithPagination; class Properties extends Component{ use WithPagination; public function render(): View { $properties = Property::paginate(); return view('livewire.properties', compact('properties')); }}Next, we need to add the Livewire component into resources/views/properties.index.blade.php by replacing it with all property cards.
resources/views/properties.index.blade.php:
// ...<div class="section section-properties"> <div class="container"> @livewire('properties') <div class="row"> <div class="col-xs-12 col-sm-6 col-md-6 col-lg-4"> <div class="property-item mb-30"> // ... </div> <div class="row align-items-center py-5">// ...And, Livewire components blade file would look like this using property Blade Component:
resources/views/livewire/properties.blade.php:
<div class="row"> @foreach($properties as $property) <div class="col-xs-12 col-sm-6 col-md-6 col-lg-4"> <x-property :property="$property" /> </div> @endforeach</div>For the Livewire component all that is left, is to show pagination. By default Livewire to show pagination links uses tailwind, we need to change that.
app/Http/Livewire/Properties.php:
class Properties extends Component{ use WithPagination; protected $paginationTheme = 'bootstrap'; public function render(): View { $properties = Property::paginate(); return view('livewire.properties', compact('properties')); }}Of course, styles by default won't be the same as theme uses.

To fix this, first, we need to publish Livewire pagination views.
php artisan livewire:publish --paginationNow, in the resources/views/properties/index.blade.php pagination part is just under where we called the Livewire Properties component. You need to check how it is done in the template and go line by line to change styling in the published view at resources/views/vendor/livewire/bootstrap.blade.php. After making look like the template dose, remove the HTML code from resources/views/properties/index.blade.php.
resources/views/properties/index.blade.php:
<div class="section section-properties"> <div class="container"> @livewire('properties') <div class="row align-items-center py-5"> <div class="col-lg-3">Pagination (1 of 10)</div> <div class="col-lg-6 text-center"> <div class="custom-pagination"> <a href="#">1</a> <a href="#" class="active">2</a> <a href="#">3</a> <a href="#">4</a> <a href="#">5</a> </div> </div> </div> {{-- [tl! remove:end --}} </div></div>The final pagination view would look like the below:
<div class="row align-items-center py-5"> @if ($paginator->hasPages()) <div class="col-lg-3">Pagination ({{ $paginator->currentPage() }} of {{ $paginator->lastPage() }})</div> @php(isset($this->numberOfPaginatorsRendered[$paginator->getPageName()]) ? $this->numberOfPaginatorsRendered[$paginator->getPageName()]++ : $this->numberOfPaginatorsRendered[$paginator->getPageName()] = 1) <div class="col-lg-6 text-center"> <div class="custom-pagination"> {{-- Previous Page Link --}} @if ($paginator->onFirstPage()) <a aria-disabled="true" aria-label="@lang('pagination.previous')"> <span aria-hidden="true">‹</span> </a> @else <a type="button" dusk="previousPage{{ $paginator->getPageName() == 'page' ? '' : '.' . $paginator->getPageName() }}" wire:click="previousPage('{{ $paginator->getPageName() }}')" wire:loading.attr="disabled" rel="prev" aria-label="@lang('pagination.previous')">‹</a> @endif {{-- Pagination Elements --}} @foreach ($elements as $element) {{-- "Three Dots" Separator --}} @if (is_string($element)) <a class="disabled" aria-disabled="true"><span >{{ $element }}</span></a> @endif {{-- Array Of Links --}} @if (is_array($element)) @foreach ($element as $page => $url) @if ($page == $paginator->currentPage()) <a class="active" wire:key="paginator-{{ $paginator->getPageName() }}-{{ $this->numberOfPaginatorsRendered[$paginator->getPageName()] }}-page-{{ $page }}" aria-current="page"><span class="active">{{ $page }}</span></a> @else <span wire:key="paginator-{{ $paginator->getPageName() }}-{{ $this->numberOfPaginatorsRendered[$paginator->getPageName()] }}-page-{{ $page }}"><a type="button" wire:click="gotoPage({{ $page }}, '{{ $paginator->getPageName() }}')">{{ $page }}</a></span> @endif @endforeach @endif @endforeach {{-- Next Page Link --}} @if ($paginator->hasMorePages()) <a type="button" dusk="nextPage{{ $paginator->getPageName() == 'page' ? '' : '.' . $paginator->getPageName() }}" wire:click="nextPage('{{ $paginator->getPageName() }}')" wire:loading.attr="disabled" rel="next" aria-label="@lang('pagination.next')">›</a> @else <a class="disabled" aria-disabled="true" aria-label="@lang('pagination.next')"> <span aria-hidden="true">›</span> </a> @endif </div> </div> @endif</div>Now, if you would visit the /properties page pagination should look the same as from the template, and pagination should work.

Commit for the properties page can be found commit.
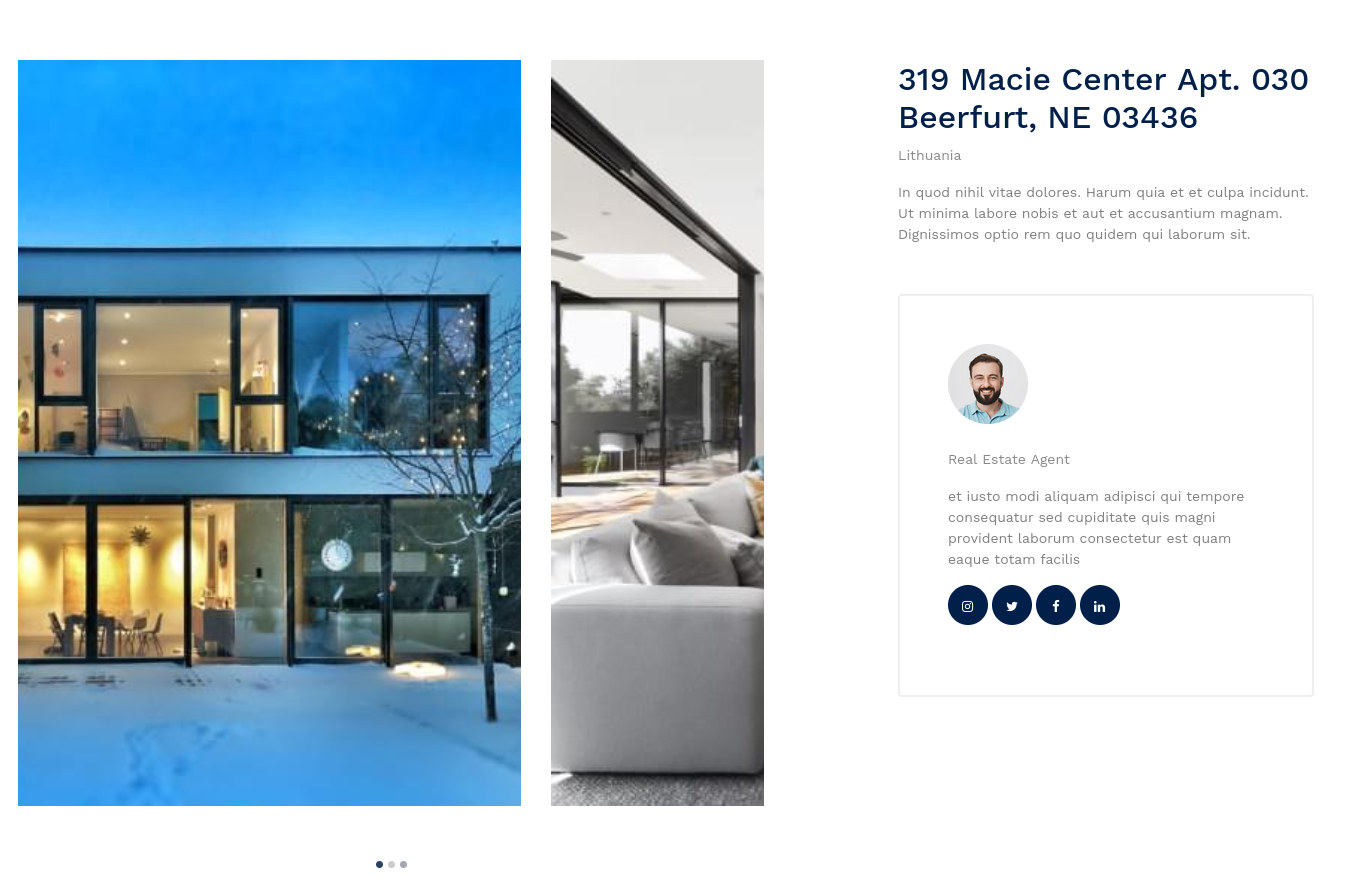
The last page, that is left to do in this tutorial, is the single property page. First, let's create the show() method in the App/Http/Controllers/PropertyController.php, route for it, and add a static page to it from the template.
App/Http/Controllers/PropertyController.php:
use App\Models\Property; use Illuminate\View\View; class PropertyController extends Controller{ public function index(): View { $properties = Property::with(['images'])->where('is_featured', true)->inRandomOrder()->take(9)->get(); return view('properties.index', compact('properties')); } public function show(Property $property): View { return view('properties.show', compact('property')); } }routes/web.php:
Route::get('/', HomeController::class); Route::view('services', 'services')->name('services');Route::view('about', 'about')->name('about');Route::view('contact', 'contact')->name('contact'); Route::get('properties', [PropertyController::class, 'index'])->name('properties');Route::get('properties/{property}', [PropertyController::class, 'show'])->name('properties.show'); As same with the other pages, open property-single.html from the downloaded template and cut content into resources/views/properties/show.blade.php. The content starts add about line 89 and finishes at about line 184.
property-single.html:
</nav> <!-- end of navigation --> <div class="hero page-inner overlay" style="background-image: url('images/hero_bg_1.jpg')" > <!-- start of content --> <div class="hero-slide"> <!-- content --> </div></div> <!-- end of content --> <div class="site-footer"> <!-- start of footer -->resources/views/properties/show.blade.php:
@extends('layouts.app') @section('content') {{-- Content goes here--}}@endsectionNow, we have a static property page and inside it, we have passed the Property model. All that's left is to add data into its appropriate place. After this, one thing remaining is to add links to a single property page. For example in our create Blade Component there are two places where to add it. You just need to go through every page where it could be and change it.
resources/views/components/properties.blade.php:
@props(['property']) <div class="property-item"> <a href="{{ route('properties.show', $property) }}" class="img"> <img src="{{ asset($property->images->first()->image) }}" alt="Image" class="img-fluid" /> </a> <div class="property-content"> <div class="price mb-2"><span>${{ number_format($property->price, 2) }}</span></div> <div> <span class="d-block mb-2 text-black-50" >{{ $property->address }}</span > <span class="city d-block mb-3">{{ $property->country }}</span> <div class="specs d-flex mb-4"> <span class="d-block d-flex align-items-center me-3"> <span class="icon-bed me-2"></span> <span class="caption">{{ $property->beds }} beds</span> </span> <span class="d-block d-flex align-items-center"> <span class="icon-bath me-2"></span> <span class="caption">{{ $property->baths }} baths</span> </span> </div> <a href="{{ route('properties.show', $property) }}" class="btn btn-primary py-2 px-3" >See details</a > </div> </div></div>Commit for the single properties page can be found commit.
And that's it for this tutorial, this is how you convert a Bootstrap theme into a Laravel project!