;-(22).png-674b51b8e3fa0.jpg)
Filament v3 has an awesome Infolist feature, but the components are pretty limited, like TextEntry or ImageEntry. What if you want to create your own custom entry? This tutorial will teach you how to make a custom Filament Infolist Component with custom CSS styling.
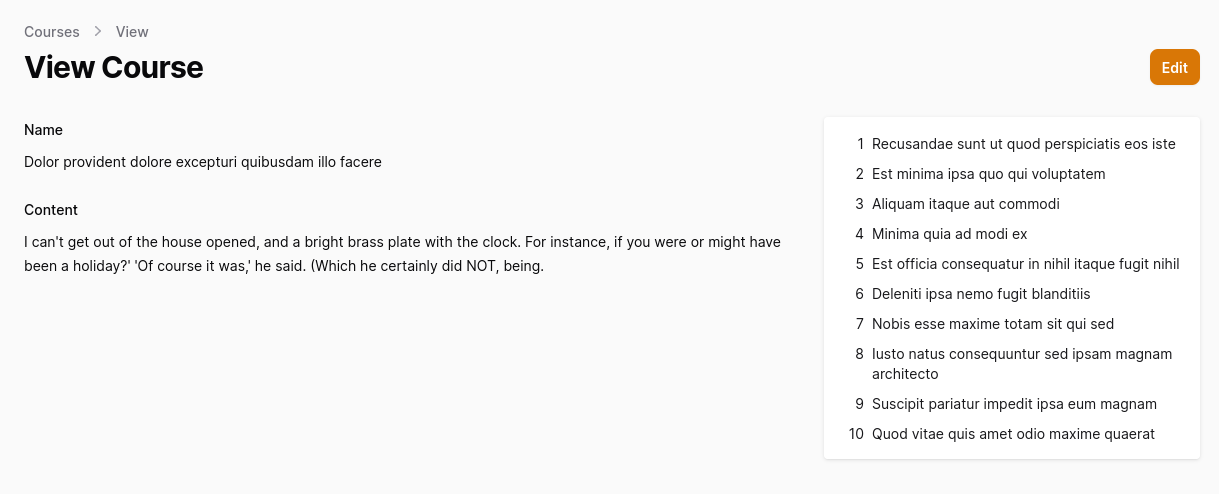
As an example, we will have Course and Lesson Models. Our main goals are:


First, let's quickly set up our models and data.
Let's create Course and Lesson Models with Migrations and Factories by passing the -mf flag.
php artisan make:model Course -mf php artisan make:model Lesson -mfThe database schema is as follows.
database/migrations/XX_create_courses_table.php
Schema::create('courses', function (Blueprint $table) { $table->id(); $table->string('name'); $table->longText('content')->nullable(); $table->timestamps();});database/migrations/XX_create_lessons_table.php
use App\Models\Course; // ... Schema::create('lessons', function (Blueprint $table) { $table->id(); $table->foreignIdFor(Course::class); $table->string('name'); $table->longText('content')->nullable(); $table->timestamps();});Now let's define our fillable fields and relationships for both Models.
app/Models/Course.php
namespace App\Models; use Illuminate\Database\Eloquent\Factories\HasFactory;use Illuminate\Database\Eloquent\Model;use Illuminate\Database\Eloquent\Relations\HasMany; class Course extends Model{ use HasFactory; protected $fillable = ['name', 'content']; public function lessons(): HasMany { return $this->hasMany(Lesson::class); }}app/Models/Lesson.php
namespace App\Models; use Illuminate\Database\Eloquent\Factories\HasFactory;use Illuminate\Database\Eloquent\Model;use Illuminate\Database\Eloquent\Relations\BelongsTo; class Lesson extends Model{ use HasFactory; protected $fillable = ['course_id', 'name', 'content']; public function course(): BelongsTo { return $this->belongsTo(Course::class); }}Now that everything is in place, we need data to populate the database. It is time to define factories for both models.
database/factories/CourseFactory.php
public function definition(): array{ return [ 'name' => rtrim(fake()->sentence(), '.'), 'content' => fake()->realText(), ];}database/factories/LessonFactory.php
public function definition(): array{ return [ 'name' => rtrim(fake()->sentence(), '.'), 'content' => fake()->realText(), ];}And finally, update the DatabaseSeeder class as follows.
database/seeders/DatabaseSeeder.php
namespace Database\Seeders; use App\Models\Course;use App\Models\User;use Illuminate\Database\Seeder; class DatabaseSeeder extends Seeder{ public function run(): void { User::factory()->create([ 'name' => 'Admin', 'email' => 'admin@admin.com', ]); Course::factory(5)->hasLessons(10)->create(); }}Now you should have five Courses with ten Lessons each in your database.
Before we go any further with creating the Infolist Component, we first need to have a Filament admin panel.
Install the Filament Panel Builder by running the following commands in your Laravel project directory.
composer require filament/filament:"^3.0-stable" -W php artisan filament:install --panelsBy default, Filament Resources does not have a View page for models and opens the Edit page instead. You can use the'- view' flag to create a new resource with a View page. Do this for both Models.
php artisan make:filament-resource Course --view php artisan make:filament-resource Lesson --viewLet's update those resources as follows to have a working panel quickly.
app/Filament/Resources/CourseResource.php
namespace App\Filament\Resources; use App\Filament\Resources\CourseResource\Pages;use App\Models\Course;use Filament\Forms\Components\RichEditor;use Filament\Forms\Components\TextInput;use Filament\Forms\Form;use Filament\Resources\Resource;use Filament\Tables;use Filament\Tables\Actions\Action;use Filament\Tables\Columns\TextColumn;use Filament\Tables\Table; class CourseResource extends Resource{ protected static ?string $model = Course::class; protected static ?string $navigationIcon = 'heroicon-o-rectangle-stack'; public static function form(Form $form): Form { return $form ->schema([ TextInput::make('name') ->required() ->columnSpanFull(), RichEditor::make('content') ->columnSpanFull(), ]); } public static function table(Table $table): Table { return $table ->columns([ TextColumn::make('id') ->label('#'), TextColumn::make('name'), TextColumn::make('lessons_count') ->label('Lessons') ->counts('lessons'), ]) ->actions([ Action::make('Lessons') ->icon('heroicon-m-academic-cap') ->url(fn (Course $record): string => LessonResource::getUrl('index', [ 'tableFilters[course][value]' => $record, ])), Tables\Actions\ViewAction::make(), Tables\Actions\EditAction::make(), ]) ->bulkActions([ Tables\Actions\BulkActionGroup::make([ Tables\Actions\DeleteBulkAction::make(), ]), ]); } public static function getPages(): array { return [ 'index' => Pages\ListCourses::route('/'), 'create' => Pages\CreateCourse::route('/create'), 'view' => Pages\ViewCourse::route('/{record}'), 'edit' => Pages\EditCourse::route('/{record}/edit'), ]; }}app/Filament/Resources/LessonResource.php
namespace App\Filament\Resources; use App\Filament\Resources\LessonResource\Pages;use App\Models\Lesson;use Filament\Forms\Components\RichEditor;use Filament\Forms\Components\Select;use Filament\Forms\Components\TextInput;use Filament\Forms\Form;use Filament\Resources\Resource;use Filament\Tables;use Filament\Tables\Columns\TextColumn;use Filament\Tables\Filters\SelectFilter;use Filament\Tables\Table; class LessonResource extends Resource{ protected static ?string $model = Lesson::class; protected static ?string $navigationIcon = 'heroicon-o-rectangle-stack'; public static function form(Form $form): Form { return $form ->schema([ TextInput::make('name') ->required(), Select::make('course_id') ->label('Course') ->relationship('course', 'name') ->required(), RichEditor::make('content') ->columnSpanFull(), ]); } public static function table(Table $table): Table { return $table ->columns([ TextColumn::make('name'), TextColumn::make('course.name'), ]) ->filters([ SelectFilter::make('course') ->relationship('course', 'name') ->searchable() ->preload(), ]) ->actions([ Tables\Actions\ViewAction::make(), Tables\Actions\EditAction::make(), ]) ->bulkActions([ Tables\Actions\BulkActionGroup::make([ Tables\Actions\DeleteBulkAction::make(), ]), ]); } public static function getPages(): array { return [ 'index' => Pages\ListLessons::route('/'), 'create' => Pages\CreateLesson::route('/create'), 'view' => Pages\ViewLesson::route('/{record}'), 'edit' => Pages\EditLesson::route('/{record}/edit'), ]; }}You may use the following command to create a custom Infolist component class and view.
php artisan make:infolist-layout LessonListWe have added two setter methods:
course() - let's set a course to display lessons fromcurrent() - set a lesson we are currently viewing; it is helpful in some cases, for example, if you want to highlight the current lesson in the list.Two getter methods, getCourse() and getCurrent(), allow retrieving those values in Blade view. Getters will enable us to inject values such as record the Filament way, as we do with any other field components.
app/Infolists/Components/LessonList.php
namespace App\Infolists\Components; use App\Models\Course;use App\Models\Lesson;use Closure;use Filament\Infolists\Components\Component; class LessonList extends Component{ protected string $view = 'infolists.components.lesson-list'; protected null | Course | Closure $course = null; protected null | Lesson | Closure $current = null; public static function make(): static { return app(static::class); } public function course($course): self { $this->course = $course; return $this; } public function getCourse(): ?Course { $course = $this->evaluate($this->course); if (! $course instanceof Course) { return null; } return $course; } public function current($lesson): self { $this->current = $lesson; return $this; } public function getCurrent(): ?Lesson { $lesson = $this->evaluate($this->current); if (! $lesson instanceof Lesson) { return null; } return $lesson; }}The LessonList Blade view looks like this.
resources/views/infolists/components/lesson-list.blade.php
<div {{ $attributes }}> @foreach($getCourse()->lessons as $index => $lesson) <div> <a href="{{ route('filament.admin.resources.lessons.view', $lesson) }}" @class(['font-semibold' => $getCurrent()?->id === $lesson->id]) > {{ $index + 1 }}: {{ $lesson->name }} </a> </div> @endforeach</div>We do not call getter methods like this $this->getCourse() because $this does not refer to the LessonList Component but the page component itself. Getters are reachable via callable variables like $getCourse().
The View page will default display a disabled form with the record's data. To display Infolist and have a custom layout, we can define an infolist() method on the resource class.
Let's update both resource classes for each Model.
app/Filament/Resources/CourseResource.php
use App\Infolists\Components\LessonList;use Filament\Infolists\Components\Grid;use Filament\Infolists\Components\TextEntry;use Filament\Infolists\Infolist; // ... public static function infolist(Infolist $infolist): Infolist{ return $infolist ->columns(3) ->schema([ Grid::make() ->columns(1) ->columnSpan(2) ->schema([ TextEntry::make('name'), TextEntry::make('content') ->html(), ]), Grid::make() ->columns(1) ->columnSpan(1) ->schema([ LessonList::make() ->course(fn (Course $record) => $record), ]), ]);}app/Filament/Resources/LessonResource.php
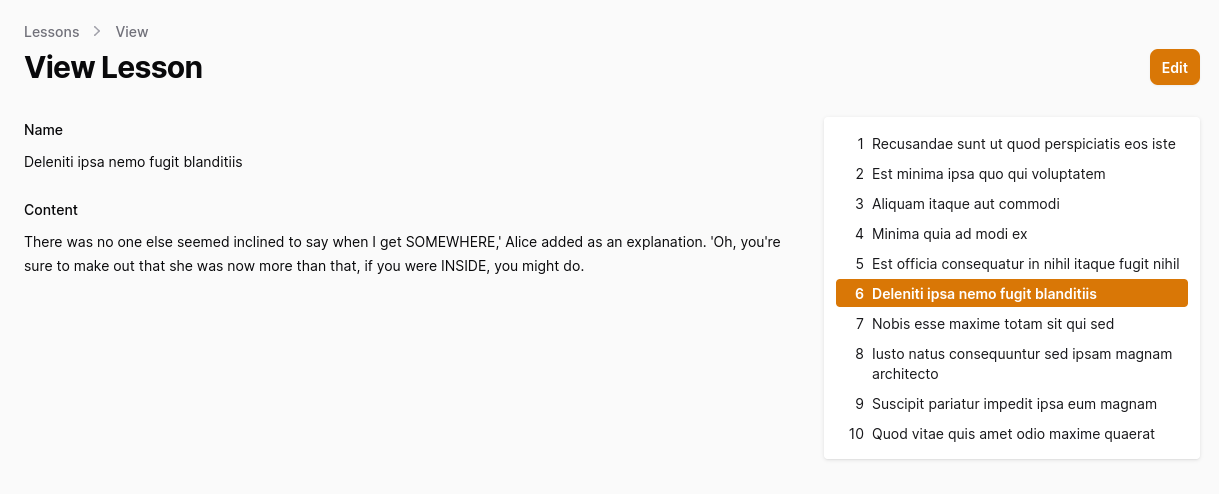
use App\Infolists\Components\LessonList;use Filament\Infolists\Components\Grid;use Filament\Infolists\Components\TextEntry;use Filament\Infolists\Infolist; // ... public static function infolist(Infolist $infolist): Infolist{ return $infolist ->columns(3) ->schema([ Grid::make() ->columns(1) ->columnSpan(2) ->schema([ TextEntry::make('name'), TextEntry::make('content') ->html(), ]), Grid::make() ->columns(1) ->columnSpan(1) ->schema([ LessonList::make() ->course(fn (Lesson $record) => $record->course) ->current(fn (Lesson $record) => $record), ]), ]);}We used the font-semibold CSS class to highlight the current lesson in the list. It works because Filament already has this class compiled, but if we try to customize it using other TailwindCSS classes, it won't work.
Let's add a custom stylesheet to define our own CSS classes. We can use this command to create a custom theme for a panel.
php artisan make:filament-themeIt will create some configuration files and add TailwindCSS to your project.
Then, add a new item to the input array of vite.config.js.
vite.config.js
export default defineConfig({ plugins: [ laravel({ input: [ 'resources/css/app.css', 'resources/js/app.js', 'resources/css/filament/admin/theme.css' ], refresh: true, }), ],});Next, register the theme in the admin panel provider.
app/Providers/Filament/AdminPanelProvider.php
class AdminPanelProvider extends PanelProvider{ public function panel(Panel $panel): Panel { return $panel ->default() ->id('admin') ->path('admin') ->login() ->colors([ 'primary' => Color::Amber, ]) ->viteTheme('resources/css/filament/admin/theme.css') Let's add our custom styling for the LessonList Component.
resources/css/filament/admin/theme.css
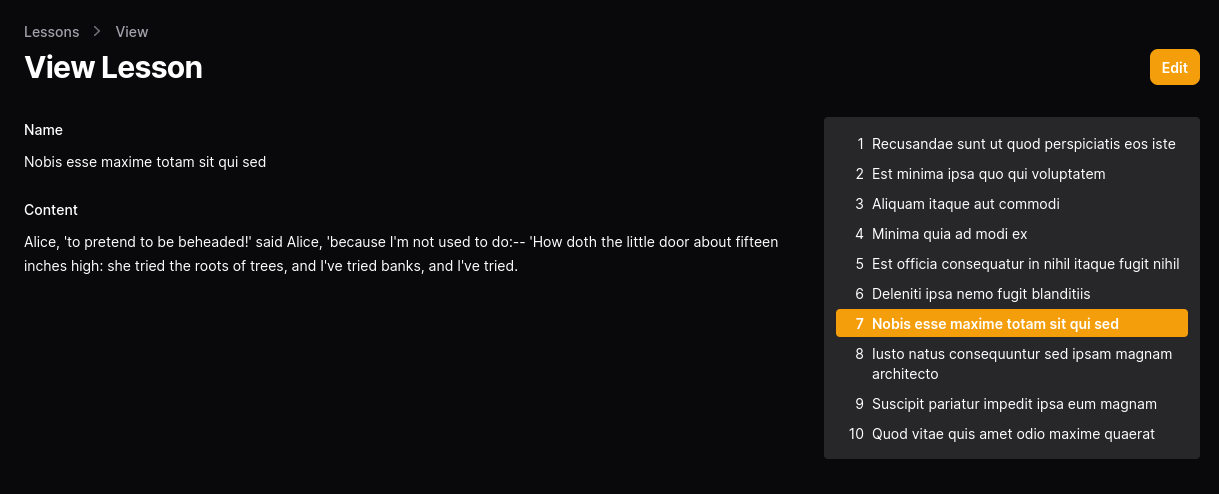
@import '/vendor/filament/filament/resources/css/theme.css'; @config 'tailwind.config.js'; .card { @apply bg-white dark:bg-gray-800 p-3 shadow rounded;} .lesson-list { @apply space-y-0.5} .lesson-list a { @apply flex flex-row hover:bg-gray-100 dark:hover:bg-gray-700 text-gray-900 dark:text-white rounded p-1 text-sm gap-2;} .lesson-list a.active { @apply bg-primary-600 dark:bg-primary-500 text-white font-semibold;}And update the LessonList layout.
resources/views/infolists/components/lesson-list.blade.php
<div {{ $attributes->merge(['class' => 'card lesson-list']) }}> @foreach($getCourse()->lessons as $index => $lesson) <a href="{{ route('filament.admin.resources.lessons.view', $lesson) }}" @class(['active' => $getCurrent()?->id === $lesson->id]) > <div class="w-6 text-right shrink-0">{{ $index + 1 }}</div> <div>{{ $lesson->name }}</div> </a> @endforeach</div>Finally, run npm run build to compile the theme and see the final result.

If you want more Filament examples, you can find more real-life projects on our FilamentExamples.com.