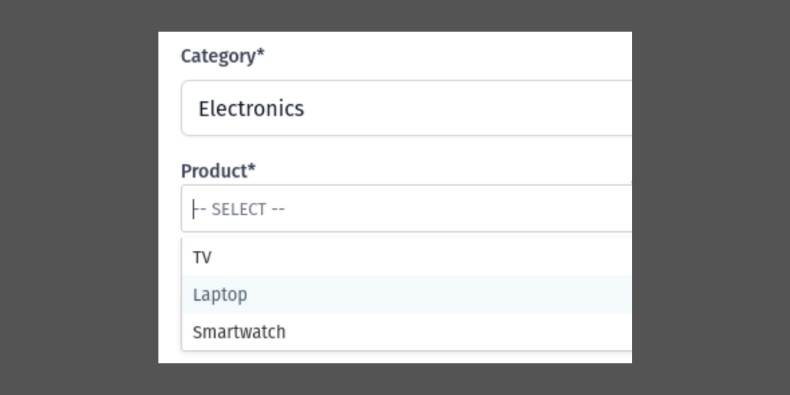
When creating forms it is pretty common to use two <select> dropdown fields depending on each other, with a parent-child relationship. In this tutorial, we will show to use Livewire Lifecycle Hooks to implement exactly that.
Also, we will make those <select> inputs even better by using Virtual Select and Tom Select JavaScript libraries.
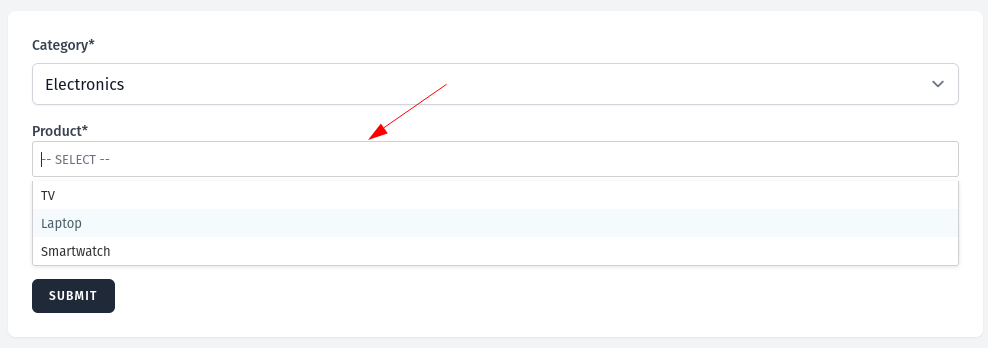
The final result we will achieve using Tom Select:
And, of course, link to the repository will be posted at the end of this tutorial.
Let's go?
First, we will take a look at two select inputs. For this we will have two Models:
And a Livewire component called CategoryProduct.
After selecting Category we will show all Products that belong to that category.
First, we need to set two public properties $categories and $products where the list of both will be set. And when the component gets mounted we set them.
use Livewire\Component;use App\Models\Category;use Illuminate\Support\Collection;use Illuminate\Contracts\View\View; class CategoryProduct extends Component{ public Collection $categories; public Collection $products; public function mount(): void { $this->categories = Category::all(); $this->products = collect(); } public function render(): View { return view('livewire.category-product'); }}And simple form with two select inputs.
<div> <form wire:submit.prevent="submit"> <div> <label class="block text-sm font-medium text-gray-700" for="category"> Category* </label> <select wire:model="category" name="category" class="mt-2 w-full rounded-md border-gray-300 shadow-sm focus:border-indigo-500 focus:ring-indigo-500" required> <option value="">-- choose category --</option> @foreach ($categories as $category) <option value="{{ $category->id }}">{{ $category->name }}</option> @endforeach </select> </div> <div class="mt-4"> <label class="block text-sm font-medium text-gray-700" for="product"> Product* </label> <select wire:model="product" name="product" class="mt-2 w-full rounded-md border-gray-300 shadow-sm focus:border-indigo-500 focus:ring-indigo-500" required> @if($products->isEmpty()) <option value="">-- choose category first --</option> @endif @foreach ($products as $product) <option value="{{ $product->id }}">{{ $product->name }}</option> @endforeach </select> </div> <x-primary-button class="mt-4"> Submit </x-primary-button> </form></div>
Now we bind these inputs to category and product.
class CategoryProduct extends Component{ public ?int $category = null; public ?int $product = null; public Collection $categories; public Collection $products; public function mount(): void { $this->categories = Category::all(); $this->products = collect(); } // ...}After selecting the category we get its ID by which we can search for the products. For this, we need to use Lifecycle Hooks.
class CategoryProduct extends Component{ public ?int $category = null; public ?int $product = null; public Collection $categories; public Collection $products; public function mount(): void { $this->categories = Category::all(); $this->products = collect(); } public function updatedCategory($value): void { $this->products = Product::where('category_id', $value)->get(); $this->product = $this->products->first()->id ?? null; } public function render(): View { return view('livewire.category-product'); }}Here we add a new method updatedCategory. This will run after the property called category is updated and sends its value. All that's left to do is get the products list and set the first product to be selected.

All that is left is to implement the Submit button action with usual logic like validation, creating a record, redirecting, etc.
use App\Models\Order; class CategoryProduct extends Component{ // ... public function submit() { // Do validation Order::create(['product_id' => $this->product]); // Other related things for the creation process and redirect } // ...}For the third selection, we will add a new Sizes field. This will get available sizes for the product from the Sizes table. We'll make this example in a new CreateOrder component which the starter will be taken from the 2-level dropdown example.
The sizes table migration looks as follows:
return new class extends Migration { public function up(): void { Schema::create('sizes', function (Blueprint $table) { $table->id(); $table->string('name'); $table->foreignId('product_id')->constrained(); $table->timestamps(); }); }};For the Livewire component, we need to add two new properties $size and $sizes and add a select field to the view.
class CreateOrder extends Component{ public ?int $category = null; public ?int $product = null; public ?int $size = null; public Collection $categories; public Collection $products; public Collection $sizes; public function mount(): void { $this->categories = Category::all(); $this->products = collect(); $this->sizes = collect(); } // ...}<div> // ... <div class="mt-4"> <label class="block text-sm font-medium text-gray-700" for="size"> Size* </label> <select wire:model="size" name="size" class="mt-2 w-full rounded-md border-gray-300 shadow-sm focus:border-indigo-500 focus:ring-indigo-500" required> @if($sizes->isEmpty()) <option value="">-- choose product first --</option> @endif @foreach ($sizes as $size) <option value="{{ $size->id }}">{{ $size->name }}</option> @endforeach </select> </div> <x-primary-button class="mt-4"> Submit </x-primary-button> </form></div>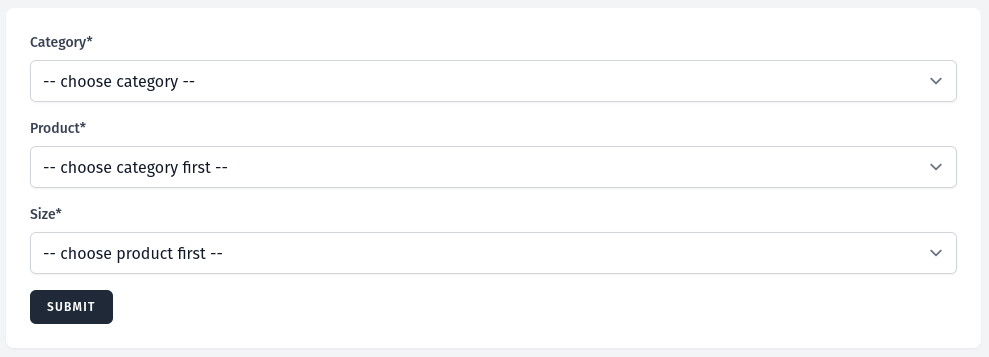
To make it work, we need to change the updatedCategory Lifecycle Hook and add a new one for when the product will be selected named updatedProduct.
class CategoryProduct extends Component{ // .. public function updatedCategory($value): void { $this->sizes = collect(); $this->reset('size', 'product'); $this->products = Product::where('category_id', $value)->get(); $this->product = $this->products->first()->id ?? null; } public function updatedProduct(int $value): void { if (! is_null($value)) { $this->sizes = Size::where('product_id', $value)->get(); $this->size = $this->sizes->first()->id ?? null; } } // ...}As you see when the category is selected we reset three properties. This needs to be done if users select a category more than one time so that values wouldn't be set. Otherwise, there could be no product for the next category but it would still be set and validation would pass. And we don't set the product to the first one because this way Lifecycle Hook won't be triggered.
After submitting the form than the usual validation, creating record, redirecting, etc.
In this section, we will see how to make edit form work with 3-level dropdowns. Let's say we have a simple Order table list that has an edit button.
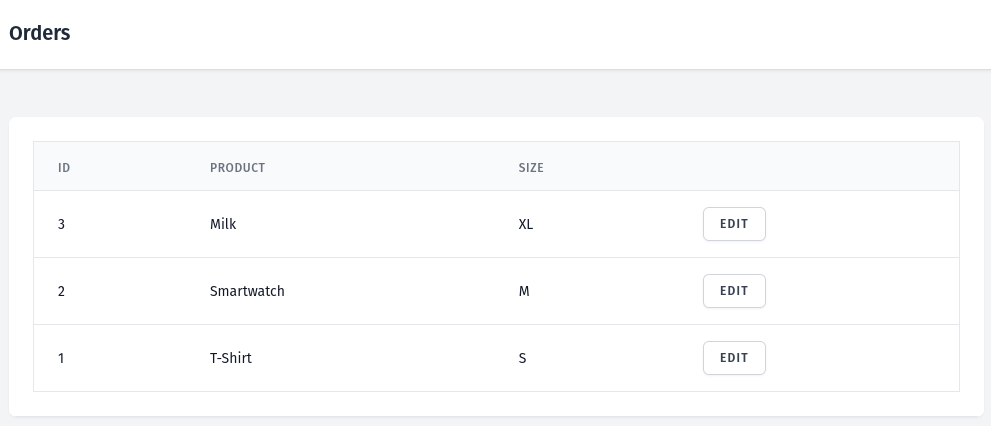
After clicking the Edit button we go to the edit order page where we pass Order to the Livewire component.
// ...@livewire('orders.edit', [$order])// ...The Edit order Livewire component looks the same as we did in the earlier part. The whole "magic" to make it work is only done in the mount() method where the only difference there is here.
class Edit extends Component{ // ... public function mount(Order $order): void { $this->categories = Category::all(); $this->order = $order; $this->size = $order->size->id; $this->product = $order->product->id; $this->category = $order->product->category->id; $this->products = Product::where('category_id', $this->category)->get(); $this->sizes = Size::where('product_id', $this->product)->get(); } // ...}So what do we do here?
Order to the property $order.Products and Sizes lists.After visiting the Edit page we see the filled form.
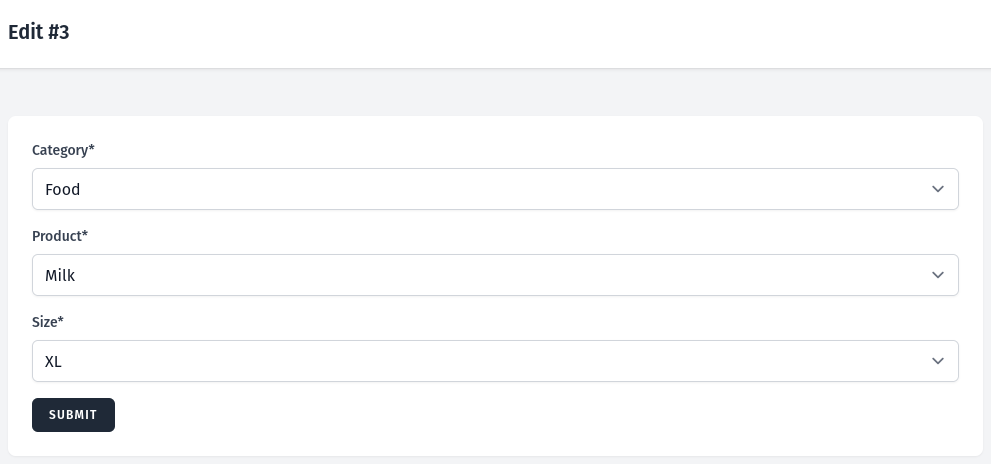
All that's left after submitting is to validate, update the Order, redirect, etc.
class Edit extends Component{ // ... public function submit(): Redirector { // Do validation $this->order->update([ 'product_id' => $this->product, 'size_id' => $this->size, ]); // Other related things for creation process and redirect return redirect()->route('orders.index'); } // ...}In this last part of this tutorial we will add Virtual Select and Tom Select JavaScript libraries to make select inputs have more features like search.
In the past, there was a popular Select2 library for that, but it requires jQuery and can cause potential conflict with Livewire, so I can't recommend it in this case. Let's see what are better alternatives.
In this part, we make a Virtual Select blade component and will make it work with dependent values.
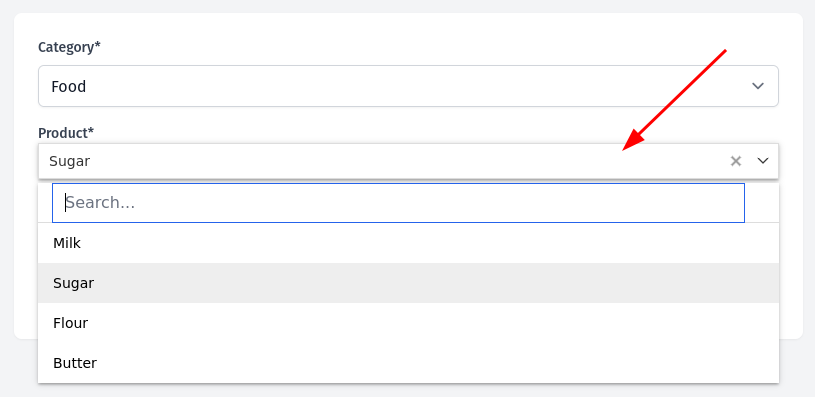
How to add JS and CSS files for Virtual Select you can find in their documentation.
Now let's create a Blade component.
php artisan make:component VirtualSelect --viewTo make Virtual Select work we will use Alpine.js.
resources/views/components/virtual-select.blade.php:
<div x-data="{ options: @entangle($attributes['options']) }" x-init=" VirtualSelect.init({ ele: $refs.select, options: options, search: true, placeholder: 'Select', noOptionsText: 'No results found', maxWidth: '100%' }) $refs.select.addEventListener('change', () => { if ([null, undefined, ''].includes($refs.select.value)) { return } $wire.set('{{ $attributes->whereStartsWith('wire:model')->first() }}', $refs.select.value) }) "> <div x-ref="select" wire:ignore {{ $attributes }}></div></div>First in the x-data, we set options data to share state between Livewire and Alpine. In our case, it will be set to products. Next, everything that is in x-init will be called when the component initializes.
So here we call VirtualSelect.init() to initialize the Virtual Select javascript plugin and pass properties into it. For Virtual Select the most important properties are ele and options.
The ele property is where we define where Virtual Select will initialize its plugin. For this we use Alpine.js x-ref directive in combination with $refs. For x-ref we gave a name select so this way we can access it by $refs.select.
For the options property, we just set do options which was defined in the x-data.
Next, for the select element, we add an Event Listener for the change event. After this event is triggered first, we need to check if it isn't empty, if so just do nothing. Otherwise using Livewire magic $wire object we set the selected value to the property defined in the wire:model.
Before using this component, we need to property in the Livewire component to have correct values. It needs to have value and label. In our Livewire component when we select the category Livewire calls Lifecycle Hook in this case updatedCategory. In this updatedCategory method for the $products property, we need to add the map method to return only the correct values.
class CreateVirtualSelect extends Component{ // ... public function updatedCategory(int $value): void { $this->sizes = collect(); $this->reset('size', 'product'); $this->products = Product::where('category_id', $value)->get(); $this->products = Product::where('category_id', $value)->get()->map(function ($product) { return [ 'label' => $product->name, 'value' => $product->id, ]; }); } // ...}Now in the blade view instead of manually adding a select field we can use this VirtualSelect blade component.
// ...<x-virtual-select id="product" name="product" wire:model="product" options="products" /><select wire:model="product" name="product" class="mt-2 w-full rounded-md border-gray-300 shadow-sm focus:border-indigo-500 focus:ring-indigo-500" required> @if($products->isEmpty()) <option value="">-- choose category first --</option> @else <option value="" selected>-- choose product --</option> @endif @foreach ($products as $product) <option value="{{ $product->id }}">{{ $product->name }}</option> @endforeach</select>// ...Until now, we made Virtual Select work only for the create form. Now let's add code so that it would also work for edit forms.
<div x-data="{ options: @entangle($attributes['options']), selectValue: @entangle($attributes->whereStartsWith('wire:model')->first()) }" x-init=" VirtualSelect.init({ ele: $refs.select, options: options, search: true, placeholder: 'Select', noOptionsText: 'No results found', maxWidth: '100%' }) $refs.select.setValue(selectValue) $refs.select.addEventListener('change', () => { if ([null, undefined, ''].includes($refs.select.value)) { return } $wire.set('{{ $attributes->whereStartsWith('wire:model')->first() }}', $refs.select.value) }) $watch('options', () => $refs.select.setOptions(options)) "> <div x-ref="select" wire:ignore {{ $attributes }}></div></div>Here we need to add just two things. First, in the x-data, we added selectValue data where we bind it to the Livewire components wire:model property. Next, for the default selected value we set it using the plugins setValue method. Only what is left, is to change how we set the $product property in the Livewire components mount method. Also, don't forget to change how we set the $products property in the create component to set it the same way in the edit component.
class EditVirtualSelect extends Component{ // ... public function mount(Order $order): void { $this->categories = Category::all(); $this->order = $order; $this->size = $order->size->id; $this->category = $order->product->category->id; $this->products = Product::where('category_id', $this->category)->get(); $this->products = Product::where('category_id', $this->category)->get()->map(function ($product) { return [ 'label' => $product->name, 'value' => $product->id, ]; }); $this->product = $this->products->where('value', $this->order->product_id)->flatten()[1]; $this->sizes = Size::where('product_id', $this->product)->get(); } public function updatedCategory(int $value): void { $this->sizes = collect(); $this->reset('size', 'product'); $this->products = Product::where('category_id', $value)->get(); $this->products = Product::where('category_id', $value)->get()->map(function ($product) { return [ 'label' => $product->name, 'value' => $product->id, ]; }); } // ...}Now we have a working Virtual Select blade component for both create and edit forms.
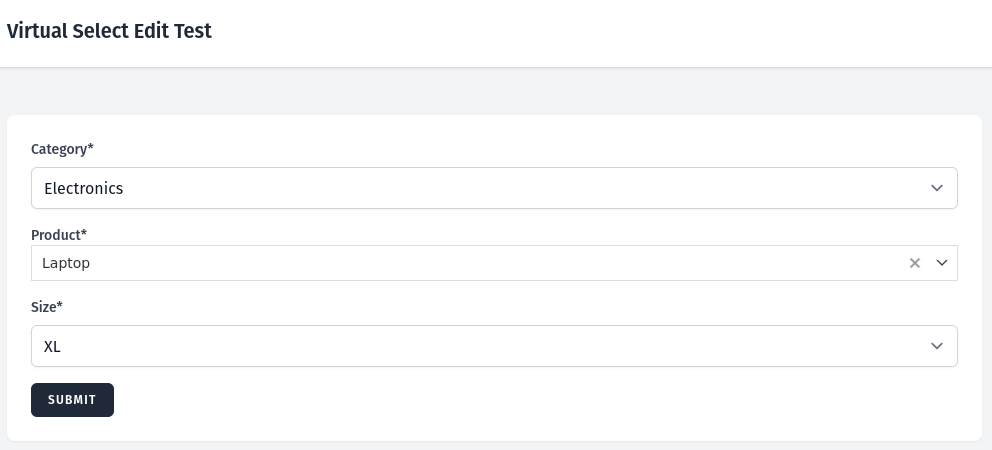
In this part, we will make another alternative for select input Tom Select.
How to install Tom Select you can find in their documentation.

Now let's create a Blade component.
php artisan make:component TomSelect --viewTo make Tom Select work we will use Alpine.js.
resources/views/components/tom-select.blade.php:
<div wire:ignore> <select x-data="{ tomSelect: null, options: @entangle($attributes['options']) }" x-init="tomSelect = new TomSelect($refs.select, { options: options, valueField: 'value', labelField: 'label' }) $watch('options', () => { if (tomSelect !== null) { tomSelect.clearOptions() tomSelect.addOptions(options) tomSelect.settings.placeholder = '-- SELECT --' tomSelect.inputState() } })" x-ref="select" x-cloak {{ $attributes }}> </select></div>Very similar to what we did previously with the Virtual Select, first we set x-data data tomSelect and options. Next, we add all the required JS code in the x-init to run it when the component gets loaded.
When we create a new TomSelect instance we assign it to the tomSelect data. To set input for which to add Tom Select again we use x-ref with the $refs and name it select. For the Tom Select parameters, we pass options where all select options are passed as an array. The next two parameters valueField and labelField is to Tom Select which key values take from the options array to show selects.
And the last part, using $watch we watch changes for the options data. Inside watch first we check if the tomSelect data isn't null, and if it isn't then we do the:
Now we need to pass the correct values from the Livewire component when the category gets updated. We will do the same way as we did for the Virtual Select component but in the end will make it into an array.
class CreateTomSelect extends Component{ // ... public array $products = []; public Collection $products; // ... public function updatedCategory(int $value): void { $this->sizes = collect(); $this->reset('size', 'product'); $this->products = Product::where('category_id', $value)->get(); $this->products = Product::where('category_id', $value)->get()->map(function ($product) { return [ 'label' => $product->name, 'value' => $product->id, ]; })->toArray(); } // ...}We can call the TomSelect blade in the create form.
// ...<x-tom-select id="products" name="products" wire:model="product" options="products" placeholder="-- choose category first --" /> <select wire:model="product" name="product" class="mt-2 w-full rounded-md border-gray-300 shadow-sm focus:border-indigo-500 focus:ring-indigo-500" required> @if($products->isEmpty()) <option value="">-- choose category first --</option> @else <option value="" selected>-- choose product --</option> @endif @foreach ($products as $product) <option value="{{ $product->id }}">{{ $product->name }}</option> @endforeach</select>// ...Now let's make this component also work for edit forms.
resources/views/components/tom-select.blade.php:
<div wire:ignore> <select x-data="{ tomSelect: null, options: @entangle($attributes['options']), selectValue: @entangle($attributes->whereStartsWith('wire:model')->first()) }" x-init="tomSelect = new TomSelect($refs.select, { options: options, items: selectValue, valueField: 'value', labelField: 'label' }) $watch('options', () => { if (tomSelect !== null) { tomSelect.clearOptions() tomSelect.addOptions(options) tomSelect.settings.placeholder = '-- SELECT --' tomSelect.inputState() } }) $watch('selectValue', (newValue) => { if (newValue === null && tomSelect !== null) { tomSelect.clear(true); } })" x-ref="select" x-cloak {{ $attributes }}> </select></div>Again, here we add new data to the x-data called selectValue which is bound to the wire:model property. Next, we set it to items in the Tom Select properties.
Last thing, we add a new $watch for the selectValue. In this watch first, we check if the selectValue new set value is null and if tomSelect isn't set to null, then we clear selected items.
Now we need to set the correct values in the Livewire component for the edit page. Besides passing $products as an array after the category gets updated we need to reset $product or set it to null.
use Illuminate\Support\Arr; class EditTomSelect extends Component{ // ... public array $products = []; public function mount(Order $order): void { $this->categories = Category::all(); $this->order = $order; $this->size = $order->size->id; $this->category = $order->product->category->id; $this->products = Product::where('category_id', $this->category)->get()->map(function ($product) { return [ 'label' => $product->name, 'value' => $product->id, ]; })->toArray(); $this->product = Arr::flatten( Arr::where($this->products, fn($value) => $value['value'] === $this->order->product_id) )[1]; $this->sizes = Size::where('product_id', $this->product)->get(); } public function updatedCategory(int $value): void { $this->sizes = collect(); $this->reset('size', 'product'); $this->products = Product::where('category_id', $value)->get()->map(function ($product) { return [ 'label' => $product->name, 'value' => $product->id, ]; })->toArray(); $this->reset('product'); } // ...}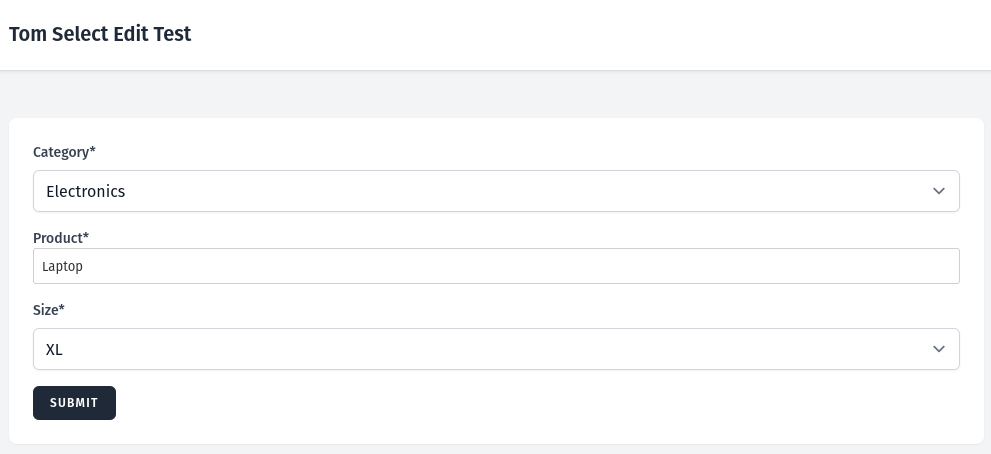
All the code used in this tutorial you can find in the GitHub repository here.