Filament is an awesome rapidly growing adminpanel platform that includes table builder, form builder, and more features. But also there are many plugins that add even more functionality. Let's explore some of the best ones, in this article.
I've picked 12 plugins to showcase, each with screenshots and with the demo repository, you will find all the links below.
For those unfamiliar with Filament, I have a full 2-hour course on how to get started.
The missing toolkit from Filament Admin with Breeze-like functionality. Includes login, registration, password reset, password confirmation, email verification, and profile page. All using the TALL-stack, all very Filament-y.
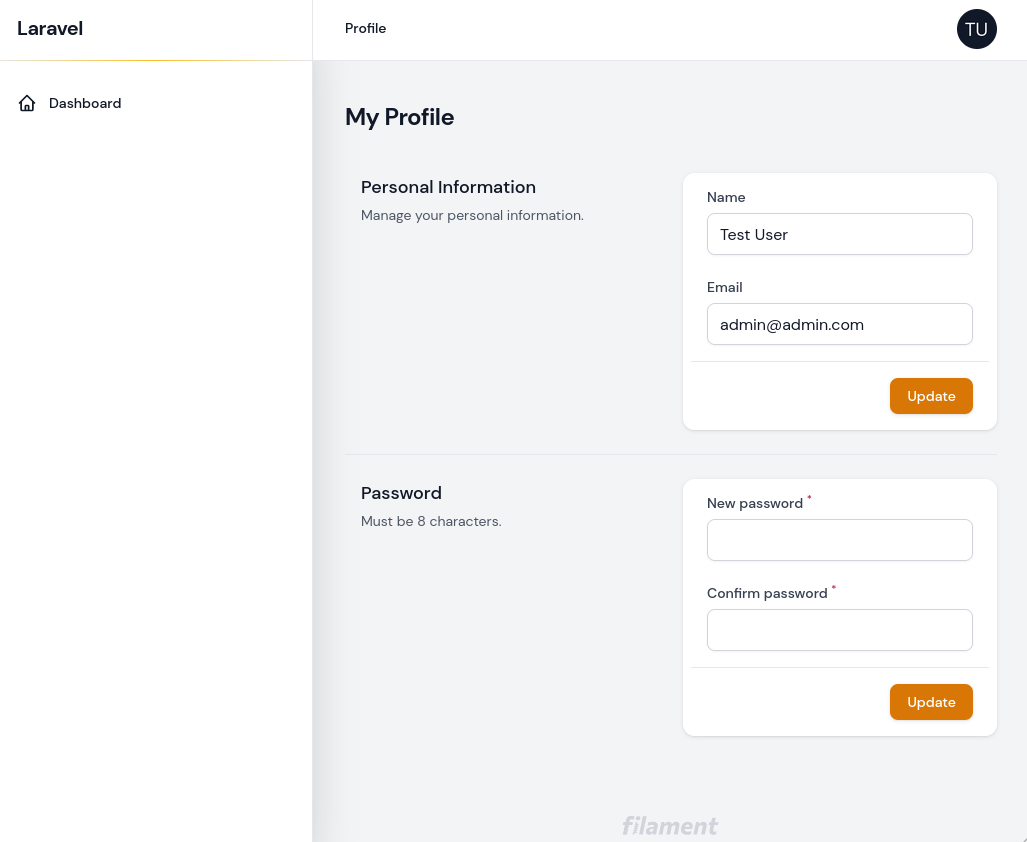
Using this package is very easy. First, install via composer
composer require jeffgreco13/filament-breezyNext, change the default Filament login to use Breezy in config/filament.php
"auth" => [ "guard" => env("FILAMENT_AUTH_GUARD", "web"), "pages" => [ "login" => \JeffGreco13\FilamentBreezy\Http\Livewire\Auth\Login::class, ],],And that's it, you now have Breeze-like functionality in your Filament Admin. If you want to enable more features like Two Factor Authentication read official documentation.
You can find the demo repository here.
A collection of easy-to-use filters with clause conditions to Filament.

To use this package we only need to install it and then we will be able to add filters to the table builder.
composer require webbingbrasil/filament-advancedfilterFor this example we will use a simple ProductResource which will have four fields:
Now we can add filters from this package to the ProductResource table builder.
app/Filament/Resources/ProductResource.php:
public static function table(Table $table): Table{ return $table ->columns([ TextColumn::make('name') ->searchable() ->sortable(), IconColumn::make('is_visible') ->boolean(), TextColumn::make('price'), TextColumn::make('published_at') ->label('Published Date') ->date(), ]) ->filters([ TextFilter::make('name'), BooleanFilter::make('is_visible'), DateFilter::make('published_at'), NumberFilter::make('price') ]); }For more information on what every filter condition means read official documentation.
You can find the demo repository here.
Excel Export for Filament Admin Resources.
To use this package as always first we need to install it via composer.
composer require pxlrbt/filament-excelcomposer require fails on Laravel 9 because of the simple-cache dependency, you will have to specify the psr/simple-cache version as ^2.0 in your composer.json to satisfy the PhpSpreadsheet dependency. You can install both at the same time as:
You can add the Export button to any place. In this example we will use simple ProductResource and add the Export button to three places:
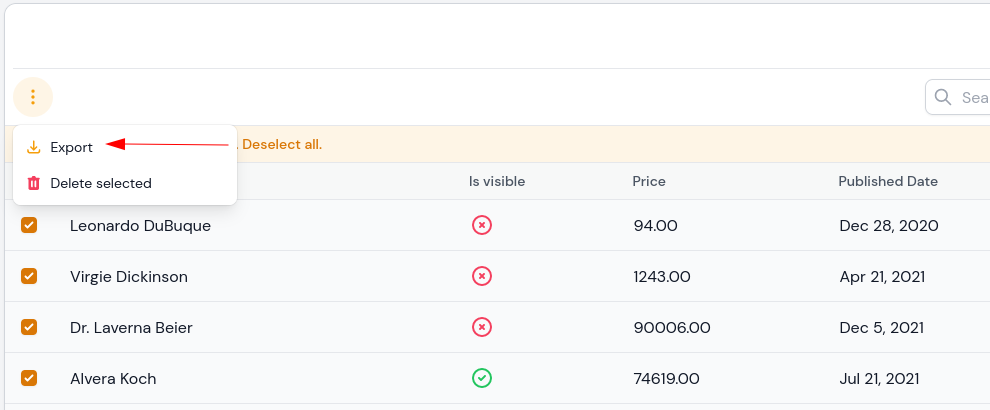
To add any additional actions to tables bulk actions we just need to use the prependBulkActions() method for table builder.
app/Filament/Resources/ProductResource.php:
public static function table(Table $table): Table{ return $table ->columns([ TextColumn::make('name') ->searchable() ->sortable(), IconColumn::make('is_visible') ->boolean(), TextColumn::make('price'), TextColumn::make('published_at') ->label('Published Date') ->date(), ]) ->prependBulkActions([ Actions\Tables\ExportBulkAction::make() ->deselectRecordsAfterCompletion() ]); Now when you will select records and will go to bulk actions, you will see the export button.
Next, we will add the Export button above the table. To do that we need to use the prependHeaderActions() method for table builder.
app/Filament/Resources/ProductResource.php:
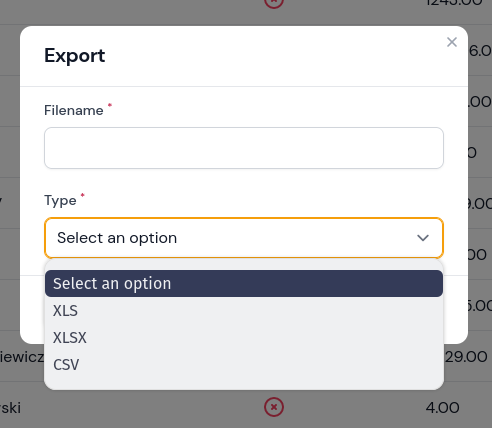
public static function table(Table $table): Table{ return $table ->columns([ TextColumn::make('name') ->searchable() ->sortable(), IconColumn::make('is_visible') ->boolean(), TextColumn::make('price'), TextColumn::make('published_at') ->label('Published Date') ->date(), ]) ->prependBulkActions([ Actions\Tables\ExportBulkAction::make() ->deselectRecordsAfterCompletion() ]) ->prependHeaderActions([ Actions\Tables\ExportAction::make() ->exports([ ExcelExport::make() ->fromTable() ->askForFilename() ->askForWriterType() ->withColumns([ Column::make('is_visible') ->formatStateUsing(fn ($state) => $state ? 'True' : 'False'), ]) ]), ]);}Now you will see the Export button above the table.

Also here we tell to export from the table, ask the user for the filename and file type, and when exporting we make the is_visible field not be blank when the value is false.
For the last one, we will add the Export button to the view page. This will only export record, in our case product, which we are viewing. To achieve this we need to use the getActions() method on the ViewRecord page.
app/Filament/ProductResource/Pages/ViewProduct.php:
protected function getActions(): array{ return array_merge(parent::getActions(), [ ExportAction::make() ->exports([ ExcelExport::make() ->fromForm() ->withFilename(fn ($query) => $query->first()->name), ]), ]);}Here we merge default Filament actions with our new ExportAction. Also for Export here we tell you to use the form for the data and make the filename the product name.
For more available customization check official documentation.
You can find the demo repository here.
This package will make it easier for you to import from files to your model, very easily without the need to do templates.
All you have to do is drag and drop and match the fields and columns of your file, and let the magic happens!
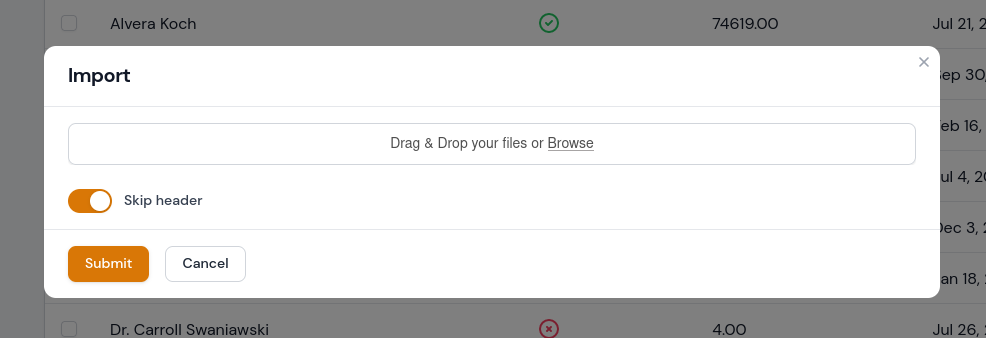
First, again we need to install the package via composer.
composer require konnco/filament-importNow we can add import action. All code needs to go into the ListRecords page, getActions() method.
app/Filament/Resources/Pages/ListProducts.php:
protected function getActions(): array{ return [ CreateAction::make(), ImportAction::make() ->fields([ ImportField::make('name') ->helperText('Products name') ->required(), ImportField::make('is_visible') ->label('Is visible') ->required() ->mutateBeforeCreate(function (string $value): bool { if ($value === 'True') { return true; } return false; }), ImportField::make('price') ->required(), ImportField::make('published_at') ->required() ->label('Published at'), ]) ];}Here we add the Import action with all fields. Also, we make all fields be required, add to one field helper text, to two fields label and for is_visible we make sure that when in Excel file we have the word "True", that would be sent to DB as true, and "False" would be sent as false.
After uploading the file you will see a form to match data to columns.
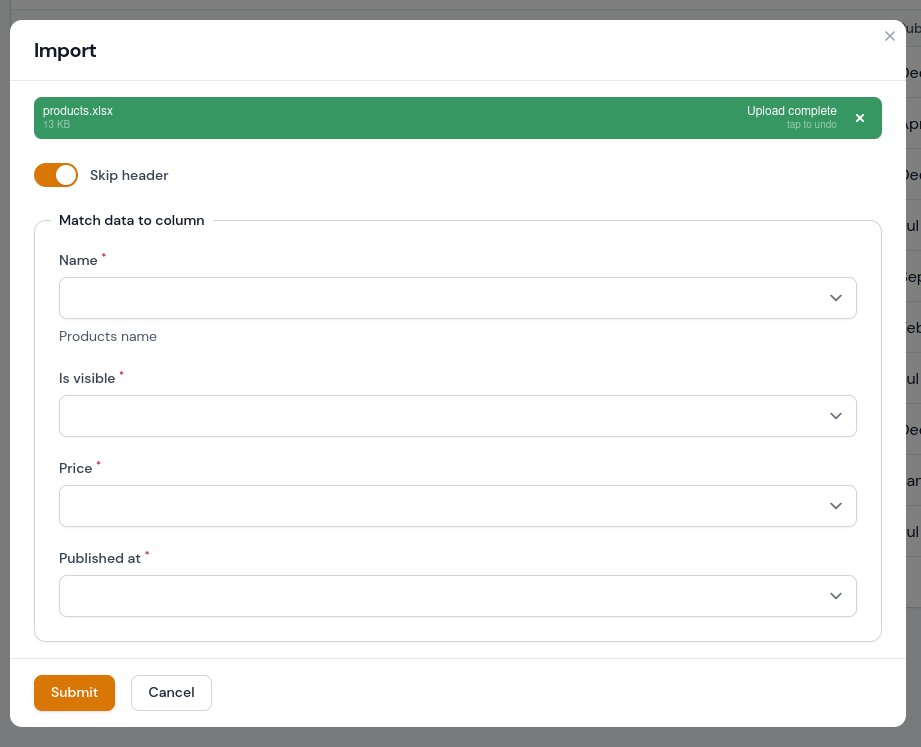
After selecting columns press the Submit button and data will be imported.
For more available customization check official documentation.
You can find the demo repository here.
The Most Popular JavaScript Calendar as a Filament Widget
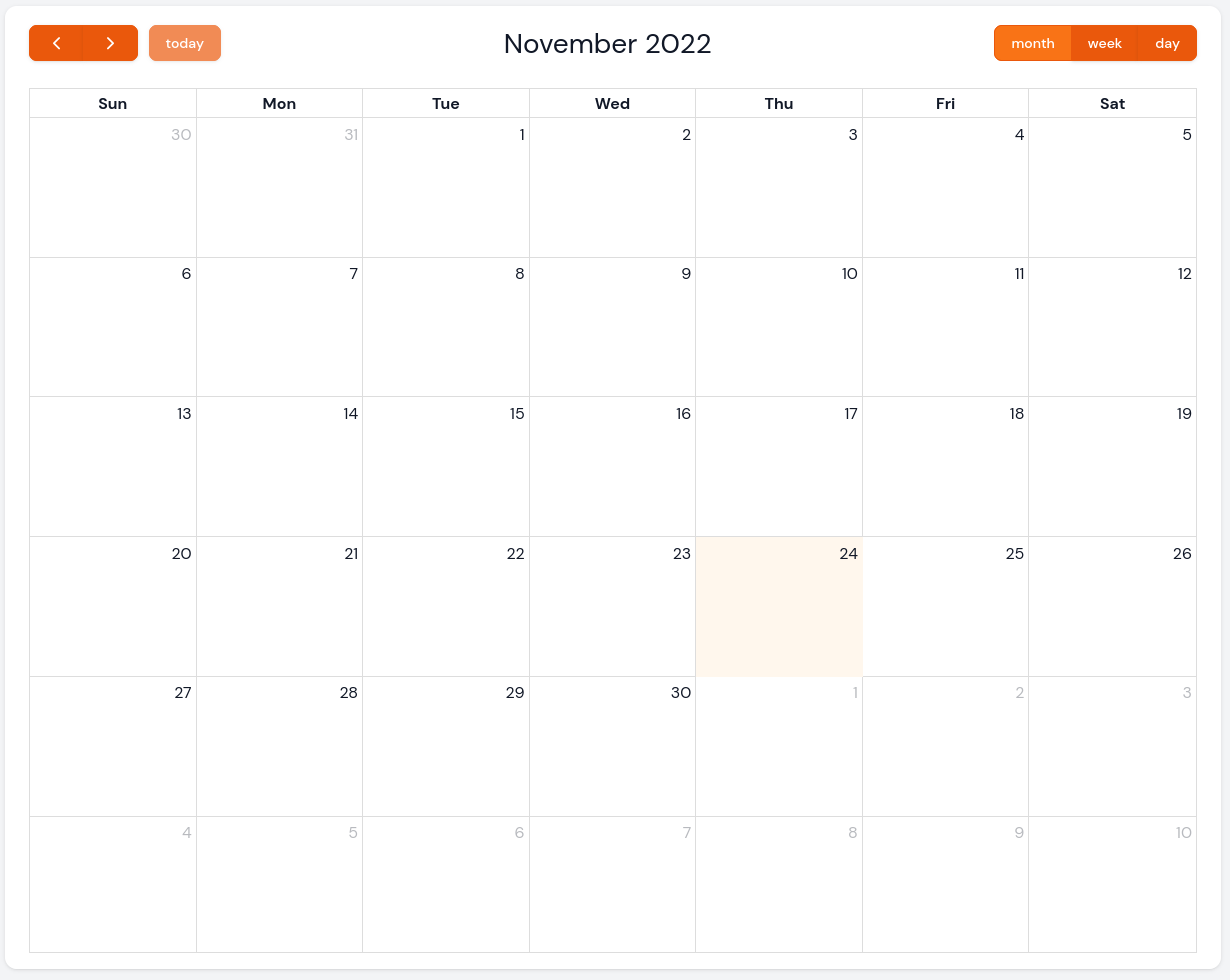
First, let's install the package
composer require saade/filament-fullcalendarNext, we need to create a new Filament Widget
php artisan make:filament-widget CalendarWidgetOur newly created widget needs to extend Saade\FilamentFullCalendar\Widgets\FullCalendarWidget and we need to remove protected static string $view.
For this demo, we will use a basic Event Model with fields title, start, and end.
Now, back to our CalendarWidget most important is the getViewData() method which needs to return array. We can do that by getting all Events and adding them to the array.
app/Filament/Widgets/CalendarWidget.php:
class CalendarWidget extends FullCalendarWidget{ public function getViewData(): array { return Event::all()->toArray(); }}Next, we need to create an event. One way to do it is by pressing on the calendar on the day you want to create it. This will then hit the createEvent() method when the form gets submitted in CalendarWidget.
public function createEvent(array $data): void{ Event::create($data); $this->refreshEvents();}After creating an event we should refresh the calendar which is done by calling $this->refreshEvents().
For events editing besides the editEvent() method, we need an additional resolveEventRecord() method to resolve the Event record into the Model.
public function editEvent(array $data): void{ $this->event->update($data); $this->refreshEvents();} public function resolveEventRecord(array $data): Model{ return Event::find($data['id']);}For more available customization check official documentation.
You can find the demo repository here.
Calendar plugin for filament.
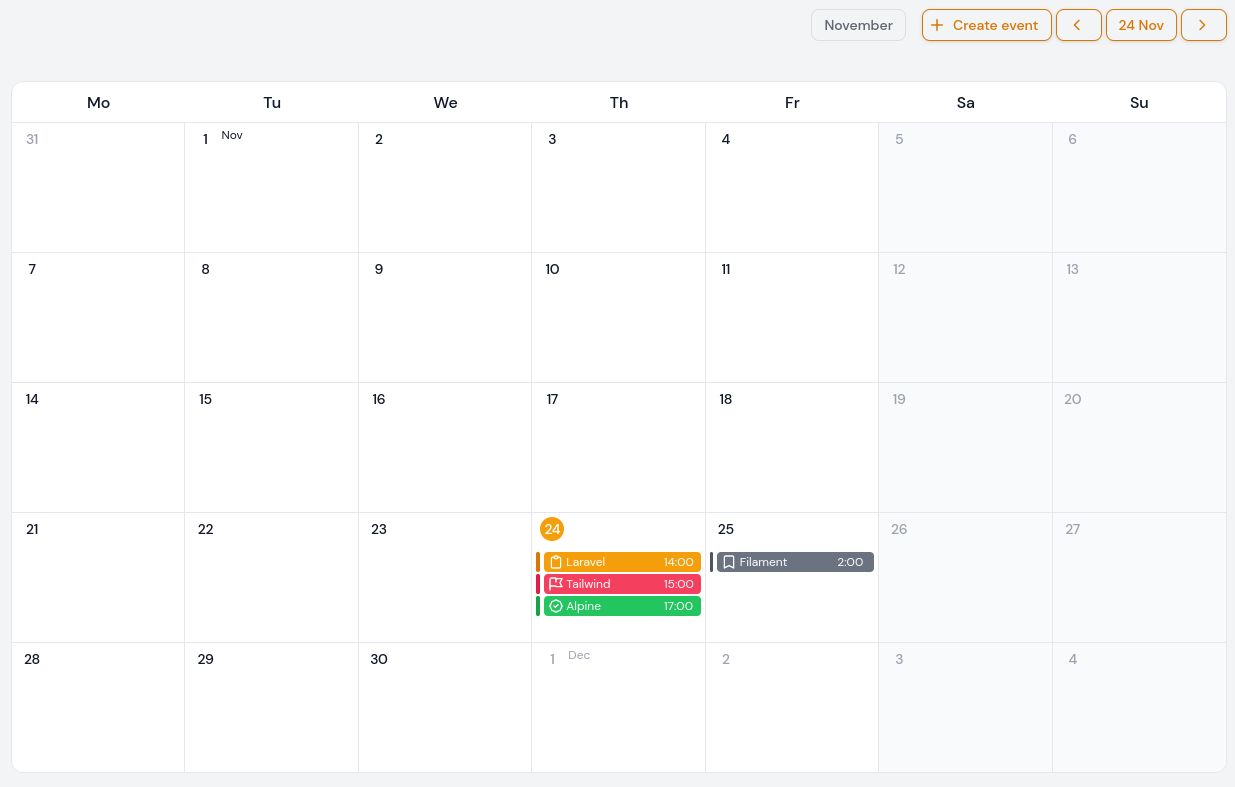
First, install via composer
composer require buildix/timexThen publish and run the migrations
php artisan vendor:publish --tag="timex-migrations"php artisan migrateNow when you visit your admin panel, you will see two new navigation items and at the top bar date and upcoming events.

For more available customization check official documentation.
You can find the demo repository here.
Configurable activity logger for filament. Powered by spatie/laravel-activitylog.
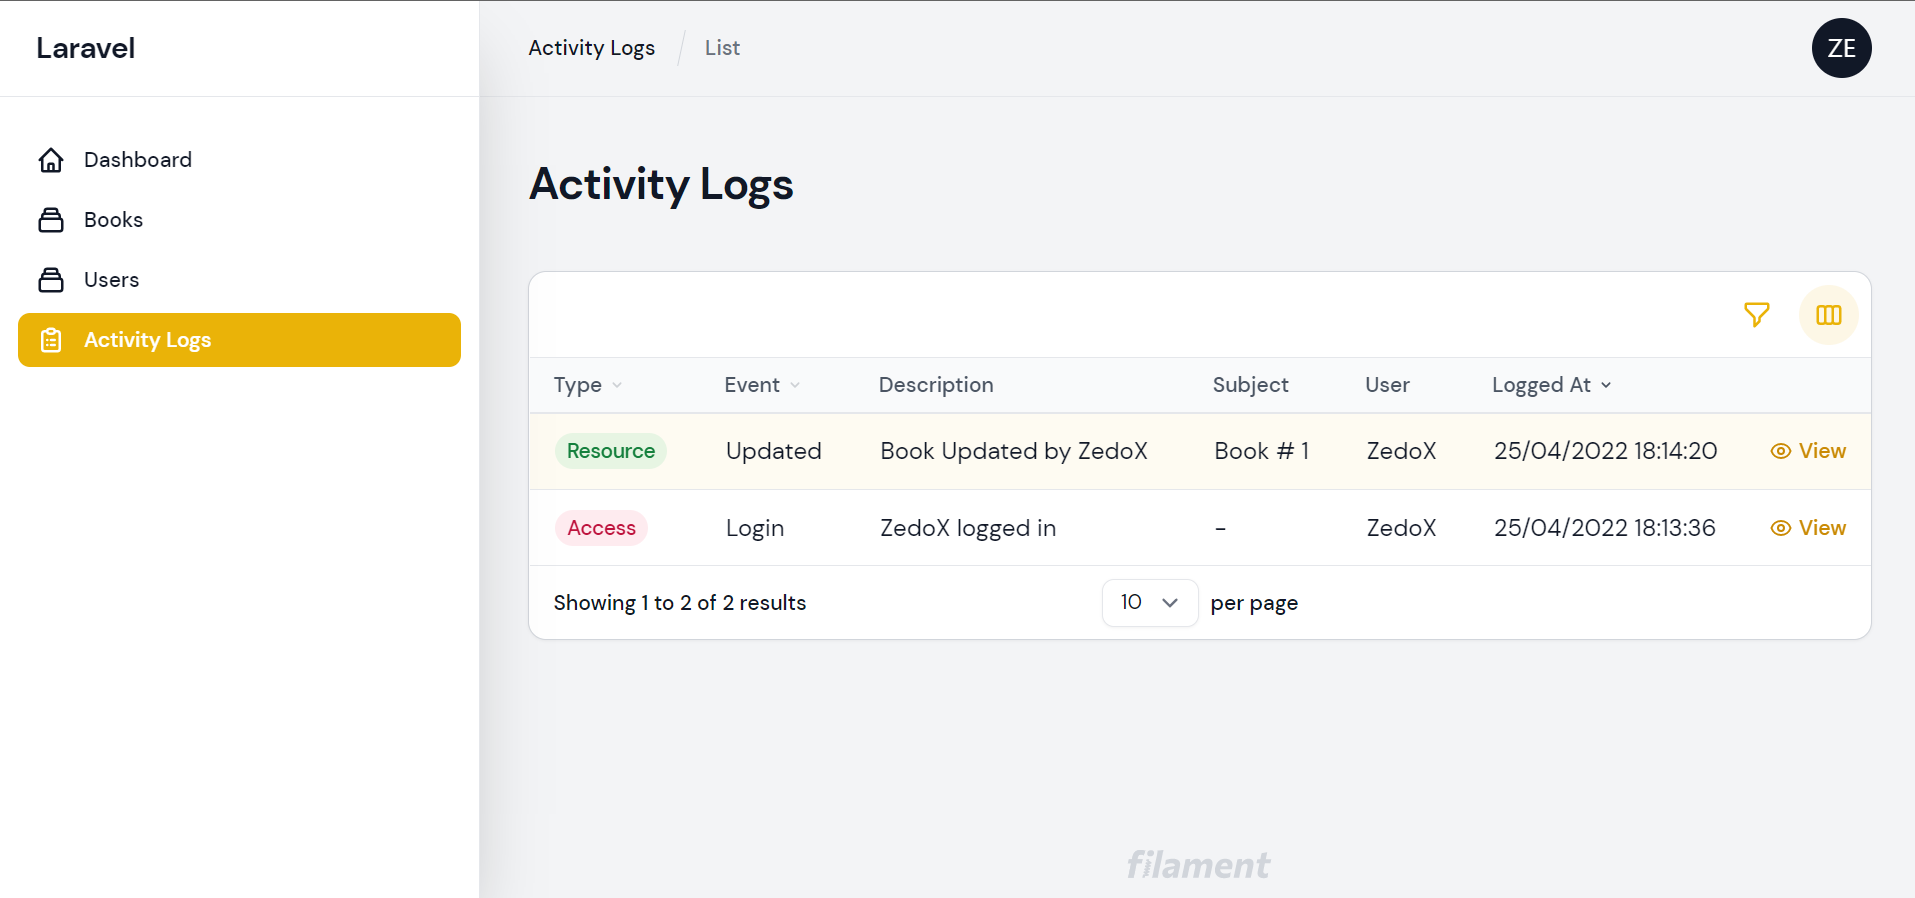
To use this package you just need two commands:
composer require z3d0x/filament-loggerphp artisan filament-logger:installThis will install the filament-logger package and publish the config & migrations from spatie/laravel-activitylog.
According to package documentation:
By default this package will log Filament Resource Events, Access(Login) Events, and Notification Events.
So now everything is logged by default.
For more available customization check official documentation.
You can find the demo repository here.
Quickly navigate your Filament pages.
Supports pages, resources, and links from the user menu.
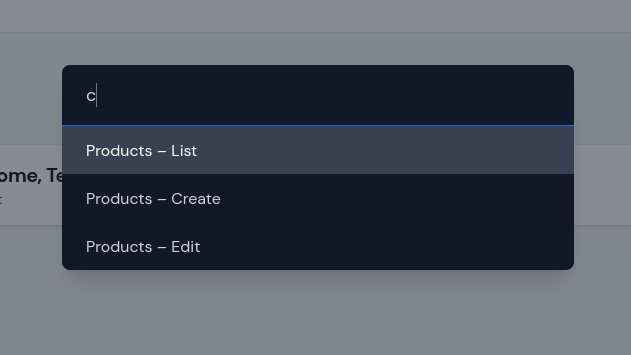
To use this package you only need to install it and everything will be picked up automatically.
composer require pxlrbt/filament-spotlightThe GitHub repository can be found here.
You can find the demo repository here.
Zero config Language Switch(Changer/Localizer) plugin for Filamentphp Admin.
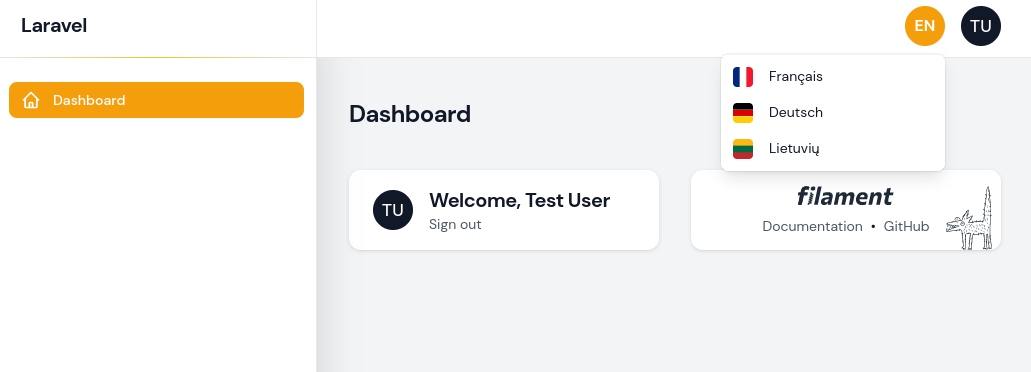
Install the package via composer
composer require bezhansalleh/filament-language-switchEvery configuration is made in the packages config file. You can publish it:
php artisan vendor:publish --tag="filament-language-switch-config"The GitHub repository can be found here.
You can find the demo repository here.
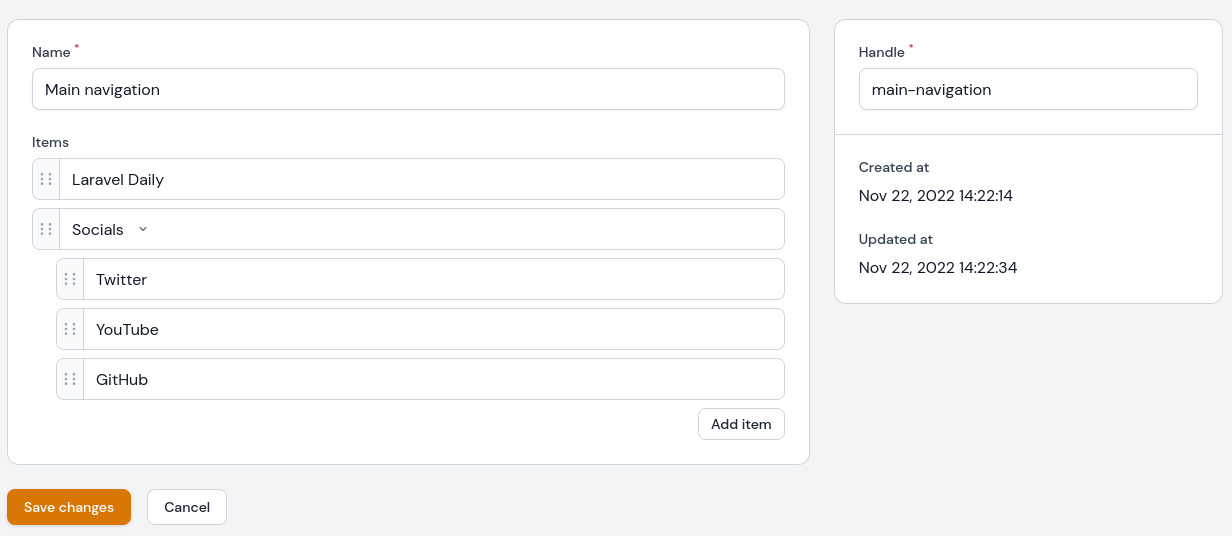
Begin by installing this package via composer:
composer require ryangjchandler/filament-navigationand running migrations:
php artisan migrateNow you can go to the admin panel and using Navigation create new navigation and add items to it.
Let's say we create navigation with the handle main-navigation. To get it in the blade file code would look something like this:
@php $menu = RyanChandler\FilamentNavigation\Facades\FilamentNavigation::get('main-navigation')@endphp<ul> @foreach($menu->items as $item) <li> @isset($item['data']['url']) <a href="{{ $item['data']['url'] }}" target="{{ $item['data']['target'] }}" class="underline">{{ $item['label'] }}</a> @else {{ $item['label'] }} @endisset @if($item['children']) <ul> @foreach($item['children'] as $child) <li> <a href="{{ $child['data']['url'] }}" target="{{ $child['data']['target'] }}" class="underline">{{ $child['label'] }}</a> </li> @endforeach </ul> @endif </li> @endforeach</ul>Which will output the result:
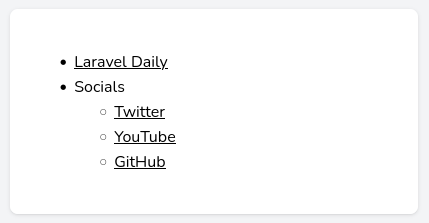
The GitHub repository can be found here.
You can find the demo repository here.
The easiest and most intuitive way to add access management to your Filament Admin:
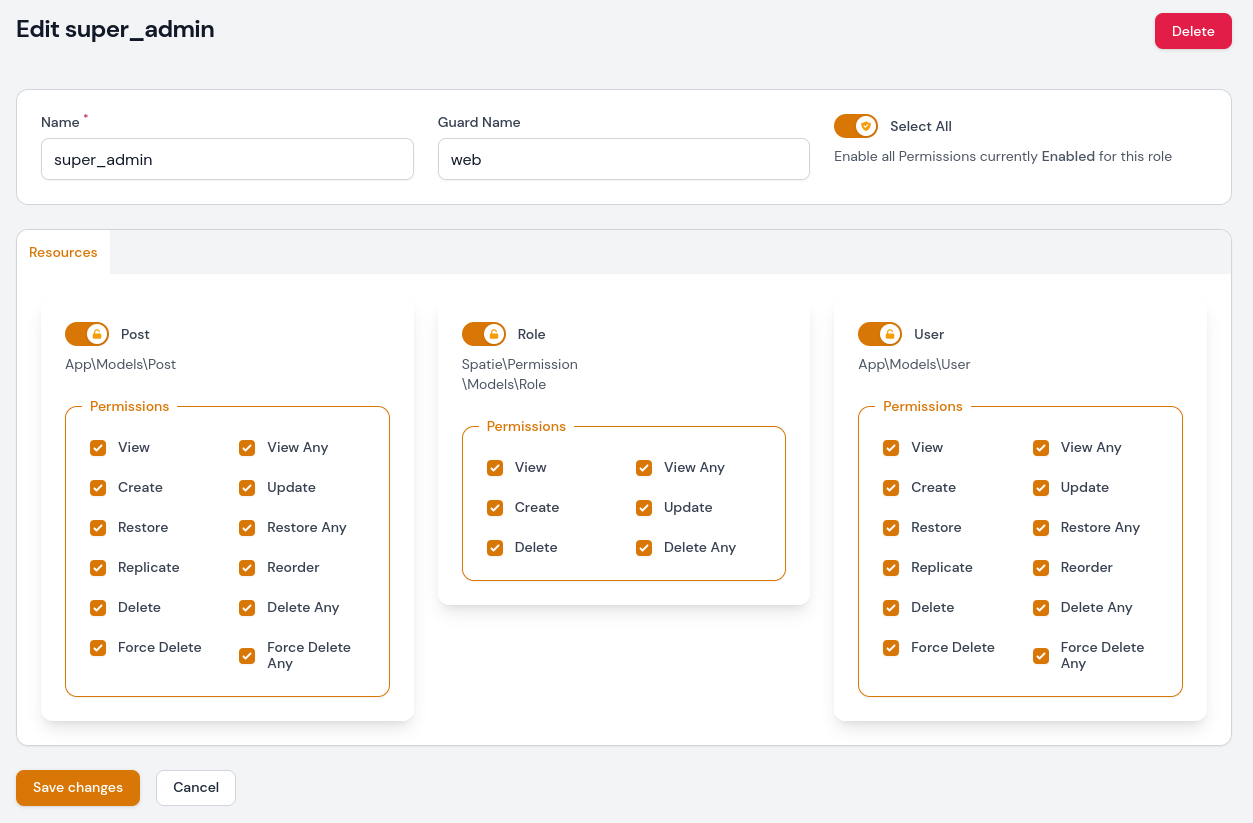
Nothing new with installing the package:
composer require bezhansalleh/filament-shieldThen add Spatie\Permission\Traits\HasRoles to User Model.
app/Models/User.php:
class User extends Authenticatable{ use HasApiTokens, HasFactory, Notifiable; use HasRoles; //}And publish config:
php artisan vendor:publish --tag=filament-shield-configNow, setup your configuration and run the command to install the shield:
php artisan shield:installNow you have set up roles and generated policies for all your Resources.
Filament Shield has some useful commands you can find here.
For more available customization check official documentation.
You can find the demo repository here.
A simple CMS for your website. it includes posts, pages, tags, and categories, with a frontend scaffolding.
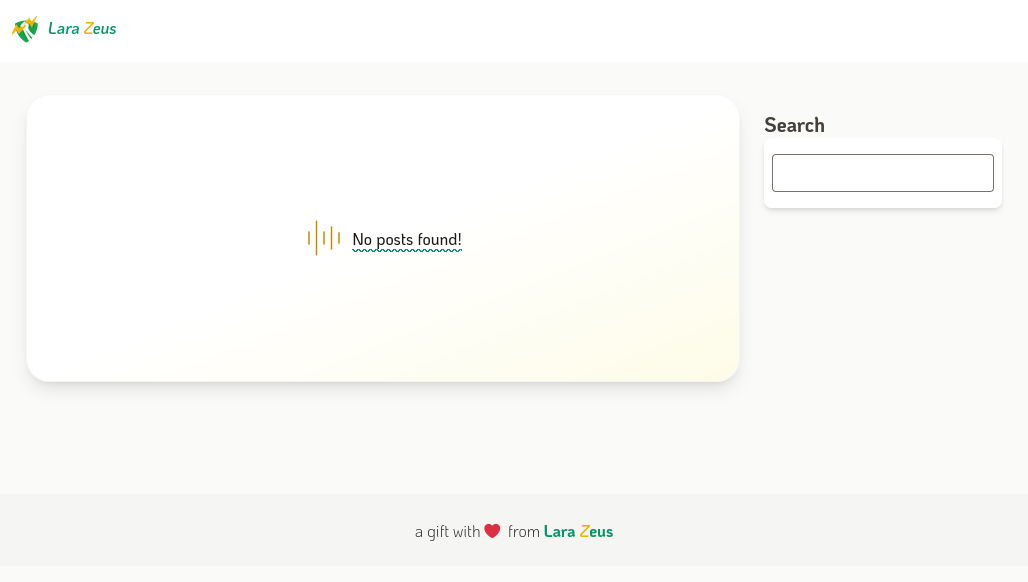
To install this package first we need to require it via the composer
composer require lara-zeus/skyThen publish migrations
php artisan vendor:publish --tag=zeus-sky-migrationsphp artisan vendor:publish --provider="Spatie\Tags\TagsServiceProvider" --tag="tags-migrations"php artisan vendor:publish --provider="Spatie\MediaLibrary\MediaLibraryServiceProvider" --tag="migrations"And finally, run migrations
php artisan migrateNow after visiting the admin panel you will see new navigation items where you will be able to create your content.
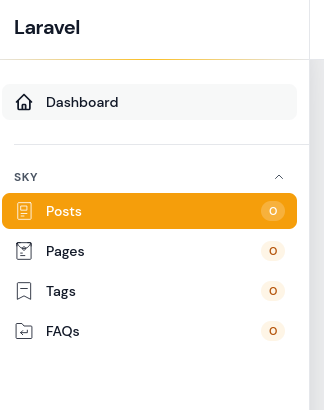
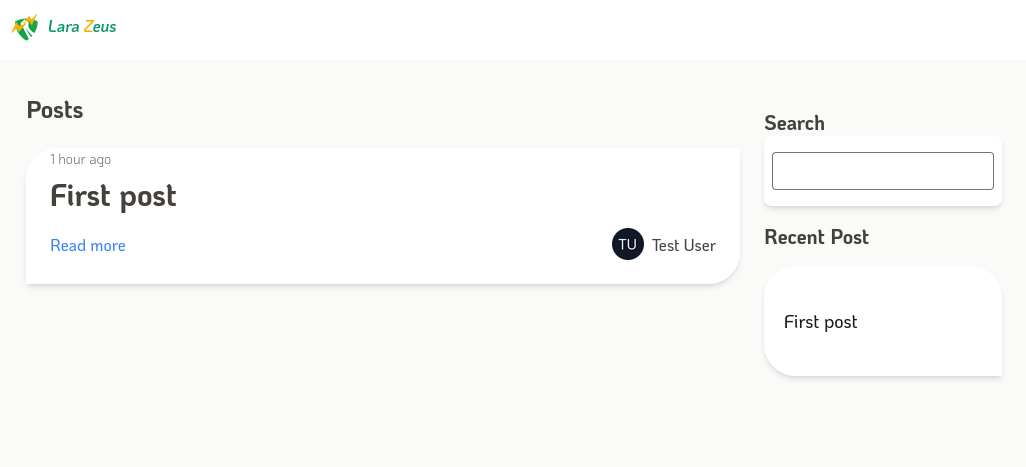
Now go to Posts and create your first post. After creating head to yourdomain.com/blog and here you will see your post.
For more available customization check official documentation.
You can find the demo repository here.
That's a wrap for now. If I missed some important plugins, let me know in the comments below.
Also, I'm pretty sure this article would get a follow-up with more plugins, and also a new fresh look when Filament 3 is released some time in 2023. So, stay tuned for the updated!