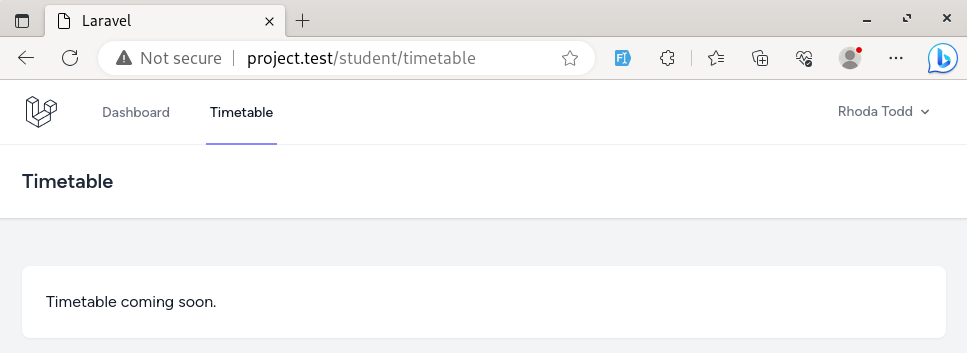
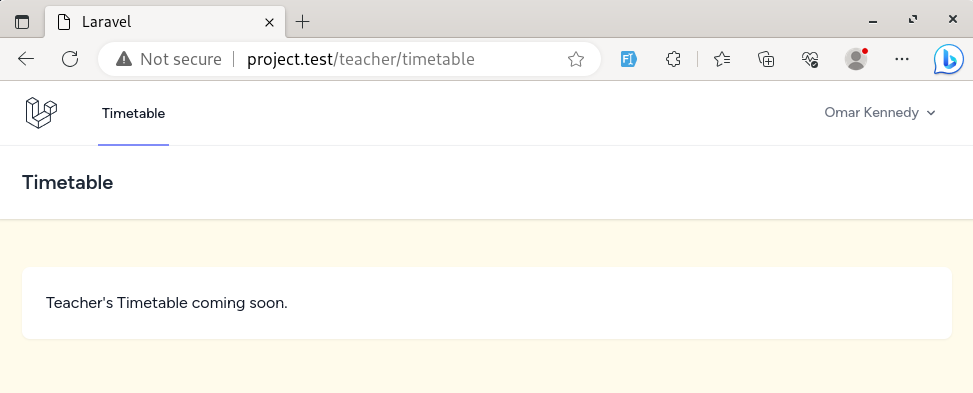
Now, let's create a page for a teacher and call it a timetable. I deliberately chose the same page name: so it would be the student and teacher timetables for all the classes, but separated in the folders/namespaces
The name is the same, but the purpose and what will be on the page would be radically different.
First, let's generate the Controller. And again, we must specify a namespace.
php artisan make:controller Teacher/TimetableControllerWe have two timetable Controllers, which are separated in the subfolder or the namespace.
Now, let's add the index() method to the Controller and create a View with different text. The View file will be in the teacher folder.
app/Http/Controllers/Teacher/TimetableController.php:
use Illuminate\Contracts\View\View;use App\Http\Controllers\Controller; class TimetableController extends Controller{ public function index(): View { return view('teacher.timetable'); }}resources/views/teacher/timetable.php:
<x-app-layout> <x-slot name="header"> <h2 class="font-semibold text-xl text-gray-800 dark:text-gray-200 leading-tight"> {{ __('Timetable') }} </h2> </x-slot> <div class="py-12"> <div class="max-w-7xl mx-auto sm:px-6 lg:px-8"> <div class="bg-white dark:bg-gray-800 overflow-hidden shadow-sm sm:rounded-lg"> <div class="p-6 text-gray-900 dark:text-gray-100"> {{ __("Teacher's Timetable coming soon.") }} </div> </div> </div> </div></x-app-layout>We need to create a new Route by creating a Route group for the teacher that is similar to what we have for the student.
routes/web.php:
Route::get('/', function () { return view('welcome');}); Route::middleware(['auth', 'verified'])->group(function () { Route::prefix('student') ->name('student.') ->group(function () { Route::get('timetable', [\App\Http\Controllers\Student\TimetableController::class, 'index']) ->name('timetable'); }); Route::prefix('teacher') ->name('teacher.') ->group(function () { Route::get('timetable', [\App\Http\Controllers\Teacher\TimetableController::class, 'index']) ->name('timetable'); }); }); Route::middleware('auth')->group(function () { Route::get('/profile', [ProfileController::class, 'edit'])->name('profile.edit'); Route::patch('/profile', [ProfileController::class, 'update'])->name('profile.update'); Route::delete('/profile', [ProfileController::class, 'destroy'])->name('profile.destroy');}); require __DIR__ . '/auth.php';After visiting the /teacher/timetable, we see the correct page for the teacher.

Both timetable pages use the same x-app-layout Blade component from Laravel Breeze. We need to create three layouts from this app layout.
So, using your editor, use the Save As feature for the app/View/Components/AppLayout.php file and name it StudentLayout.php and TeacherLayout.php.

Remember to set the correct class name as the filenames. Next, we must change the View file rendered in these two classes.
app/View/Components/StudentLayout.blade.php:
use Illuminate\View\View;use Illuminate\View\Component; class StudentLayout extends Component{ public function render(): View { return view('layouts.student'); }}app/View/Components/TeacherLayout.blade.php:
use Illuminate\View\Component;use Illuminate\View\View; class TeacherLayout extends Component{ public function render(): View { return view('layouts.teacher'); }}The View files can also be created from the original resources/views/layouts/app.blade.php using the Save As option or manually copying the content.
Also, we will have different navigation for each layout. For that, we will move the navigation to a folder in resources/views/layouts/navigation and call it by the same name as the layout.
So, first, let's move the resources/views/layouts/navigation.blade.php to the resources/views/layouts/navigation folder and rename it to student.blade.php. Now, we must use this navigation in the student layout.
resources/views/layouts/student.blade.php:
<!DOCTYPE html><html lang="{{ str_replace('_', '-', app()->getLocale()) }}"> <head> // ... </head> <body class="font-sans antialiased"> <div class="min-h-screen bg-gray-100 dark:bg-gray-900"> @include('layouts.navigation') {{-- [tl! --] --}} @include('layouts.navigation.student') {{-- [tl! ++] --}} // ... </div> </body></html>Finally, we can change the layout for the student timetable page.
resources/views/student/timetable.blade.php:
<x-app-layout> <x-student-layout> <x-slot name="header"> <h2 class="font-semibold text-xl text-gray-800 dark:text-gray-200 leading-tight"> {{ __('Timetable') }} </h2> </x-slot> <div class="py-12"> <div class="max-w-7xl mx-auto sm:px-6 lg:px-8"> <div class="bg-white dark:bg-gray-800 overflow-hidden shadow-sm sm:rounded-lg"> <div class="p-6 text-gray-900 dark:text-gray-100"> {{ __('Timetable coming soon.') }} </div> </div> </div> </div></x-app-layout> </x-student-layout> After visiting the /student/timetable page, we can see that it is the same, but structurally, it has a different layout.

Now, let's repeat the same for the teacher layout. First, we will set the navigation.
resources/views/layouts/teacher.blade.php:
<!DOCTYPE html><html lang="{{ str_replace('_', '-', app()->getLocale()) }}"> <head> // ... </head> <body class="font-sans antialiased"> <div class="min-h-screen bg-gray-100 dark:bg-gray-900"> @include('layouts.navigation') @include('layouts.navigation.teacher') // ... </div> </body></html>In the navigation, we must change the Route names from student to teacher.
resources/views/layouts/navigation/teacher.blade.php:
<nav x-data="{ open: false }" class="bg-white dark:bg-gray-800 border-b border-gray-100 dark:border-gray-700">// ... <!-- Navigation Links --> <div class="hidden space-x-8 sm:-my-px sm:ms-10 sm:flex"> <x-nav-link :href="route('student.timetable')" :active="request()->routeIs('student.timetable')"> <x-nav-link :href="route('teacher.timetable')" :active="request()->routeIs('teacher.timetable')"> {{ __('Timetable') }} </x-nav-link> </div>// ...</nav>And now we can also change the layout for the teacher's timetable page.
resources/views/teacher/timetable.blade.php:
<x-app-layout> <x-teacher-layout> <x-slot name="header"> <h2 class="font-semibold text-xl text-gray-800 dark:text-gray-200 leading-tight"> {{ __('Timetable') }} </h2> </x-slot> <div class="py-12"> <div class="max-w-7xl mx-auto sm:px-6 lg:px-8"> <div class="bg-white dark:bg-gray-800 overflow-hidden shadow-sm sm:rounded-lg"> <div class="p-6 text-gray-900 dark:text-gray-100"> {{ __("Teacher's Timetable coming soon.") }} </div> </div> </div> </div></x-app-layout> </x-teacher-layout> If you have any files left from the App Layout, you can delete them now.
Now, you have separate layouts, navigations, and everything.
But wait, visually the designs are absolutely identical!
In this course we won't be building any fancy designs, but to see some visual changes, we can change the background for one of the layouts.
resources/views/layouts/teacher.blade.php:
<!DOCTYPE html><html lang="{{ str_replace('_', '-', app()->getLocale()) }}"> // ... <body class="font-sans antialiased"> <div class="min-h-screen bg-gray-100 dark:bg-gray-900"> <div class="min-h-screen bg-amber-50 dark:bg-gray-900"> // ... </div> </body></html>After using different classes from Tailwind CSS, remember to recompile using npm run dev or npm run build.
The teacher timetable page now has a yellow background instead of gray.

The main point of this lesson was to have two different files as a layout. Now, these layouts can look completely different.